Documentation for Substance 3D Sampler is now available on Experience League. After March 14th, HelpX pages will automatically redirect to the equivalent Experience League page.
Refer to the FAQ for more information about which documentation is affected.
Last updated on
Feb 20, 2025

- Substance 3D home
- Home
- Getting Started
- Getting Started overview
- Activation and licenses
- System requirements /content/help/en/substance-3d-sam
- Shortcuts
- Importing Resources
- Report a bug
- Project Management
- Export
- Export overview
- Export Window
- Default Presets
- Managing custom presets
- Managing Presets
- Interface
- Interface overview
- The Home Screen
- 2D and 3D Viewport
- Sidebars
- Panels
- Tools and Widgets
- Preferences
- Filters
- Filters overview
- Custom Filters
- Compound Filters
- Generators
- Adjustments
- Tools
- Tools overview
- Atlas Creator
- Atlas Splitter
- Auto Tiling
- Channels Generation
- Channel Switch
- Clone Stamp
- Crop tool
- Delight (AI Powered)
- Height to AO
- Height to Normal
- Image To Material
- Make it Tile
- Match
- Multiangle To Material
- Normal to Height
- Paint Wrap *missing*
- PBR Validate
- Perspective Correction
- Tiling
- Transform
- Warp
- Warp Transform
- Upscale
- HDRI Tools
- Wear and Finish
- Technical Support
- Technical Support overview
- Exporting the log file
- Configuration
- Technical Issues
- Data or project issues
- Filter issues
- Interface issues
- Performance issues
- Stability issues
- Startup issues
- Features and workflows
- Pipeline and integrations
- Scripting and Development
- 3D Capture
- Release Notes
- FAQ
Create and edit custom presets
Custom presets can be created with Substance 3D Designer.
The creation of custom presets respects the same rules as creating a custom filter for Sampler. Documentation is available here.
Creation
Create the graph
Open Substance Designer and create a new Substance graph.
Open the graph properties and fill in the following mandatory information:
- Label: Enter the name of your custom preset that will be used in the Sampler interface
- User Data: alchemist::type=filter
Definition of inputs and outputs
Inputs
The inputs represent the material channels you want to transform before the export.
Create an Input Color node (or grayscale) per material channel and add a usage in the attributes to each input node to ensure the connection is made between your material(s) and your custom preset.
Example: Definition of the Base Color input

Outputs
The outputs represent the result of your texture export.
Create one Output node per texture and add usage and a label in the attributes to each output node. The label will be displayed in the Channels list in the Exporter window and in the name of your texture file.
Example: Definition of the custom texture Color Opacity

Example of channel packing and channel conversion
Packing of 3 grayscale channels in one RGB texture:

Channel conversion from PBR Metallic/Roughness to PBR Specular/Glossiness:

Import
To import your new preset:
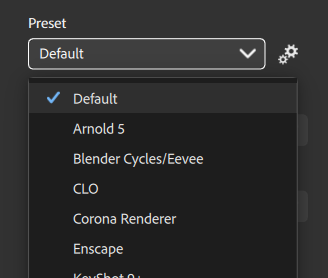
- Click the Manage presets button to the right of the Presets dropdown.
- Use the Import presets button at the bottom of the presets list.