User Guide Cancel

Warp projection | Substance 3D Painter

  1. Substance 3D home
  2. Home
  3. Getting Started
    1. Getting Started overview
    2. Activation and licenses
    3. System requirements
    4. Project creation
    5. Export
      1. Export overview
      2. Export window
        1. Export window overview
        2. Export settings
        3. Output templates
        4. List of exports
      3. Export presets
        1. Export presets overview
        2. Predefined presets
          1. Predefined Presets
          2. USD PBR Metal Roughness Preset
          3. Default Presets
        3. Creating export presets
    6. Glossary
    7. Performance
  4. Interface
    1. Assets
      1. Assets overview
      2. Navigation
      3. Customizing the layout
      4. Filter by path
      5. Saved searches
      6. Advanced search queries
      7. Adding a new library
      8. Sub-library tab
    2. Substance 3D Assets
    3. Color picker
    4. Display settings
      1. Display settings overview
      2. Environment settings
      3. Camera settings
      4. Viewport settings
    5. History
    6. Layer stack
      1. Layer stack overview
      2. Creating layers
      3. Managing layers
      4. Masking and effects
      5. Blending modes
      6. Layer instancing
      7. Geometry mask
    7. Main menu
      1. Main menu overview
      2. File menu
      3. Edit menu
      4. Mode menu
      5. Window menu
      6. Viewport menu
      7. Plugins menu
      8. Help menu
    8. Project configuration
    9. Properties
    10. Settings
      1. Settings overview
      2. General preferences
      3. Shortcuts
      4. Libraries configuration
    11. Shader settings
      1. Shader settings overview
      2. Updating a shader
    12. Texture Set
      1. Texture Set overview
      2. Texture Set list
      3. Texture Set settings
      4. Texture Set reassignment
    13. Toolbars
    14. Viewport
      1. Viewport overview
      2. 2D view
      3. 3D view
      4. Camera management
    15. Miscellaneous
      1. Sliders
      2. Log
      3. Update checker
  5. Painting
    1. Painting overview
    2. Tool list
      1. Paint brush
      2. Eraser
      3. Projection
      4. Polygon fill
      5. Smudge tool
      6. Clone Tool
      7. Quick mask
      8. Path tool
    3. Straight line   
    4. Lazy mouse 
    5. Symmetry
      1. Symmetry overview
      2. Mirror Symmetry
    6. Fill projections
      1. Fill projections overview
      2. Fill (match per UV Tile)
      3. UV projection
      4. Tri-planar projection
      5. Planar projection
      6. Spherical projection
      7. Cylindrical projection
      8. Warp projection
      9. UV set to UV set projection
    7. Presets
      1. Presets overview
      2. Creating and saving presets
      3. Creating particles presets
        1. Creating particles overview
        2. Installing the particle editor
        3. Overview of the particle editor
        4. Creating a new particle script
      4. Photoshop brush presets (ABR)
        1. Photoshop brush presets overview
        2. Exporting Brush Presets from Photoshop
        3. Importing Photoshop Brush Presets
        4. Photoshop Brush Parameters Compatibility
    8. Dynamic strokes
      1. Dynamic strokes overview
      2. Enabling Dynamic Stroke feature
      3. Dynamic Stroke Performances
      4. Creating custom Dynamic Strokes
    9. Advanced channel painting
      1. Channel painting overview
      2. Ambient Occlusion
      3. Flow Map
      4. Height Map
      5. Normal Map
    10. Vector graphic (.svg & .ai)
    11. Text resource
  6. Effects
    1. Effects overview
    2. Generator
    3. Paint
    4. Fill
    5. Levels
    6. Compare Mask
    7. Filter
    8. Anchor Point
  7. Baking
    1. Baking overview
    2. How to bake mesh maps
    3. Baking visualization settings
  8. Content
    1. Creating custom effects
      1. Creating custom effects overview
      2. Generic filter
      3. Channel specific filter
      4. Generators
      5. Mesh map
      6. Mesh based input
      7. User data
    2. Importing assets
      1. Adding resources via drag and drop
      2. Adding resources via the import window
      3. Adding content on the hard drive
      4. Receiving assets from other Substance 3D applications
  9. Features
    1. Automatic UV Unwrapping
    2. Physical size
    3. Smart Materials and Masks
    4. Subsurface Scattering
      1. Subsurface Scattering overview
      2. Enabling Subsurface in a Project
      3. Subsurface Parameters
      4. Subsurface Material Type
    5. Dynamic Material Layering
    6. UV Reprojection
    7. UV Tiles
      1. UV Tiles overview
      2. Image Sequence
    8. Color Management
      1. Color management overview
      2. Color management with Adobe ACE - ICC
      3. Color management with OpenColorIO
    9. Post Processing
      1. Post Processing overview
      2. Color correction
      3. Depth of Field
      4. Glare
      5. Lens Distortion
      6. Tone Mapping
      7. Vignette
      8. Color Profile
    10. Iray Renderer
      1. Iray Renderer overview
      2. Iray Settings
      3. Viewer and MDL Settings
    11. Plugins
      1. Plugins overview
      2. Autosave
      3. Resources Updater
    12. Sparse Virtual Textures
    13. Custom Shaders
    14. SpaceMouse® by 3Dconnexion
    15. Universal Scene Description (USD)
    16. Send to
  10. Technical Support
    1. Performance Guidelines
      1. Performances guidelines overview
      2. Conflicts and background applications
      3. Mesh and UV setup
      4. GPU Drivers
      5. NVIDIA Drivers Settings
      6. GPU VRAM amount and bandwidth
      7. GPU VRAM and other applications
      8. Texture Sets amount
      9. Layer management
      10. Channels management
      11. Substance filters and materials
      12. Viewport display
    2. Configuring Pens and Tablets
    3. Exporting the log file
    4. Exporting a DXDiag
    5. Technical issues
      1. GPU Issues
        1. Crash when working with overclocked GPU
        2. Forcing the external GPU on Mac OS
        3. GPU drivers compatibility
        4. GPU drivers crash with long computations (TDR crash)
        5. GPU has outdated drivers
        6. GPU is not recognized
        7. GPU is not recognized and is mentionned as GDI Generic
        8. Issues with Nvidia GPUs on recent Mac OS versions
        9. Multi/Bi-GPU
        10. Running on integrated GPU
        11. Painter doesn't start on the right GPU
      2. Startup Issues
        1. Application failed to start because of Qt
        2. Crash or freeze during startup
        3. Software conflicts
      3. Rendering Issues
        1. Artifacts and glitches on Mac OS with Custom GPUs
        2. Blocky artifacts appear on textures in the viewport
        3. Mesh appears pink in the viewport
        4. Mesh flash to white when moving camera
        5. Some HDPI scaling values are not working
      4. Stability Issues
        1. Crash during export
        2. Crash when opening or saving a file
        3. Crash while baking
        4. Crash with low virtual memory
        5. Windows Blue Screens
      5. Miscellaneous Issues
        1. Corrupted texture error message
        2. Shelf resources are gone after 7.2 update
        3. Error there is no disk in the drive
        4. Error with missing api-ms-crt dll
        5. Impossible to drag and drop files into the shelf
        6. Impossible to use the ALT keyboard shortcut on Linux
        7. Assets (or shelf) previews are empty
    6. Workflow Issues
      1. Export Issues
        1. My exported opacity map is totally black
        2. Texture dilation or Padding
      2. Tools Issues
        1. Normal map looks incorrect when loaded in layer or tool properties
        2. Paint Tool bleeds on other UV islands
      3. Project Issues
        1. A project has been processed as a text file and is now corrupted
        2. Loading files from a network
        3. Preserve brush strokes setting stays disabled
        4. Projects are really big
      4. Library Issues
        1. Thumbnails in the shelf look incorrect
        2. Error when importing a Font
      5. Viewport Issues
        1. Mesh faces disappear when looking at them from behind
        2. Viewports and textures are blurry or lack sharpness
      6. Plugins Issues
        1. Substance Source plugin doesn't load
      7. License Issues
        1. Maintenance is expired dialog on startup
  11. Pipeline and integration
    1. Installation and preferences
      1. Preferences and application data location
      2. Automated installation
      3. Retrieving the installation path
    2. Configuration
      1. Command lines
      2. Environment variables
      3. Firewall Configuration
      4. Querying Current Software Version
      5. Remote Desktop
    3. Resource management
      1. Shelf and Assets location
      2. Resource paths
        1. Adding resource paths by editing preferences manually
        2. Editing resource paths manually
        3. Editing the Shelf Preferences with Python
      3. Adding saved searches manually
      4. Preferences and content migration
      5. Excluding resources in a resource path
  12. Scripting and development
    1. Scripts and plugins
      1. Creating a Javascript plugin
      2. Remote control with scripting
    2. Shader API Reference
      1. Shader API overview
      2. Changelog - Shader API
      3. Libraries - Shader API
        1. Lib Alpha - Shader API
        2. Lib Bayer - Shader API
        3. Lib Defines - Shader API
        4. Lib Emissive - Shader API
        5. Lib Env - Shader API
        6. Lib Normal - Shader API
        7. Lib PBR - Shader API
        8. Lib PBR Aniso - Shader API
        9. Lib Pom - Shader API
        10. Lib Random - Shader API
        11. Lib Sampler - Shader API
        12. Lib Sparse - Shader API
        13. Lib SSS - Shader API
        14. Lib Utils - Shader API
        15. Lib Vectors - Shader API
      4. Parameters - Shader API
        1. All Custom Params - Shader API
        2. All Engine Params - Shader API
        3. All Rendering States Params - Shader API
        4. Layering Bind Materials - Shader API
        5. Layering Declare Stacks - Shader API
      5. Shaders - Shader API
        1. PBR Material Layering - Shader API
        2. PBR Metal Rough - Shader API
        3. Pixelated - Shader API
        4. Surface Shader - Shader API
        5. Toon - Shader API
  13. Release notes
    1. Release notes overview
    2. All Changes
    3. Version 10.1
    4. Version 10.0
    5. Version 9.1
    6. Old versions
      1. Version 9.0
      2. Version 8.3
      3. Version 8.2
      4. Version 8.1
      5. Version 7.4
      6. Version 7.3
      7. Version 7.2
      8. Version 2021.1 (7.1.0)
      9. Version 2020.2 (6.2.0)
      10. Version 2020.1 (6.1.0)
      11. Version 2019.3
      12. Version 2019.2
      13. Version 2019.1
      14. Version 2018.3
      15. Version 2018.2
      16. Version 2018.1
      17. Version 2017.4
      18. Version 2017.3
      19. Version 2017.2
      20. Version 2017.1
      21. Version 2.6
      22. Version 2.5
      23. Version 2.4
      24. Version 2.3
      25. Version 2.2

Warp projection

The Warp projection of the fill is a 3D projection that allows to deform a texture by editing points of a grid. It can be used to fit patterns and logo on a non-planar surface.

Quick setup

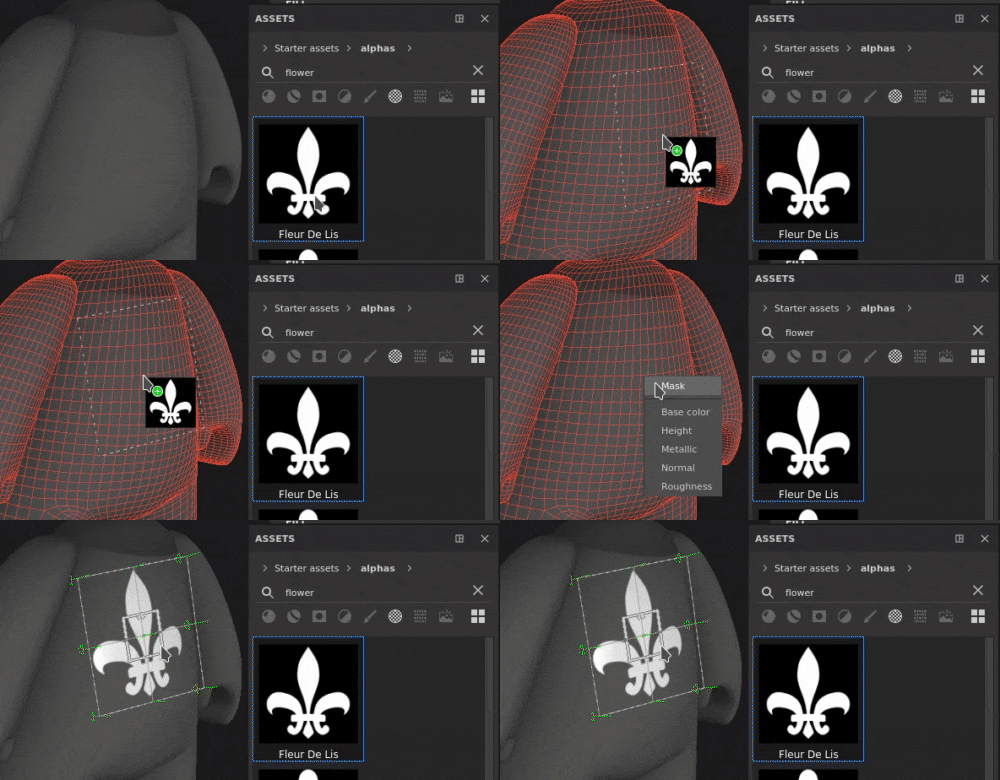
It is possible to quickly setup a layer with the warp projection by drag and dropping a resource from the Assets window onto the mesh. When releasing the mouse a menu will open allowing to choose in which channel the resource should be assigned.

Compatible resource types are:

  • Alpha
  • Procedural
  • Texture
  • Material (requires pressing the ALT key)
Properties

Setting

Description

Filtering

Controls how the texture or material will be filtered. This setting can impact how the texture looks when repeated multiple times. With high scaling values using a different filtering than the default may produce better looking result. Current settings available:

  • Bilinear | HQ (default): Advanced bilinear filtering that tries to improve the quality of the texture when the tiling values are high.
  • Bilinear | Sharp: Simple bilinear filtering that smooths the texture slightly but try to preserve details.
  • Nearest: No filtering, useful if the Bilinear filtering gives a blurry result and breaks fine details. Can introduce aliasing in the texture.

UV wrap

Control how the texture repeats within the projection. Possible values are:

  • None: the texture doesn't repeat. Anything outside the texture is black/transparent.
  • Repeat horizontally: the texture only repeats horizontally.
  • Repeat vertically: the texture only repeats vertically.
  • Repeat (default): the texture repeats on both axes.

Shape crop

Define if the projected texture should be visible outside of the projection area. Possible values are:

  • Project cropped to shape: the projection is confined within the projection area.
  • Projection extends outside shape (default): the projection continues beyond the projection area.

Projection depth

Control how far the projection goes along its Z axis. This setting helps reaching the mesh surface when the grid point or the projection plane is too far away.

The green arrows indicate the direction and distance of the projection for each points of the grid.
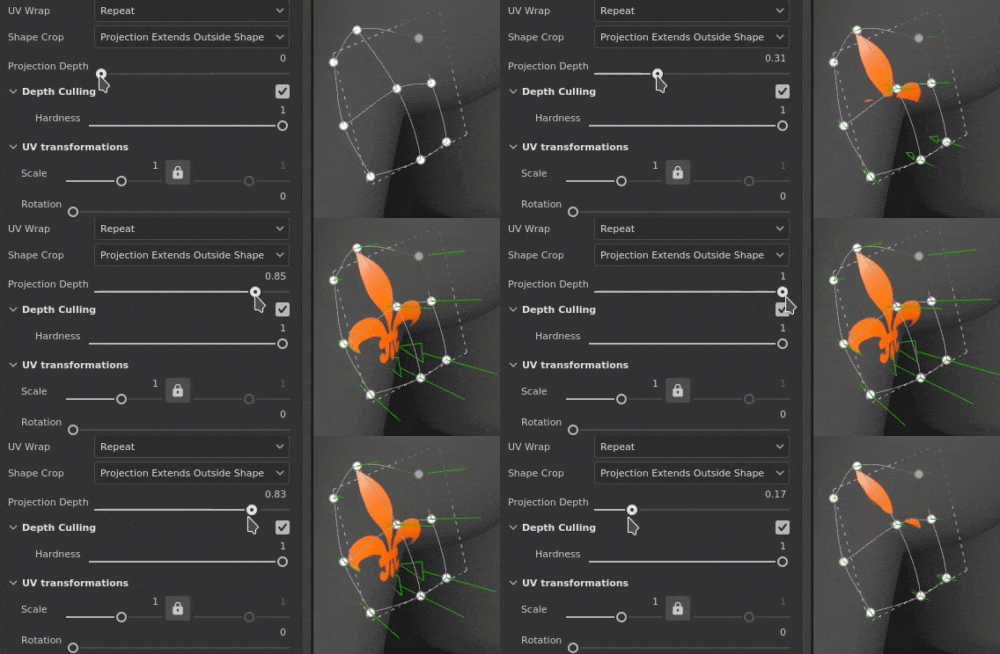
Alert:

A high value can severely impact performance. It is recommended to keep this parameter low as much as possible.

Depth culling

Fade the projection based on the distance. One parameter is available:
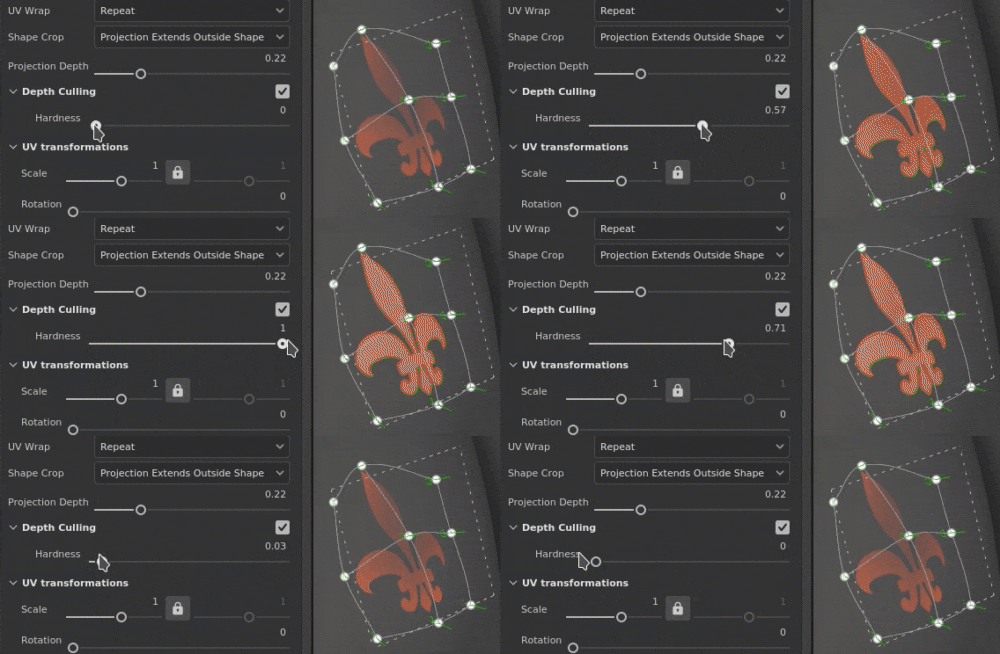
  • Hardness: control how hard or soft the fading transition is.

UV transformation

The UV transformation settings control the texture/material within the projection.

Scale modeSettingDescription

Tiling (default)

Allows to manually set the repeating amount for the current texture.

TilingControls the number of times the texture is repeated.


RotationControls the angle at which the texture is projected onto the mesh.
OffsetControls from where the texture will be projected. Default value means the texture center is at the center of the mesh's UVs.


Physical Size

Automatic adjustment of a texture according to the mesh size and embedded physical size. It uses width and length (X and Y measurements) to calculate the correct physical size. Z measurement is not taken into account.

(For more information see the dedicated documentation page)

Custom Size

If enabled, allows to enter a physical size manually and override the one provided by an asset.

It is automatically selected if no physical size is detected or if multiple assets with different physical sizes are used within the same layer/effect.

Size (cm)Embedded physical sizes are expressed in centimeters. It is possible to work with a mesh file that was created using different units of measurement - it will retain correct proportions. However asset size is currently displayed in centimeters only.
RotationControls the angle at which the texture is projected onto the mesh.
Offset

Controls from where the texture will be projected. Default value means the texture center is at the center of the mesh's UVs.

3D projection settings

The 3D projection settings control the transformation of the projection in 3D space.

SettingDescription
OffsetPosition of the origin of the projection in 3D space. The units are based on the bounding box of the whole scene. 0 is the center of this box.
RotationAngles in degrees to rotate the whole projection on each axes.
ScaleSize of the whole projection on each axes.

Contextual Toolbar

Several settings and tools are available from the Contextual toolbar sitting at the top of the viewport which give controls over the manipulator and the projection:

Icon

Name

Description

Show/Hide manipulator

If enabled, the manipulator is visible and controllable in the viewport to edit the projection transformation or the grid points. If disabled, both the manipulator and the grid are hidden.

Manipulator settings

This menu contains three settings:

  • Manipulator size: control how big the manipulator is in the viewport.
  • Grid steps: define the size of the step when translating with a constraint.
  • Angle steps: define the angle of the step when rotating with a constraint.

Warp edition menu

This menu contains five actions:

  • Transform warp: edit the warp transformation. Allow to manipulate the global grid position, rotation and scale.
  • Edit vertices: edit the warp grid points individually (or in group).
  • Split warp crosswise: start the split warp tool to insert a new grid division both horizontally and vertically.
  • Split warp horizontally: start the split warp tool to insert a new grid division horizontally.
  • Split warp vertically: start the split warp tool to insert a new grid division vertically.

Warp projection settings

This menu regroups settings that affect only the current warp projection:

  • Row and columns: specify the number of divisions that the warp grid has. This setting can only be edited if no points of the grid have been modified.
  • Handle size: define the size of the grid points in Edit vertices mode.
  • Grid color: define the color of the warp grid lines.

Automatic tangents

If enabled, align the tangents of a point automatically toward its neighbors points when moved.

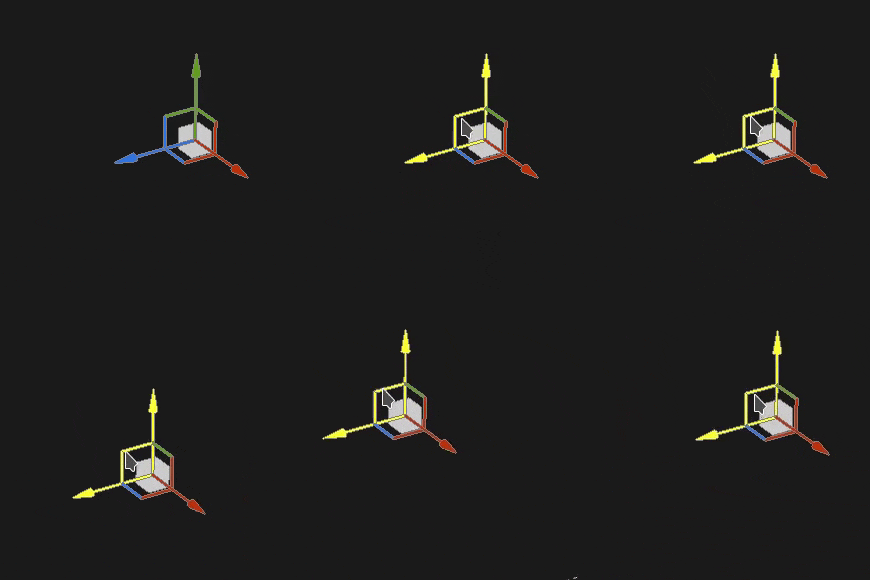
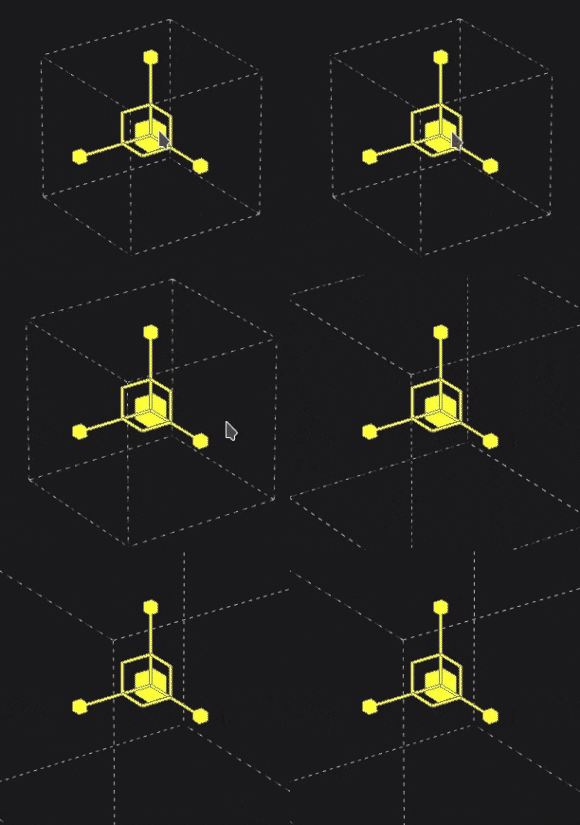
Translation manipulator

Allow to move the projection or the grid points along the main axes (X, Y, Z).

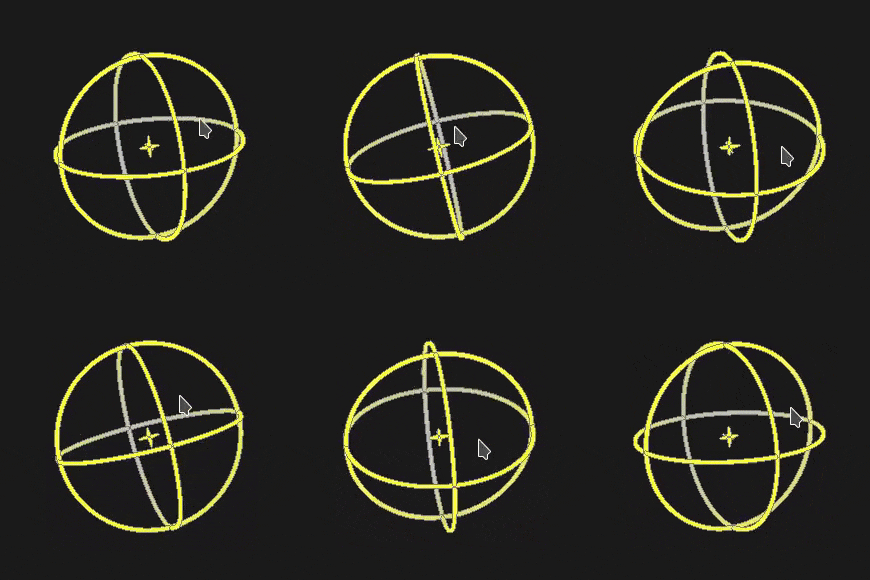
Rotation manipulator

Allow to rotate the projection or the grid points in the along the main axes (X, Y, Z).

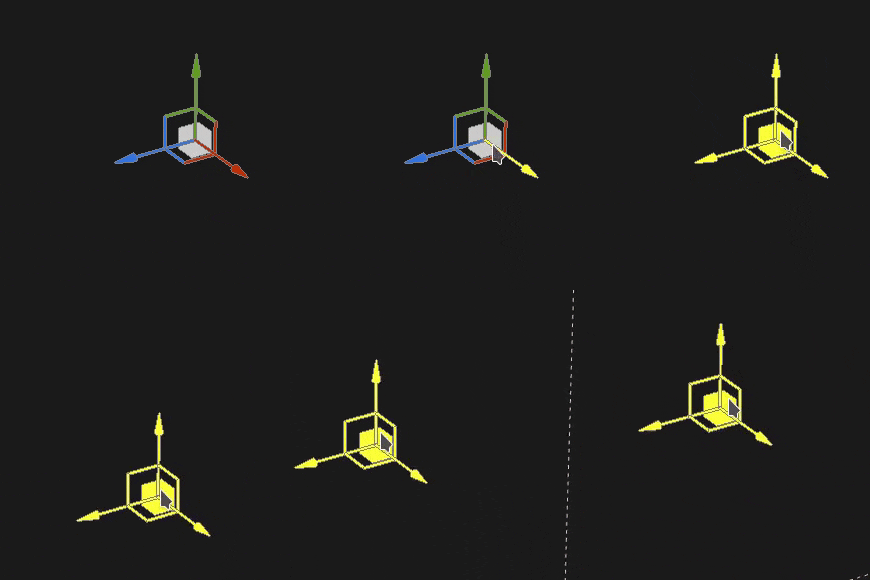
Scale manipulator

Allow to scale the projection in the scene along the main axes (X, Y, Z).

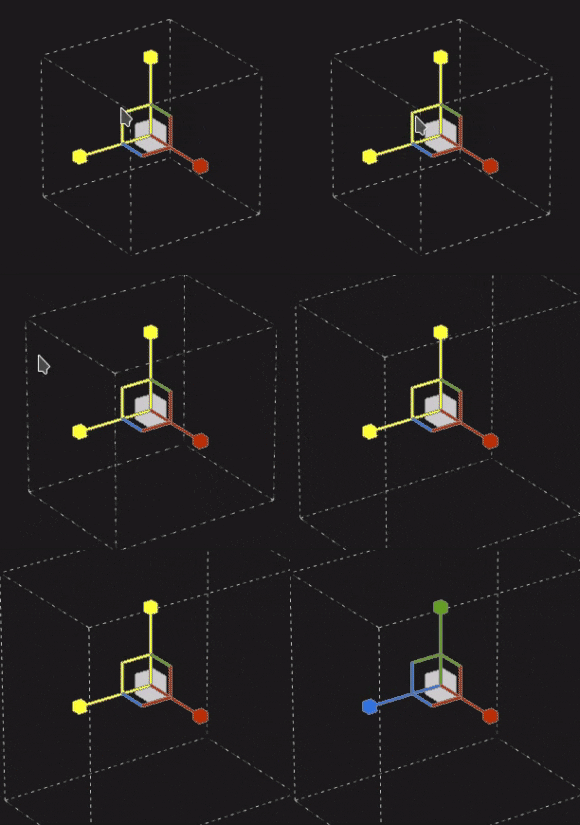
Surface manipulator

Allow to move the projection or the grid points by snapping them on the 3D model surface.

Manipulator space

Define in which space the transformations are performed. Possible values:

  • Local space: axes are aligned with the current transformation.
  • World space: axes are aligned with scene.

Mirror on X

Flip the transformation on the X axis.

Mirror on Y

Flip the transformation on the Y axis.

Mirror on Z

Flip the transformation on the Z axis.

Reset transformation

This menu contains three actions:

  • Restore the global transformation: reset the position, rotation and scale of the projection back to the initial values. This action doesn't affect the grid points themselves.
  • Reset all vertices: reset all the position and tangents of the grid points of the warp grid.
  • Reset selected vertices: reset the position and tangents of only the selected points of the warp grid.

Manipulator

This projection manipulator is only available in the 3D viewport.

Action

Shortcut

Description

Translation

Mouse click

With the Translation manipulator, clicking on the axes move the projection:
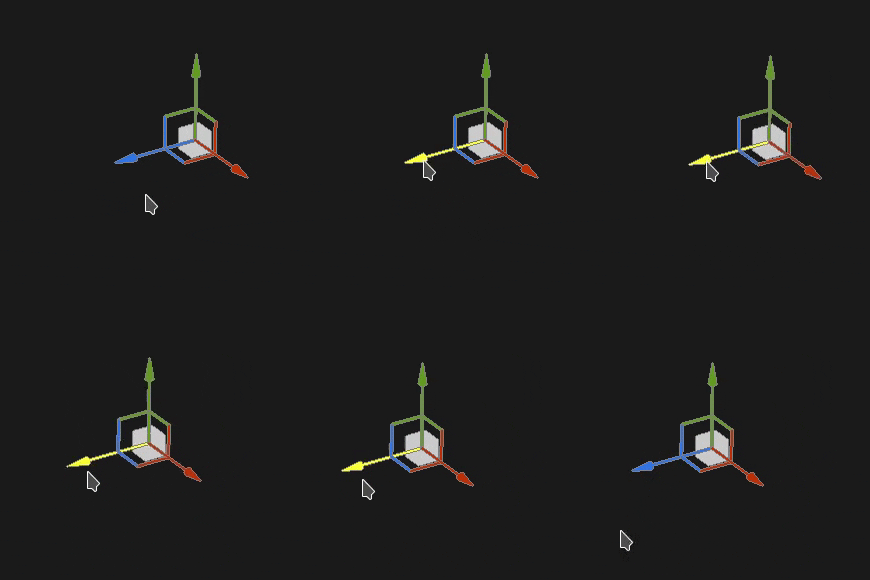
  • One axis: only move in one direction the projection.
  • Two axes: move the projection on the plans aligned with the axes.
  • Three axes: move the projection in the space of the camera (plan facing it).

Translation constrained

SHIFT+Mouse click

With the Translation manipulator, move the projection along the selected axes but only at specific intervals (stepping). The size of the interval is defined via the manipulator settings.
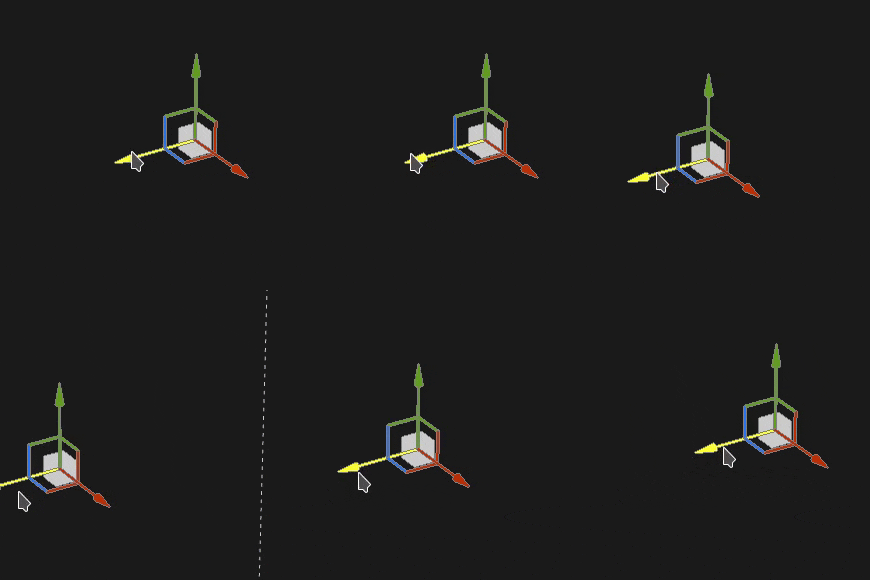
Rotation

Mouse click

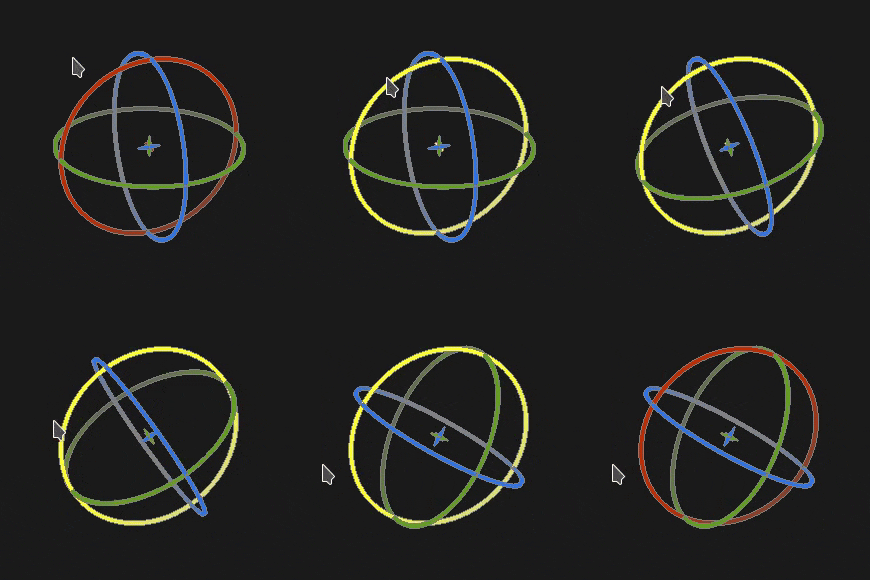
With the Rotation manipulator, clicking on one axes rotate the projection. Click in-between the axes allow to rotate all the axes at the same time.
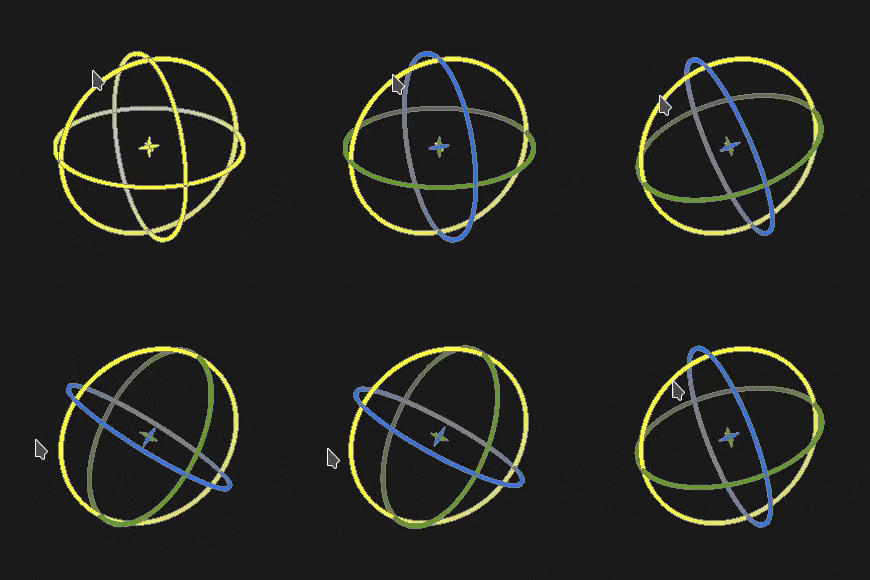
Rotation constrained

SHIFT+Mouse click

With the Rotation manipulator, clicking on one axis to rotate the projection will only happen at specific intervals. The step is defined by an angle via the manipulator settings.
Scale

Mouse click

With the Scale manipulator, clicking on one axis handle resize the projection along the given axis.
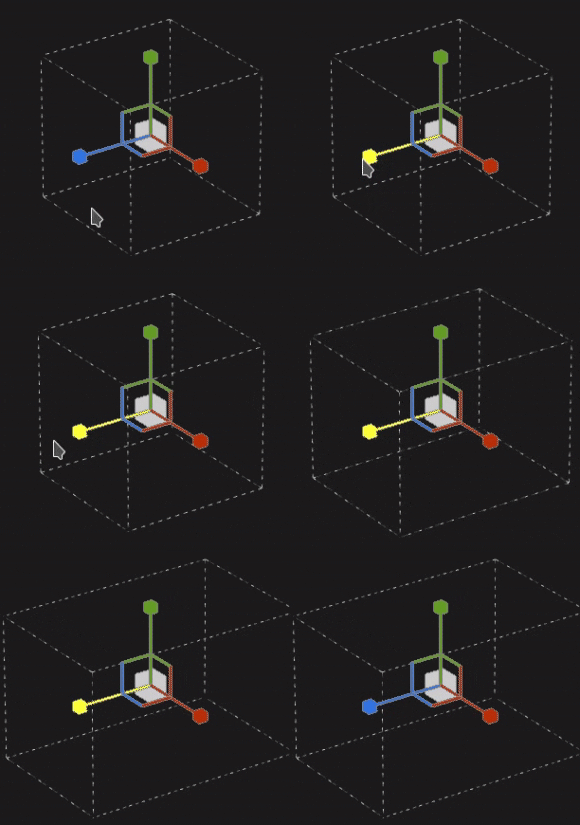
Scale constrained

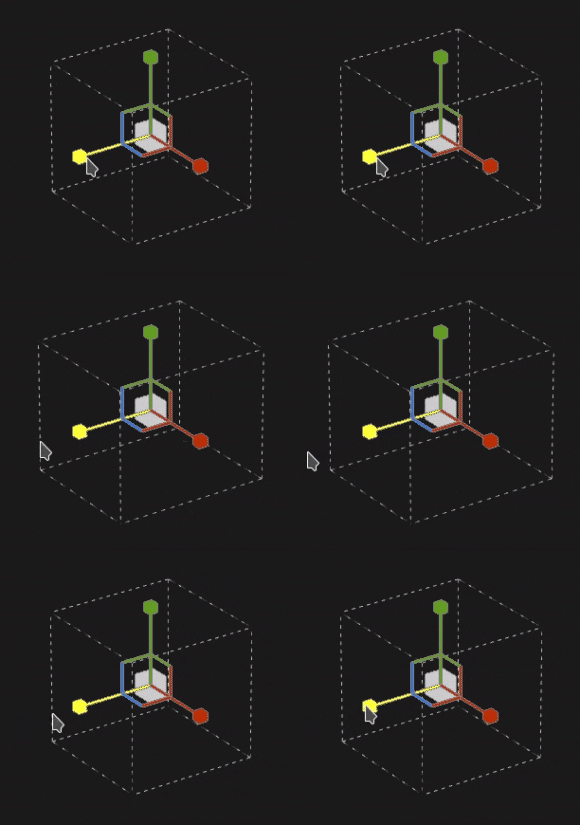
SHIFT+Mouse click

With the Scale manipulator, clicking on one axis handle while maintaining the shortcut will resize the projection in steps. The step size is the same as for the Translation manipulator.
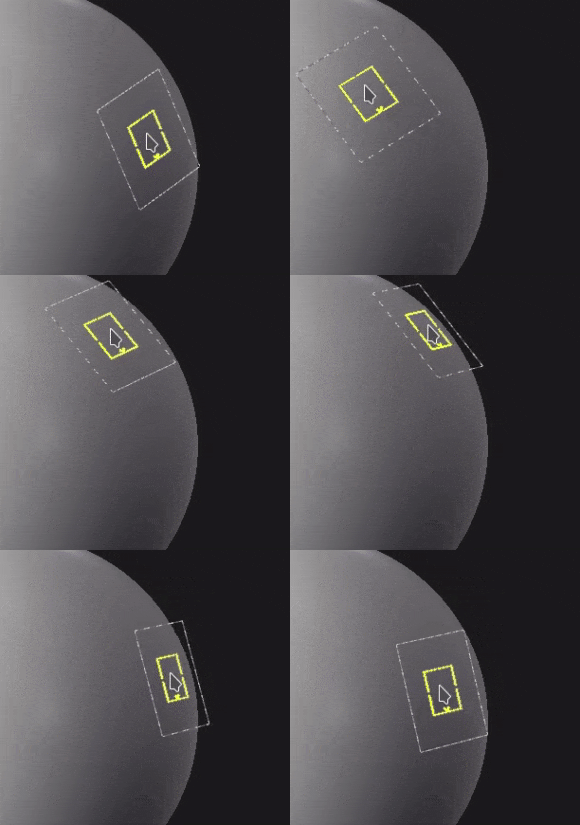
Surface

Mouse click

With the Surface manipulator, clicking and dragging it over the 3D model will snap it on the surface.
Note:

This manipulator is only available with the Planar and Warp projection types.

Editing grid points

The warp projection is represented by a plane and a grid of points. Each points can be modified to make the projection fit better the 3D model but also to distort the texture.

To edit the grid point, switch the edition mode to Edit vertices from the Contextual toolbar:

Note:

A keyboard shortcut is available to quickly switch between Transform warp and Edit vertices. See the Toggle warp edition mode in the Shortcuts page.

Selecting points

Action

Description

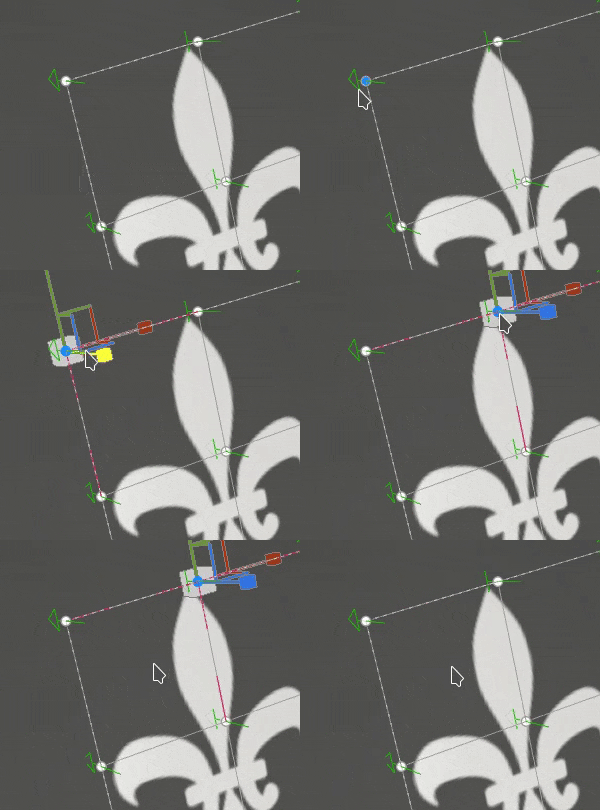
  • A single click on a point will select it.
  • Clicking away from a point or the manipulator will deselect points.
  • Clicking on points while pressing SHIFT allow to select multiple points.
  • Clicking on a point while pressing CTRL allow to deselect only this point and not the other.

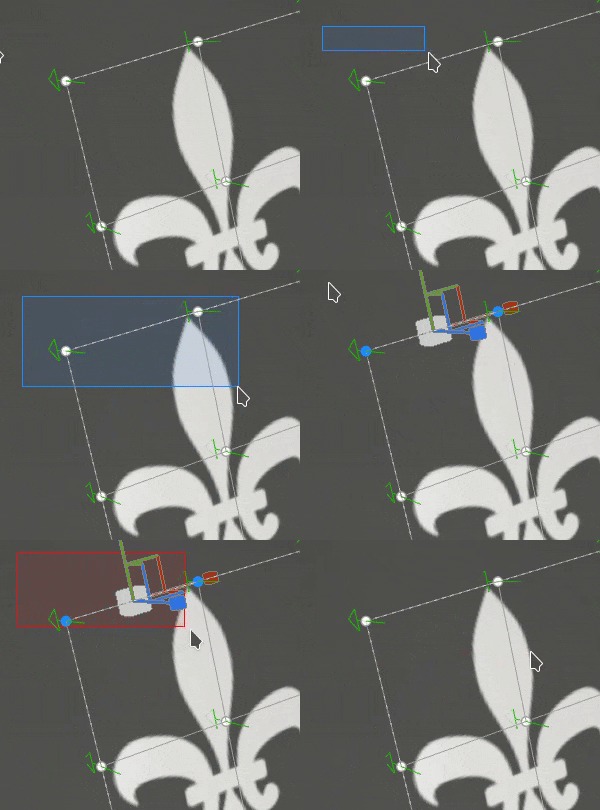
  • Clicking and dragging allow to do a rectangular selection. Any points within the rectangle will be selected when the mouse is released.
  • Clicking and dragging while pressing SHIFT allow to add more points to the current selection.
  • Clicking and dragging while pressing CTRL allow to remove points from the current selection.

Moving points

Action

Description

  • Use the Translation manipulator to move a point.
  • Use the Surface manipulator to move on point on the 3D model surface.

  • Click and drag a point to quickly move it without having to select it first.
  • Clicking and dragging a point will move it like the Surface manipulator.
  • Clicking and dragging a point while pressing CTRL will move it like the Translation manipulator (in camera space on three axes).

Adjusting tangents

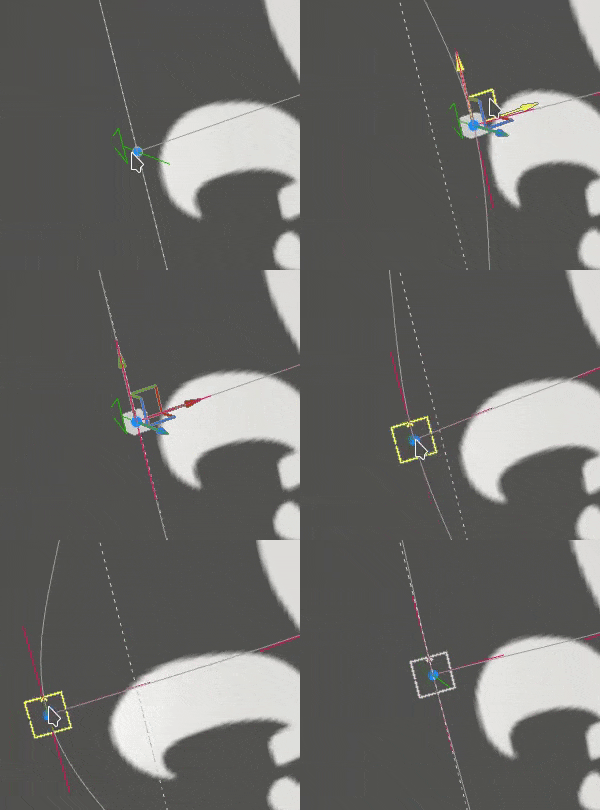
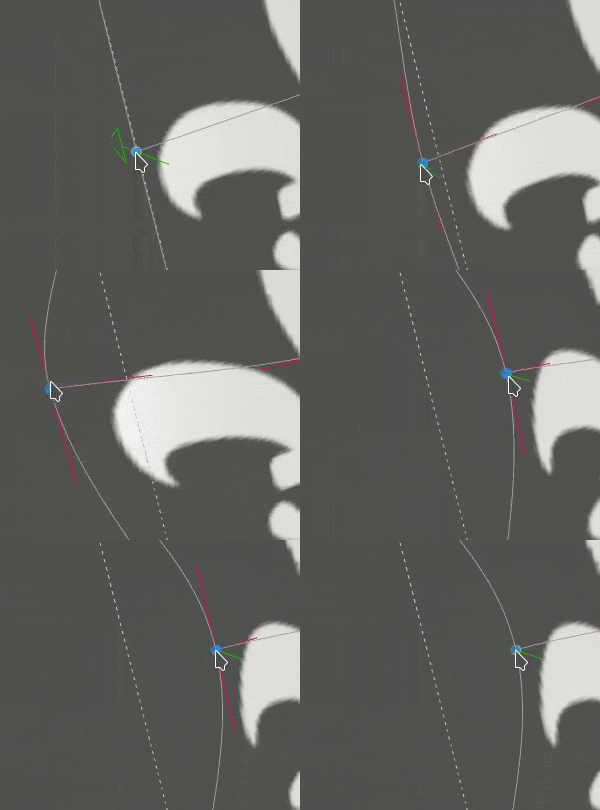
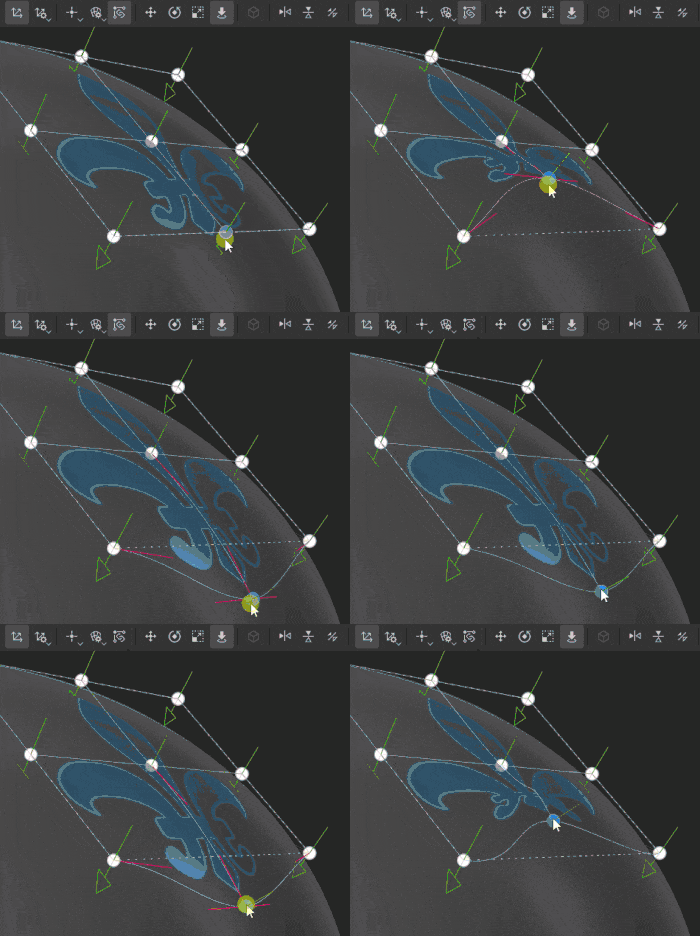
The Warp projection grid is a Bézier patch, this means each point has its own set of tangents to control the curve of the lines that join points together. Adjusting tangents give more control on how the texture is deformed.

Action

Description

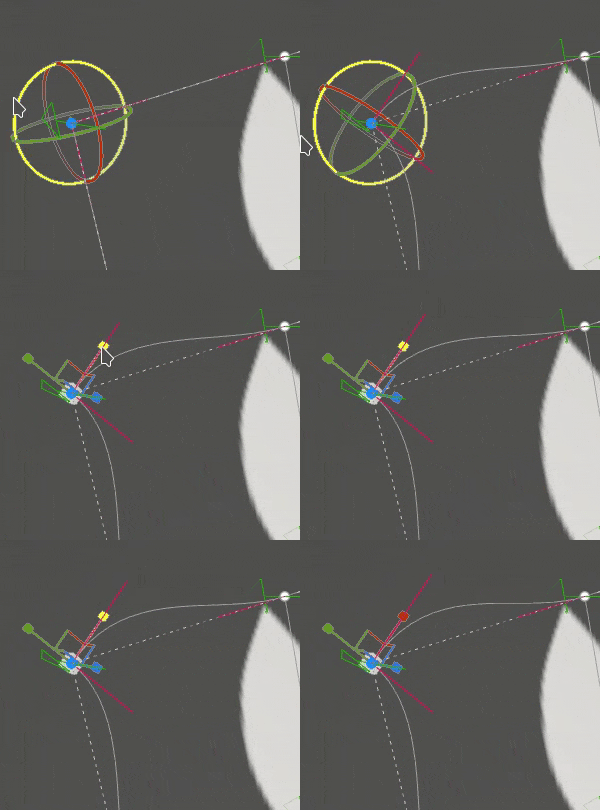
  • To modify the tangents of a point (displayed in red), simply select the given point then use the Rotation or Scale manipulator.
Note:

Tangent will be reset and adjusted automatically when moving points if the setting Automatic tangents from the Contextual toolbar is enabled.
Increasing or decreasing the number of points

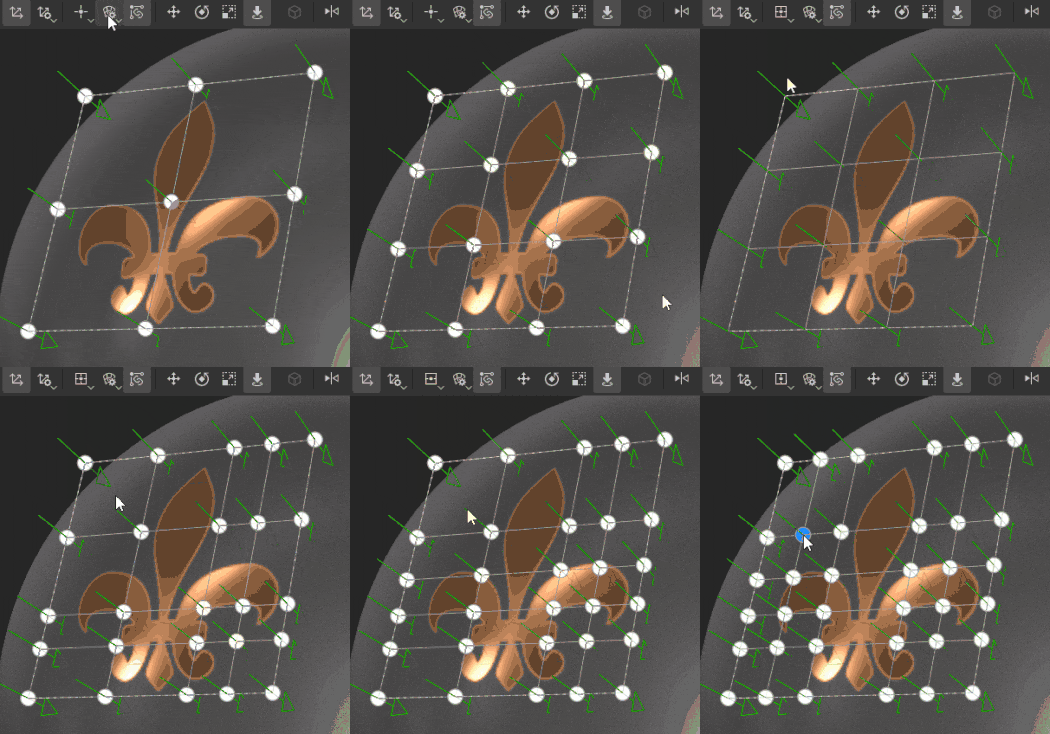
The warp grid can be subdivided to increase the number of points and give more control on how to deform the texture.

Action

Description

  • Divide the grid by rows and columns from the Warp settings menu. (This is only possible if no points have been moved)
  • Subdivide the grid by using one of the three split tools.
  • Any of the split tools can be cancelled by pressing Escape.

Get help faster and easier

New user?