Documentation for Substance 3D Painter is now available on Experience League. After March 14th, HelpX pages will automatically redirect to the equivalent Experience League page.
Refer to the FAQ for more information about which documentation is affected.
- Substance 3D home
- Home
- Getting Started
- Getting Started overview
- Activation and licenses
- System requirements
- Project creation
- Export
- Export overview
- Export window
- Output templates
- Export overview
- Glossary
- Getting Started overview
- Interface
- Interface overview
- Assets
- Substance 3D Assets
- Color picker
- Display settings
- History
- Layer stack
- Main menu
- Project configuration
- Properties
- Settings
- Shader settings
- Texture Set
- Toolbars
- Viewport
- Miscellaneous
- Painting
- Painting overview
- Paint tools
- Path tools
- Path tool overview
- Paint along path
- Ribbon path
- Filled path
- Erase along path
- Smudge along path
- Straight line
- Lazy mouse
- Symmetry
- Fill projections
- Presets
- Presets overview
- Creating and saving presets
- Creating particles presets
- Photoshop brush presets
- Dynamic strokes
- Advanced channel painting
- Vector graphic (.svg & .ai)
- Text resource
- Effects
- Baking
- Content
- Creating custom effects
- Importing assets
- Creating custom effects
- Features
- Automatic resource update
- Automatic UV Unwrapping
- Physical size
- Smart Materials and Masks
- Subsurface Scattering
- Dynamic Material Layering
- UV Reprojection
- UV Tiles
- Color Management
- Post Processing
- Iray Renderer
- Plugins
- Sparse Virtual Textures
- Custom Shaders
- SpaceMouse® by 3Dconnexion
- Universal Scene Description (USD)
- Send to
- Technical Support
- Performance Guidelines
- Configuring Pens and Tablets
- Exporting the log file
- Exporting a DXDiag
- Technical issues
- GPU Issues
- Crash when working with overclocked GPU
- Forcing the external GPU on Mac OS
- GPU drivers compatibility
- GPU drivers crash with long computations (TDR crash)
- GPU has outdated drivers
- GPU is not recognized
- GPU is not recognized and is mentionned as GDI Generic
- Issues with Nvidia GPUs on recent Mac OS versions
- Multi/Bi-GPU
- Running on integrated GPU
- Painter doesn't start on the right GPU
- Startup Issues
- Rendering Issues
- Stability Issues
- Miscellaneous Issues
- GPU Issues
- Workflow Issues
- Export Issues
- Tools Issues
- Project Issues
- Library Issues
- Viewport Issues
- Plugins Issues
- License Issues
- Pipeline and integration
- Installation and preferences
- Configuration
- Resource management
- Scripting and development
- Scripts and plugins
- Shader API Reference
- Shader API overview
- Changelog - Shader API
- Libraries - Shader API
- Lib Alpha - Shader API
- Lib Bayer - Shader API
- Lib Defines - Shader API
- Lib Emissive - Shader API
- Lib Env - Shader API
- Lib Normal - Shader API
- Lib PBR - Shader API
- Lib PBR Aniso - Shader API
- Lib Pom - Shader API
- Lib Random - Shader API
- Lib Sampler - Shader API
- Lib Sparse - Shader API
- Lib SSS - Shader API
- Lib Utils - Shader API
- Lib Vectors - Shader API
- Parameters - Shader API
- Shaders - Shader API
- Release notes
- Release notes overview
- All Changes
- Version 12.0
- Version 11.1
- Version 11.0
- Known issues
- Old versions
- Version 10.1
- Version 10.0
- Version 9.1
- Version 9.0
- Version 8.3
- Version 8.2
- Version 8.1
- Version 7.4
- Version 7.3
- Version 7.2
- Version 2021.1 (7.1.0)
- Version 2020.2 (6.2.0)
- Version 2020.1 (6.1.0)
- Version 2019.3
- Version 2019.2
- Version 2019.1
- Version 2018.3
- Version 2018.2
- Version 2018.1
- Version 2017.4
- Version 2017.3
- Version 2017.2
- Version 2017.1
- Version 2.6
- Version 2.5
- Version 2.4
- Version 2.3
- Version 2.2
Masking and effects
Masking
Layers can be masked in order to display/apply their content only on specific parts of the texture. The mask works as an intensity parameter over the content of the layer. A mask on a layer is always in grayscale, no matter what content you use to paint over it (therefore any color will be converted to a grayscale value before being painted).
You can add a mask by using the right click menu or by using the dedicated button :
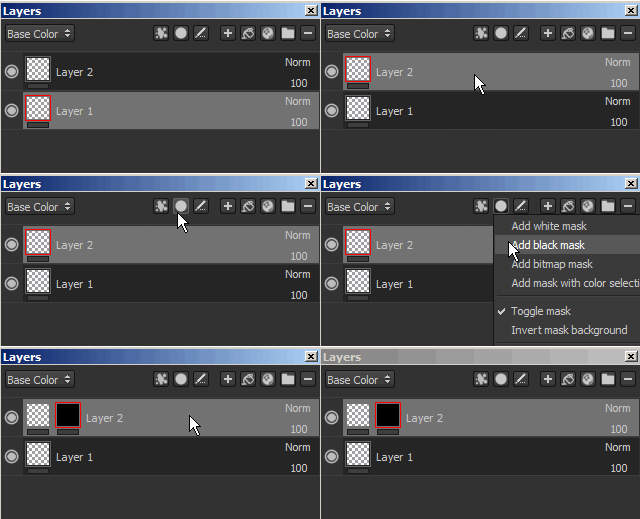

Possible operations on masks :
- You can visualize the mask itself doing ALT + Left mouse click on its thumbnail. It will switch the viewport to an isolated view of the mask from this layer. This operation is also available via the viewer settings.
- You can disable temporarily a mask doing SHIFT + Left mouse click on its thumbnail. Redo the same operation to enable it again. This operation is also available via the right-click menu ("toggle mask").
- You can copy the content of a mask to an other mask by doing Right click > Copy mask content over the thumbnail and then doing Right-click > Paste into mask on the thumbnail of the second mask.
- You can invert the background of the mask by doing Right-click > Invert mask background. This is useful if you want to avoid destroying the effects attached to a mask.
Adding again a mask or removing it will destroy the mask and all the effects attached to it.
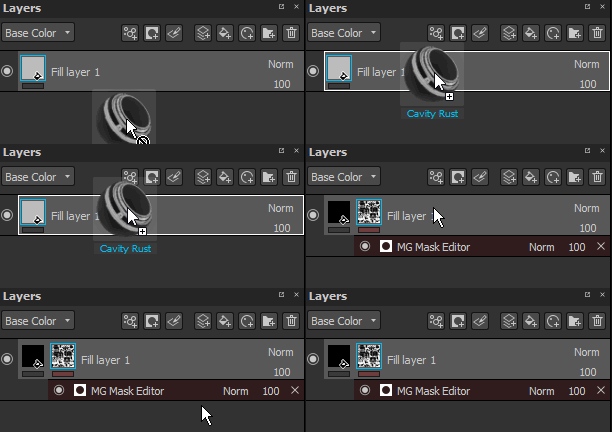
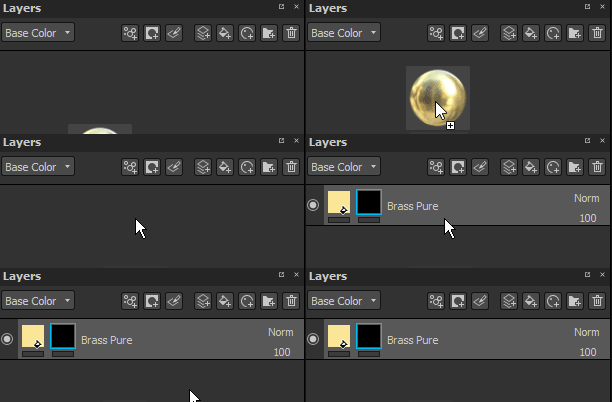
It is possible to immediately create a mask when creating a fill layer (via drag and drop) if the CTRL key is pressed :

Effects
Effects are special operation that can be edited at any time. The effects are can be placed either on a mask of on the content of a layers.
However so effects are more appropriate for on for the other. For example the "generators" are appropriate for the masks.
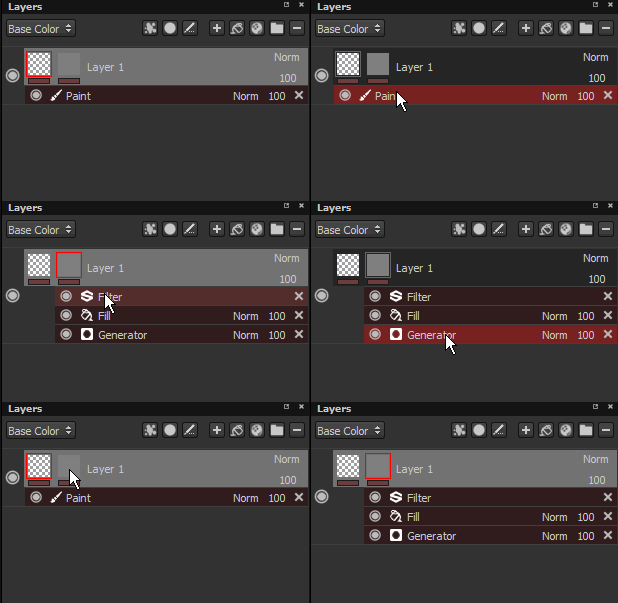
The line under each thumbnail on a layer indicate if effects exist. Grey equals no effects, red equals at least one effect. There is an effect stack is per mask and per content.

For more information, see the dedicated page.
Smart Masks
The smart masks are a way to save a mask and its effect to easily re-use them on other layers or other projects. To create a smart mask, simply right click over a mask and choose "Create smart mask".
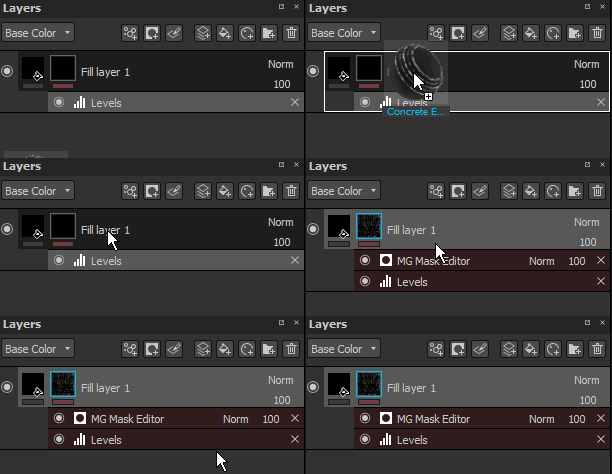
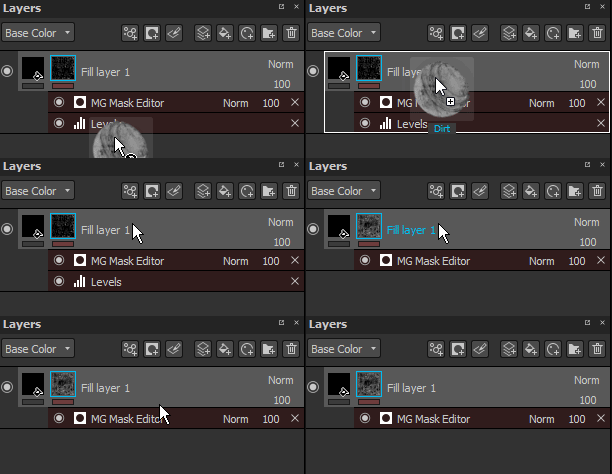
When drag and dropping a smart mask onto a layer, a black mask will be created if it doesn't already exist, otherwise the effects list will be merged with the existing one. It is possible to overwrite completely the effect list by keeping "CTRL" pressed when dropping the smart mask.
