Documentation for Substance 3D Integrations is now available on Experience League. After March 14th, HelpX pages will automatically redirect to the equivalent Experience League page.
Refer to the FAQ for more information about which documentation is affected.
- Substance 3D home
- Ecosystems and Plugins
- Home
- Game Engines
- Game Engines overview
- Unreal Engine
- Unreal Engine 5
- Unreal Engine 5 overview
- Unreal Engine 5 Release Notes
- Plugin Overview - UE5
- Plugin Settings - UE5
- Substance Input Image - UE5
- Material Instance Definition - UE5
- Material Template Usage - UE5
- Out-of-the-Box Material Templates
- Physical size - UE5
- Tiling Substance - UE5
- Substance 3D Plugin Default Templates
- Substance 3D Assets Library Usage - UE5
- Blueprints - UE5
- Unreal Engine 5 Scripting
- Installing to Source Builds
- Unreal Engine 5 overview
- Unreal Engine 4
- Unreal Engine 4 overview
- Unreal Engine 4 plugin release notes
- Unreal plugin 4.27.0.1
- Unreal plugin 4.26.0.21
- Unreal plugin 4.26.0.2
- Unreal plugin 4.26.0.1
- Unreal plugin 4.25.0.5
- Unreal plugin 4.25.0.4
- Unreal plugin 4.25.0.3
- Unreal plugin 4.24.0.3
- Unreal plugin 4.23.0.2
- Unreal plugin 4.23.0.1
- Unreal plugin 4.22.0.33
- Unreal plugin 4.22.0.32
- Unreal plugin 4.21.0.31
- Plugin Overview - UE4
- Plugin Settings - UE4
- Substance Input Image - UE4
- Material Instance Definition - UE4
- Tiling Substance - UE4
- Working with Bump Offset (Parallax) - UE4
- Working with Displacement - UE4
- Source in UE4
- Live Link in UE4
- Blueprints - UE4
- Unreal Engine 4 Scripting
- Unreal Engine 4 overview
- Unreal Engine 5
- Unity
- Unity overview
- Unity Release Notes
- Downloading Substance 3D Plugin in Unity
- Unity Plugin Overview
- Unity Preferences
- Optimization Guidelines
- Upgrading Projects/Known Issues
- Managing Substance Graphs
- Changing parameters
- Generated Textures (Packing)
- Rendering Color Space
- Using Image Inputs
- Publishing for Mobile
- Substance 3D for Unity Scripting
- API Overview
- Scripting API
- C# Example Script
- Substance 3D Assets Library Usage
- Removing Substance Plugin
- Substance 3D in Unity Tutorials
- Physical Size in Unity
- Sharing sbsar Files Between Projects
- Unity overview
- Lumberyard
- Roblox
- 3D Applications
- 3D Applications overview
- Maya
- 3ds Max
- MODO
- MODO overview
- Modo Plugin Release Notes
- Substance in MODO Overview
- Modo Installation
- Parameters
- Custom Materials
- Working with Normals
- Working with Emissive
- Bump and Displacement
- Working with References
- Animating Substances
- Copy/Duplicate Substance
- Environment and Rendering Setup
- Modo Switch Engine
- Tiling Modo textures
- MODO overview
- Cinema 4D
- Houdini
- Blender
- Blender overview
- Release Notes
- Substance in Blender Overview
- Downloading and Installing the Plugin
- Preferences
- The Substance 3D Panel
- Shortcuts and Navigation
- Workflows
- Physical size in Blender
- Substance 3D Assets Library
- Troubleshooting
- Uninstalling the Add-on
- Substance 3D Add-on for Blender Tutorials
- Blender overview
- Creative Cloud Applications
- Renderers
- Partnerships
Substance in Maya Overview
Plugin Overview
The Substance plugin allows you to load a Substance material created in Substance Designer directly in Maya. The plugin will create a Maya material and feed the substance textures into the material channels inputs. You can then make changes to the substance parameters and the textures will automatically update.
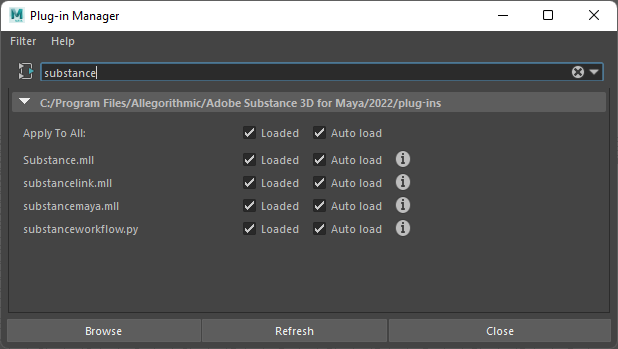
Make sure you have the plugin loaded in the Settings/Preferences ->Maya Plug-in Manager

Opening a Substance
-
Open the Hypershade and in the Node Editor, right-click and swipe up in the marking menu to choose create node. This opens the Create Node window. From there, you can search for the Substance node.
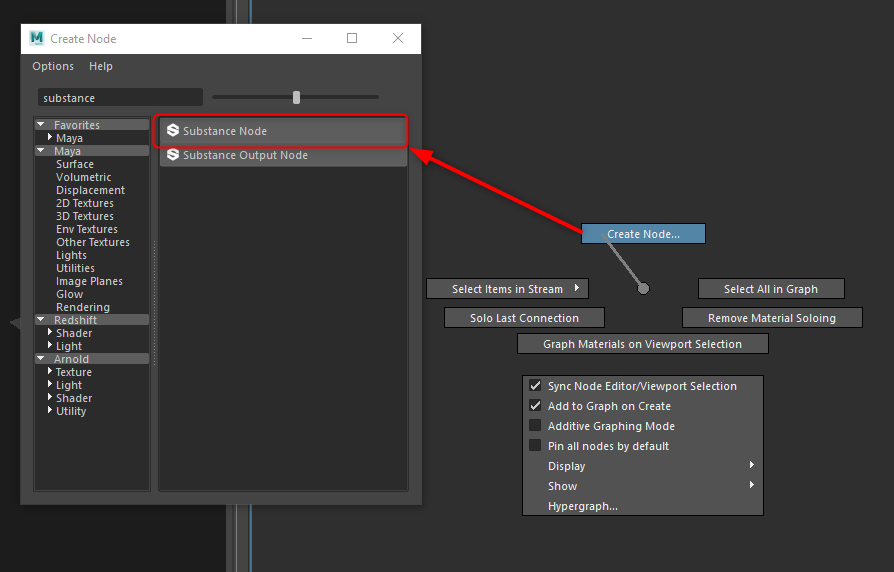
You can also hit tab in the node editor and in the text field, type substance and this will filter to the substance options. From the options, choose Substance Texture.
-
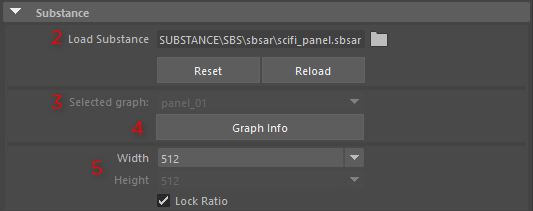
Select the Substance node and in the Property Editor and browse to load a Substance (.sbsar) file.

-
The Selected Graph drop-down will populate if the Substance contains multiple graphs. The graph chosen will be used to create the material.
-
The Graph Info button will display the graph attributes set in Substance Designer.
-
Set the Resolution by choosing a value from the Width and Height drop-down box. Lock Ration is enabled by default.
-
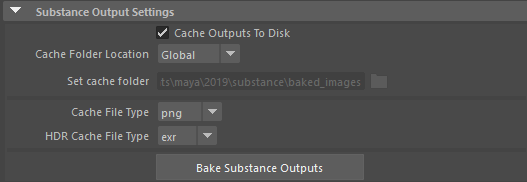
Enable Cache Outputs to Disk in order to bake the Substance Outputs to disk so they can be used with renderers such as Arnold. The cached file will be read back in by the plugin using a Maya file node.

-
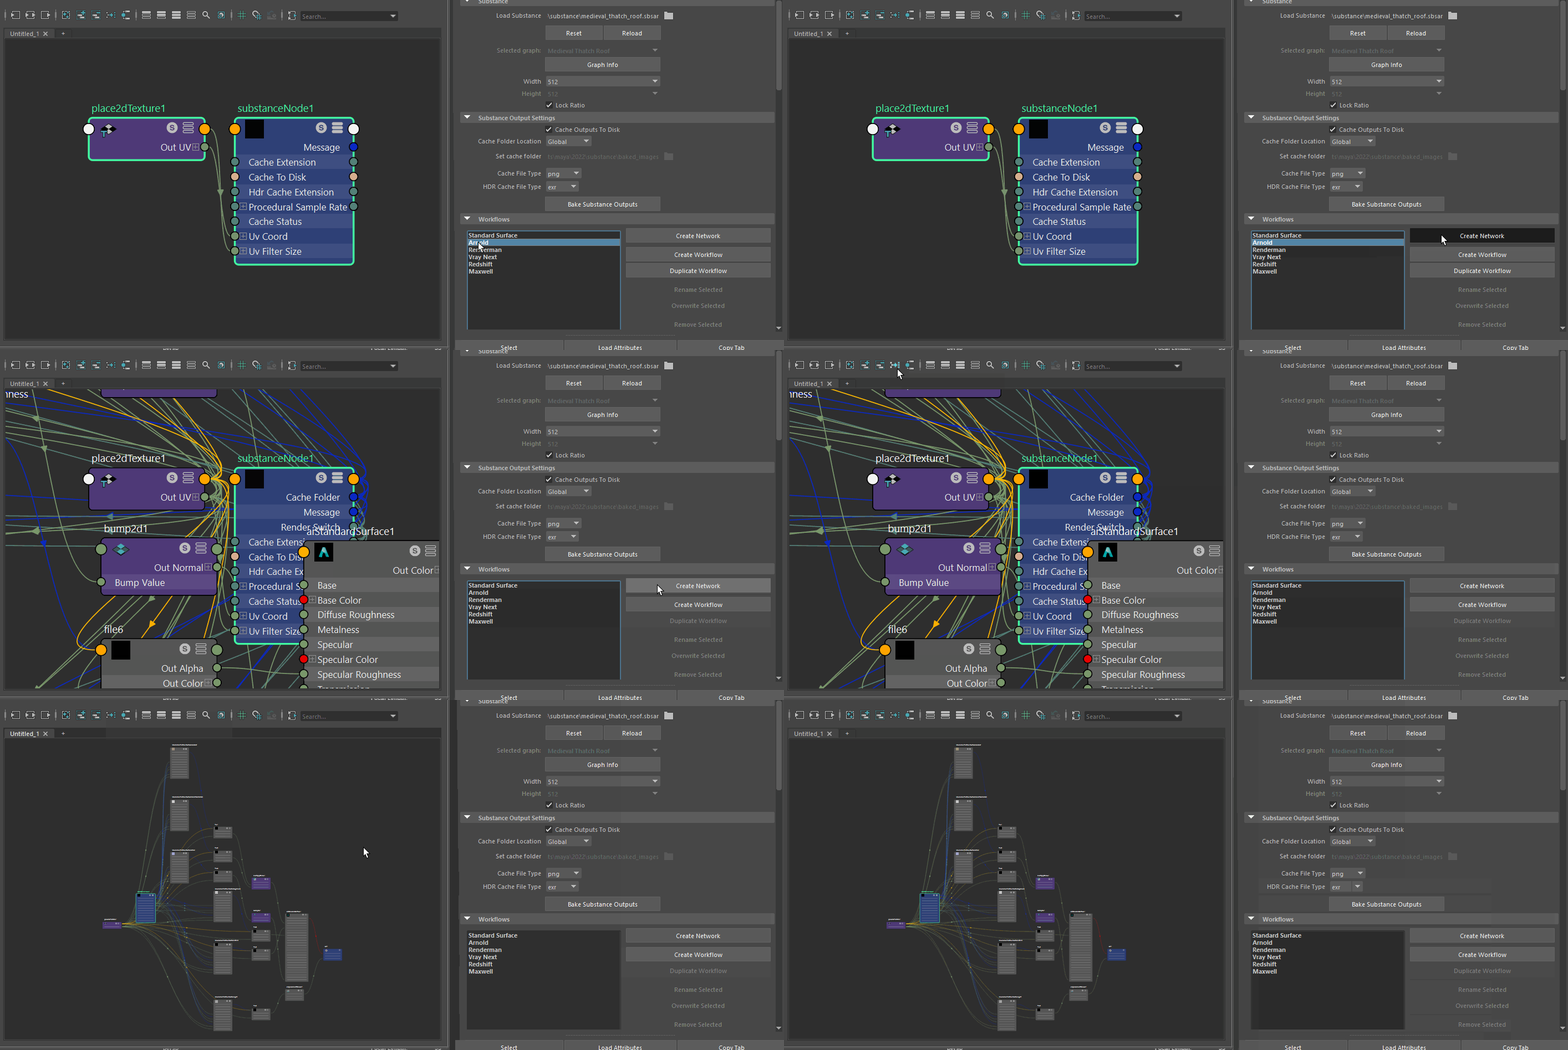
Choose a workflow for the renderer you are using and click the Create Shader Network button. A shader network is created for the renderer workflow. You can now apply the material in the scene.
