Access Sky Replacement
Choose Edit > Sky Replacement.
From clear blue skies to dramatic sunsets, create the mood you want in your images with a quick sky replacement in Photoshop
Gone are the days when replacing the sky required multiple steps and careful fine-tuning to achieve a seamless look. Now you can save time and get the sky you love and let Adobe Sensei do the masking and blending for you!
Further, you can easily adjust Sky Replacement settings, manage sky presets, and get more skies for your image.


TRY IT IN-APP
Replacing the sky and upgrading your original image has never been easier.
Read the full article to learn how to get started with Sky Replacement and elevate your creative journey.
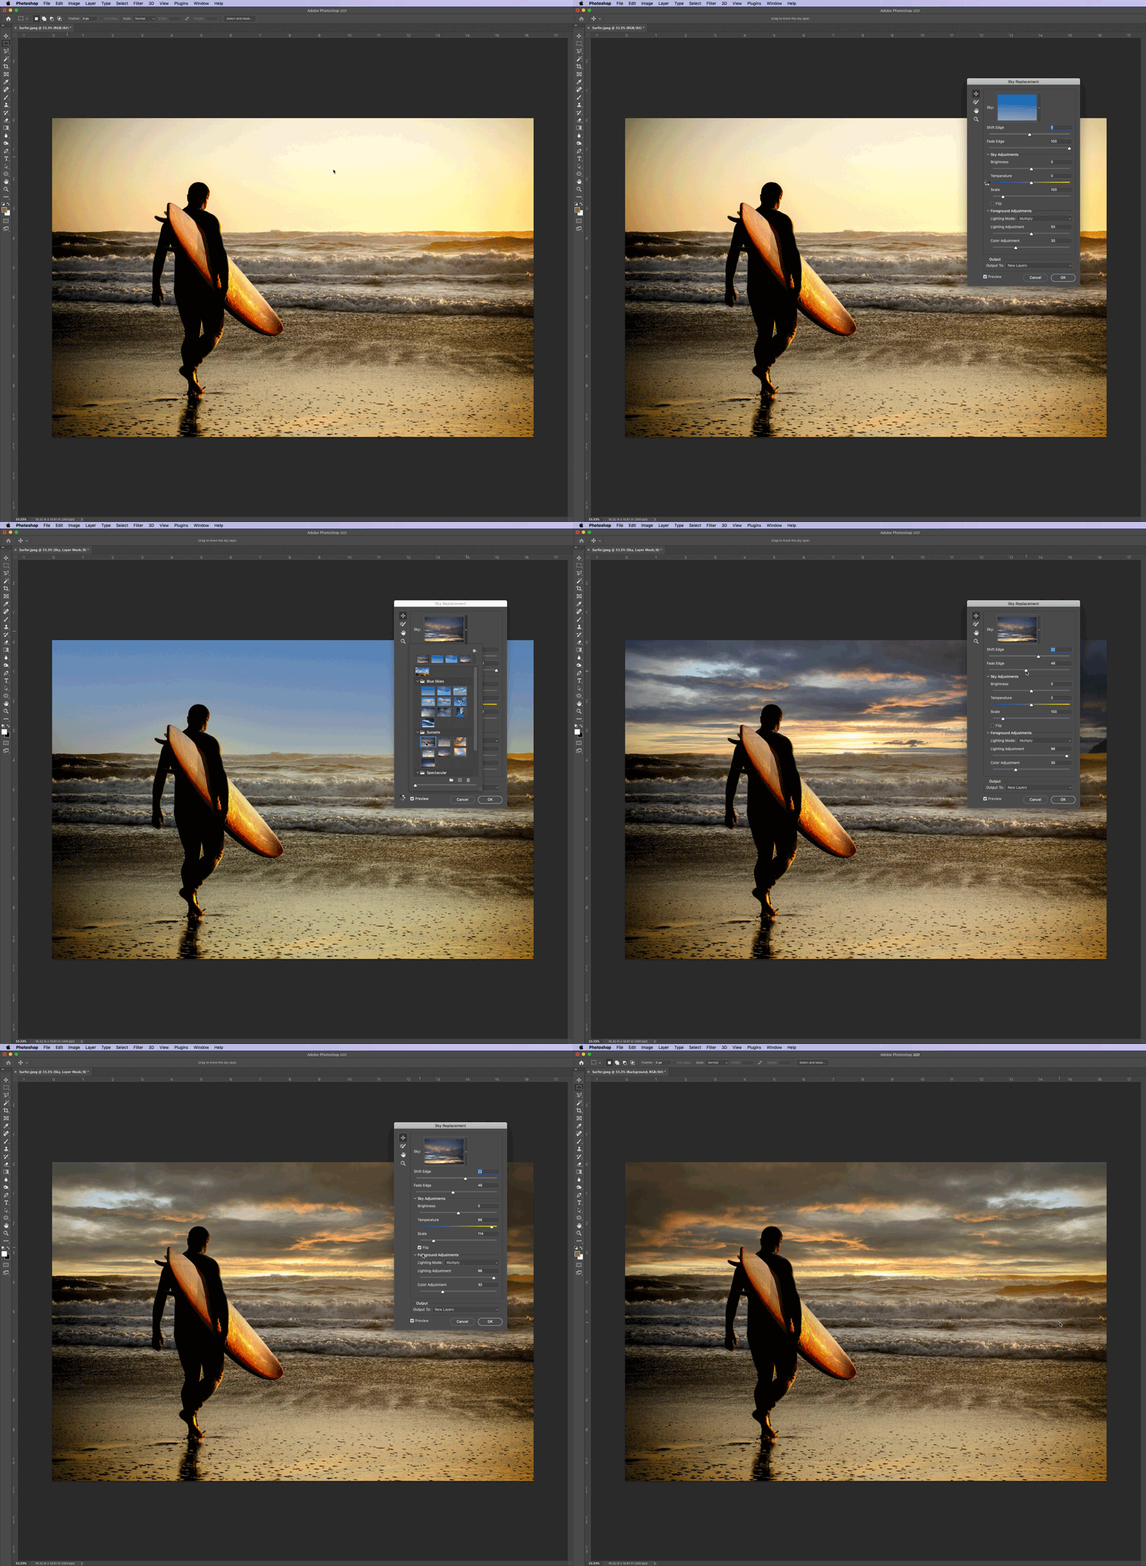
Add drama to your images with Sky Replacement in 3 quick steps:
Access Sky Replacement
Choose Edit > Sky Replacement.
Choose a new sky
Adjust the settings to create the perfect image
The sky area on the original image is automatically selected and masked, allowing the new sky to be displayed based on your selected options. For a seamless look, adjust the sliders to modify the sky and blend the foreground with the background colors.

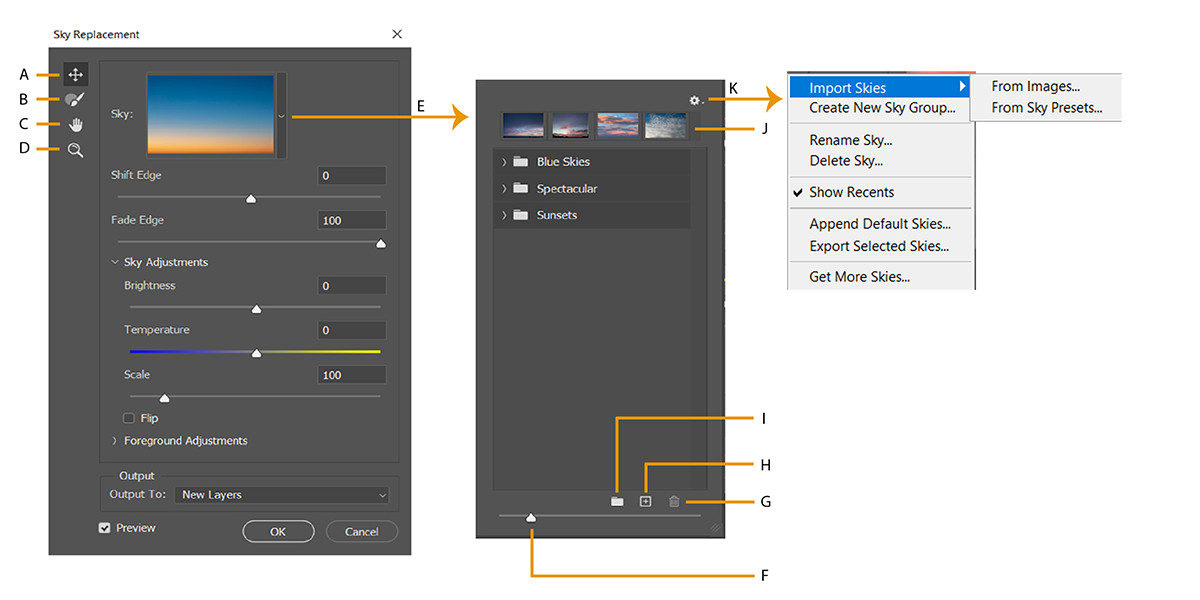
A. Sky Move tool B. Sky Brush C. Hand Tool D. Zoom Tool E. Manage sky presets F. Preset Preview Zoom G. Delete Skies H. Import skies from images I. Create a new sky group J. Recently used skies K. Sky Preset Menu

In the Sky Replacement dialog, you can set the following options:


With the April 2022 release of Photoshop 23.3, we have improved the quality along the edges of objects in Sky Replacement. The contrast between the foreground and background around the thin line objects is better preserved, while the halo artifacts are also reduced when replacing a bright sky with a darker sky or vice versa. To achieve this quality improvement, a new layer group is introduced in the layer stack of the sky replacement result, which includes two adjustment layers and a mask that is less smooth than the compositing mask.
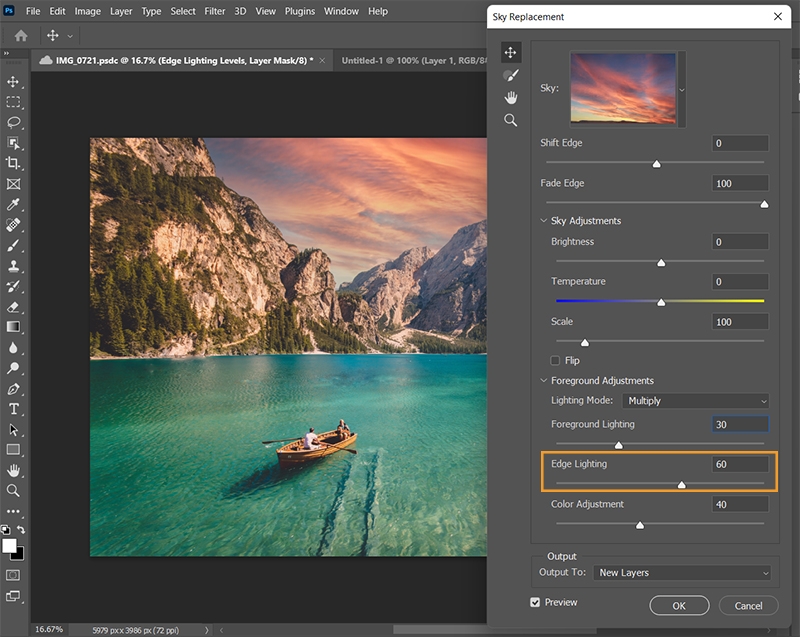

To control the lighting adjustments applied to the object edges in your sky images, simply use the new Edge Lighting slider in the Sky Replacement dialog. Larger values provide higher contrast while reducing more halos along the edges.
You can see a new layer group called the Edge Lighting Group is added to the layer stack of the sky replacement result. All the rest of the layers remains the same.


In the Sky Preset flyout menu, you can set the following options:
Import Skies from images: Use for creating one or more new sky presets from your own sky images. This allows you to select multiple images and import them as new presets in one batch.
Import Skies from Sky Presets: Use for importing existing sky presets from one or more .sky files.
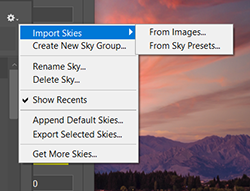

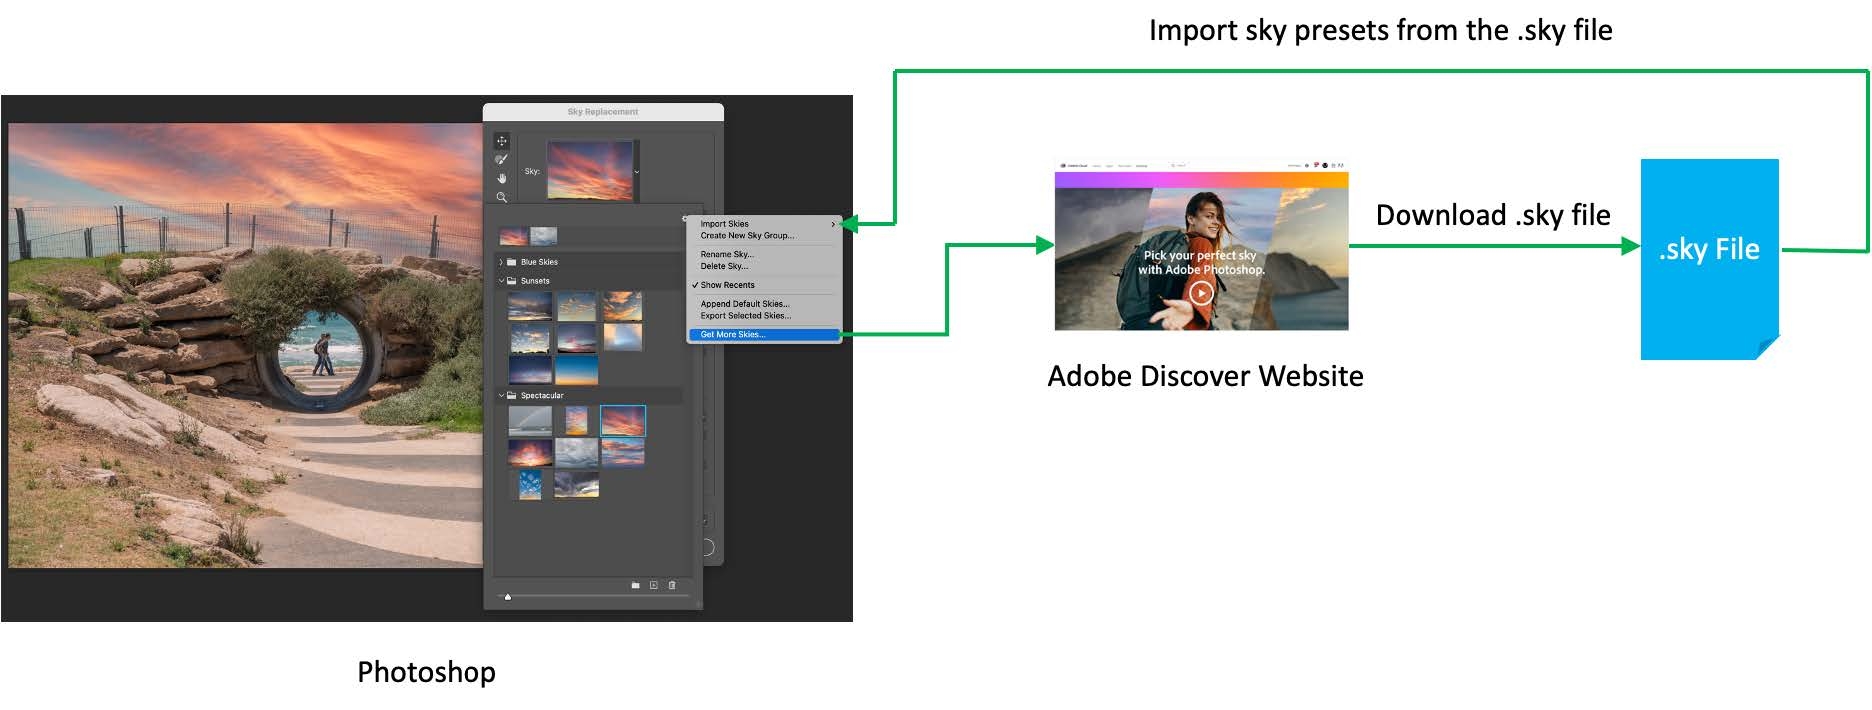
With the August 2021 (v22.5) release, a new menu item in the Sky Preset fly-out menu will take you to the Adobe Discover website where you can view and download more sky images for free.


To access new sky files, do the following:
Navigate to Edit > Sky Replacement.
Click the disclosure arrow to reveal the Manage Sky Presets panel.
Click the gear icon in Manage Sky Presets panel to expose the fly-out Sky Preset menu.
Choose Get More Skies...
If you are currently logged out on the website, you would be automatically logged in when being directed to the website from Photoshop.
Select a Sky Pack for download. Each Sky Pack is represented with an animation of example images.
The downloaded .sky file can be imported as a new sky preset in Sky Replacement by doing any of the following:

If you have a question to ask or an idea to share, come and participate in the Adobe Photoshop community. We'd love to hear from you!