User Guide Cancel

Work with Illustrator cloud documents

  1. Illustrator User Guide
  2. Get to know Illustrator
    1. Introduction to Illustrator
      1. What's new in Illustrator
      2. Common questions
      3. Illustrator system requirements
      4. Illustrator for Apple silicon
    2. Workspace
      1. Workspace basics
      2. Learn faster with the Illustrator Discover panel
      3. Create documents
      4. Toolbar
      5. Default keyboard shortcuts
      6. Customize keyboard shortcuts
      7. Introduction to artboards
      8. Manage artboards
      9. Customize the workspace
      10. Properties panel
      11. Set preferences
      12. Touch Workspace
      13. Microsoft Surface Dial support in Illustrator
      14. Undo edits and manage design history
      15. Rotate view
      16. Rulers, grids, and guides
      17. Accessibility in Illustrator
      18. Safe Mode
      19. View artwork
      20. Use the Touch Bar with Illustrator
      21. Files and templates
    3. Tools in Illustrator
      1. Tools at a glance
      2. Select tools
        1. Selection
        2. Direct Selection
        3. Group Selection
        4. Magic Wand
        5. Lasso
        6. Artboard
      3. Navigate tools
        1. Hand
        2. Rotate View
        3. Zoom
      4. Paint tools
        1. Gradient
        2. Mesh
        3. Shape Builder
      5. Text tools
        1. Type
        2. Type on a Path
        3. Vertical Type
      6. Draw tools
        1. Pen
        2. Add Anchor Point
        3. Delete Anchor Point
        4. Anchor Point
        5. Curvature
        6. Line Segment
        7. Rectangle
        8. Rounded Rectangle
        9. Ellipse
        10. Polygon
        11. Star
        12. Paintbrush
        13. Blob Brush
        14. Pencil
        15. Shaper
        16. Slice
      7. Modify tools
        1. Rotate
        2. Reflect
        3. Scale
        4. Shear
        5. Width
        6. Free Transform
        7. Eyedropper
        8. Blend
        9. Eraser
        10. Scissors
        11. Dimension
    4. Generative AI (not available in mainland China)
      1. Generate scenes, subjects, and icons using text prompts
      2. Generate vector patterns using text prompts
      3. Generate vector shape fills using text prompts
      4. Recolor your artwork using text prompts
    5. Quick actions
      1. Retro text
      2. Neon glow text
      3. Old school text
      4. Recolor
      5. Convert sketch to vector
  3. Illustrator on the web (beta)
    1. Illustrator on the web (beta) overview
    2. Illustrator on the web (beta) FAQ
    3. Troubleshooting issues FAQ
    4. Keyboard shortcuts for Illustrator on the web (beta)
    5. Create and combine shapes on the web
    6. Add and edit text on the web
    7. Apply colors and gradients on the web
    8. Draw and edit paths on the web
    9. Work with cloud documents on the web
    10. Invite collaborators to edit on the web
  4. Illustrator on the iPad
    1. Introduction to Illustrator on the iPad
      1. Illustrator on the iPad overview
      2. Illustrator on the iPad FAQs
      3. System requirements | Illustrator on the iPad
      4. What you can or cannot do on Illustrator on the iPad
    2. Workspace
      1. Illustrator on the iPad workspace
      2. Touch shortcuts and gestures
      3. Keyboard shortcuts for Illustrator on the iPad
      4. Manage your app settings
    3. Documents
      1. Work with documents in Illustrator on the iPad
      2. Import Photoshop and Fresco documents
    4. Select and arrange objects
      1. Create repeat objects
      2. Blend objects
    5. Drawing
      1. Draw and edit paths
      2. Draw and edit shapes
    6. Type
      1. Work with type and fonts
      2. Create text designs along a path
      3. Add your own fonts
    7. Work with images
      1. Vectorize raster images
    8. Color
      1. Apply colors and gradients
  5. Cloud documents
    1. Basics
      1. Work with Illustrator cloud documents
      2. Share and collaborate on Illustrator cloud documents
      3. Share documents for review
      4. Upgrade cloud storage for Adobe Illustrator
      5. Illustrator cloud documents | Common questions
    2. Troubleshooting
      1. Troubleshoot create or save issues for Illustrator cloud documents
      2. Troubleshoot Illustrator cloud documents issues
  6. Add and edit content
    1. Drawing and dimensioning
      1. Drawing basics
      2. Edit paths
      3. Draw pixel-perfect art
      4. Draw with the Pen, Curvature, or Pencil tool
      5. Draw simple lines and shapes
      6. Draw rectangular and polar grids
      7. Draw and edit flares
      8. Image Trace
      9. Simplify a path
      10. Symbolism tools and symbol sets
      11. Adjust path segments
      12. Design a flower in 5 easy steps
      13. Create and edit a perspective grid
      14. Draw and modify objects on a perspective grid
      15. Use objects as symbols for repeat use
      16. Draw pixel-aligned paths for web workflows
      17. Measure and plot dimensions
    2. 3D objects and materials
      1. About 3D effects in Illustrator
      2. Create 3D graphics
      3. Map artwork over 3D objects
      4. Create 3D Text
      5. Create 3D objects
    3. Color
      1. About color
      2. Select colors
      3. Use and create swatches
      4. Adjust colors
      5. Use the Adobe Color Themes panel
      6. Color groups (harmonies)
      7. Color Themes panel
      8. Recolor your artwork
    4. Painting
      1. About painting
      2. Paint with fills and strokes
      3. Live Paint groups
      4. Gradients
      5. Brushes
      6. Transparency and blending modes
      7. Apply stroke on an object
      8. Create and edit patterns
      9. Meshes
      10. Patterns
    5. Select and arrange objects
      1. Select objects
      2. Layers
      3. Group and expand objects
      4. Move, align, and distribute objects
      5. Snap objects to glyph
      6. Snap objects to Japanese glyph
      7. Stack objects    
      8. Lock, hide, and delete objects
      9. Copy and duplicate objects
      10. Rotate and reflect objects
      11. Intertwine objects
      12. Create realistic art mockups
    6. Reshape objects
      1. Crop images
      2. Transform objects
      3. Combine objects
      4. Cut, divide, and trim objects
      5. Puppet Warp
      6. Scale, shear, and distort objects
      7. Blend objects
      8. Reshape using envelopes
      9. Reshape objects with effects
      10. Build new shapes with Shaper and Shape Builder tools
      11. Work with Live Corners
      12. Enhanced reshape workflows with touch support
      13. Edit clipping masks
      14. Live shapes
      15. Create shapes using the Shape Builder tool
      16. Global editing
    7. Type
      1. Add text and work with type objects
      2. Create bulleted and numbered lists
      3. Manage text area
      4. Fonts and typography
      5. Convert text within images into editable text
      6. Add basic formatting to text
      7. Add advanced formatting to text
      8. Import and export text
      9. Format paragraphs
      10. Special characters
      11. Create type on a path
      12. Character and paragraph styles
      13. Tabs
      14. Find missing fonts (Typekit workflow)
      15. Arabic and Hebrew type
      16. Fonts | FAQ and troubleshooting tips
      17. Create 3D text effect
      18. Creative typography designs
      19. Scale and rotate type
      20. Line and character spacing
      21. Hyphenation and line breaks
      22. Spelling and language dictionaries
      23. Format Asian characters
      24. Composers for Asian scripts
      25. Create text designs with blend objects
      26. Create a text poster using Image Trace
    8. Create special effects
      1. Work with effects
      2. Graphic styles
      3. Appearance attributes
      4. Create sketches and mosaics
      5. Drop shadows, glows, and feathering
      6. Summary of effects
    9. Web graphics
      1. Best practices for creating web graphics
      2. Graphs
      3. SVG
      4. Slices and image maps
  7. Import, export, and save
    1. Import
      1. Place multiple files
      2. Manage linked and embedded files
      3. Links information
      4. Unembed images
      5. Import artwork from Photoshop
      6. Import bitmap images
      7. Import Adobe PDF files
      8. Import EPS, DCS, and AutoCAD files
    2. Creative Cloud Libraries in Illustrator 
      1. Creative Cloud Libraries in Illustrator
    3. Save and export
      1. Save artwork
      2. Export artwork
      3. Create Adobe PDF files
      4. Adobe PDF options
      5. Use Illustrator artwork in Photoshop
      6. Collect assets and export in batches
      7. Package files
      8. Extract CSS | Illustrator CC
      9. Document info panel
  8. Printing
    1. Prepare for printing
      1. Set up documents for printing
      2. Change the page size and orientation
      3. Specify crop marks for trimming or aligning
      4. Get started with large canvas
    2. Printing
      1. Overprint
      2. Print with color management
      3. PostScript printing
      4. Print presets
      5. Printer's marks and bleeds
      6. Print and save transparent artwork
      7. Trapping
      8. Print color separations
      9. Print gradients, meshes, and color blends
      10. White Overprint
  9. Automate tasks
    1. Data merge using the Variables panel
    2. Automation with scripts
    3. Automation with actions
  10. Troubleshooting 
    1. Fixed issues
    2. Known issues
    3. Crash issues
    4. Recover files after crash
    5. File issues
    6. Supported file formats
    7. GPU device driver issues
    8. Wacom device issues
    9. DLL file issues
    10. Memory issues
    11. Preferences file issues
    12. Font issues
    13. Printer issues
    14. Share crash report with Adobe
    15. Improve Illustrator performance

Learn how to save your work as cloud documents and instantly access it wherever you have Illustrator.

Cloud documents are Adobe's cloud-native document file type that can be accessed online or offline directly from within the Illustrator application. You can access Illustrator cloud documents on any device (desktop, web, or iPad) where Illustrator is installed.

Why cloud documents

Hi, I'm Annie! I'm a designer, working on a client project using Illustrator on desktop. I need to travel often for work. I'm looking for an efficient system that can help me continue my creative work on-the-go.


Be able to seamlessly collaborate on Illustrator documents across devices without the risk of losing work. Be able to retrieve previous document versions as my work goes through multiple review iterations with the client.
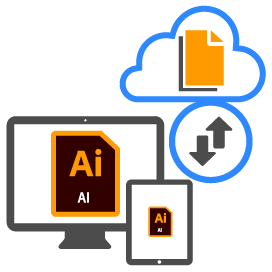
Does this sound familiar? If you're facing such challenges, save your creative work as cloud documents! Cloud documents let you work on different devices with full document fidelity.

How cloud documents help

Access files on-the-go

Stay creative wherever you go! Save your work as cloud documents and access it from any device where you have Illustrator installed. 

Autosave files to cloud

No loss of unsaved work as your updates get autosaved. Saving of cloud documents is faster than your local documents.

Track version history

Easily manage or view cloud document revisions directly from within the app. Autosave keeps past versions readily available! 

Create and save Illustrator cloud documents

All the documents that you create and edit using Illustrator on the iPad are automatically saved as cloud documents. Use the Create new option in the app home screen to create a cloud document.

To save a new document as a cloud document in Illustrator on the desktop, choose File Save. In the Save to Creative Cloud window, type in a name and select Save.

The cloud documents are saved with .aic extension and display a cloud symbol on the tab name to indicate that you're working on a cloud document.

Autosave Illustrator cloud documents

Your cloud documents will be saved automatically as you work. Autosave keeps the cloud documents up-to-date and you can access them wherever you have Illustrator installed. A version history is also maintained for each save operation that you manually perform. For more details, see View version history.

The default autosave time is 5 minutes. To change the autosave time, go to Preferences > File Handling & Clipboard and select a time in the Automatically Save Cloud Documents Every drop-down list.

Access Illustrator cloud documents

Access cloud documents from Your files tab of the Home screen

Cloud documents ensure that your work is always updated, across devices with full fidelity.

After your document is saved as a cloud document, you can access it from the Your files tab in the Illustrator Home screen or from the Creative Cloud website

 You can manage your cloud documents on this website, however, you need to use Illustrator app to create, open, edit, and save cloud documents.

Organize Illustrator cloud documents

From the app

Organize cloud docs from the app

Click or tap Cloud documents tab in the Home screen on your desktop or iPad. You can perform the following tasks: 

  • Click  to create a new folder to organize your cloud documents.
  • Enable the check box for each cloud document to select multiple cloud documents.
  • Click list view () or grid view () icons to change the view.
  • Click the   button to rename, delete, move, and select a document. You can also make a document available offline through this menu.

From the web

Organize cloud docs from the Creative Cloud website

Go to Creative Cloud website > Files tab > Cloud documents.

  • Click to create a new folder to organize your cloud documents. 
  • Enable the check box next to each cloud document to select multiple cloud documents.
  • Click list view () or grid view () icons to change the view.
  • Click the  button to open, rename, delete, move, and select a document.

Manage Illustrator cloud documents

  Explore the beta app
Illustrator on web (beta) is available for testing and feedback. Try it now to experience new features.

Note:

The app is available as part of your Illustrator subscription.

Rename

delete

Move

Copy

Rename a cloud document

To rename your cloud documents from the app (desktop, web, or iPad Home screen) or from the Creative Cloud website:

  1. Click the   icon available for a cloud document thumbnail and select Rename
  2. Type in a new name for your cloud document to rename it.

Delete and restore a cloud document

To delete a cloud document from the app (desktop, web or iPad Home screen) or from the Creative Cloud website:

  • Click   icon available for a cloud document thumbnail and select Delete. The documents you delete will get archived and stored in the Deleted section in the Home screen and Creative Cloud > Files > Deleted folder. 

To restore a deleted cloud document:

  • Open the Deleted section and click   menu for a cloud document and choose Restore. You can find the restored cloud documents under the Cloud documents section.

To delete your cloud documents permanently to clear your cloud storage:

  • Open the Deleted section and click   menu for a cloud document and choose Permanently delete. To learn more about storage quota, see File storage and quota.

Move a cloud document to a folder

To move a cloud document to a folder from the app (desktop, web, or iPad Home screen) or from the Creative Cloud website:

  1. Click the   icon available for cloud document thumbnail and choose Move To
  2. In the panel that opens, select from available folders or use the Add folder () option to create a folder.
  3. Click Move to place your selected cloud documents in a folder.

To move multiple cloud documents simultaneously, click the check box for the cloud documents and then perform the move operation. 

Copy a cloud document

To create a copy of the cloud document from the Creative Cloud website:

  • Click the  icon available for cloud document thumbnail and choose Copy.

Note: You cannot copy a cloud document while working with Illustrator on desktop.

View version history of Illustrator cloud documents

You can view and manage the version history of your Illustrator cloud documents from the desktop and web apps.

Version History panel with search bar, filter, and timestamps.
Use the Version History panel to manage your document versions better.

From the desktop and web

You can track and view the version history of your cloud documents using the Version History panel.

Do the following to open the Version history panel:

  • Illustrator desktop: select File Version History.
  • Illustrator on the web (beta): In the app workspace, select the document's name in the title bar and then select Version history.

In the Version History panel:

  • Select   icon > Edit version info to add name and description to your document version. 
  • Select the Mark versions () icon to save the version. Select the Mark versions icon again to remove a saved version.
  • Search for your document version by typing its name or description.
  • Filter your document version using Marked Versions or any of the timestamps.

 Versions that are not marked are deleted periodically, so make sure to mark any version you want to retain permanently. 

From the iPad

To view the version history for a cloud document in Illustrator on the iPad, do the following:

  1. Go to Home screenYour files.
  2. Tap  below the thumbnail of a cloud document and choose View version history.
    The version history is displayed. You can rename the version or mark a history version to save it.

From the Creative Cloud website

To view the version history from the web, do the following:

  1. Go to Creative Cloud website > Files > Cloud documents.
  2. Open a cloud document and click Timeline ().
  3. In the Timeline panel, you will find auto-saved versions of your cloud document. Hover over a cloud document version to see more options.
Version history on the Creative Cloud website

Revert to a previous version of Illustrator cloud document

From the Creative Cloud website

Revert to a previous version on the Creative Cloud website

  1. In the Timeline panel, click the  icon.
  2. Select Revert to this version to revert to a previous version. The reverted version will appear when you open the cloud document in Illustrator.

From the desktop or Web

Revert to a previous version in the app

  1. In the Version History panel, click the  icon next to a marked version you want to revert.
  2. Choose Revert to this version. The cloud document will be reverted to the selected version immediately when you close the dialog.

 Also, you can click Rename this version to change the name of the cloud document version.

From the iPad

To revert to a previous version of cloud document in Illustrator on the iPad, do the following:

  1. Go to Home screenYour files.
  2. Tap  below the thumbnail of a cloud document and choose View version history
  3. In the Version history dialog that appears, select a history version from the history list on the right.
  4. Tap  and choose Revert to this version to revert to the selected history version. 

Generate a cloud document link for sharing

On the Creative Cloud website:

  • Click the   icon available for the cloud document thumbnail and choose Get link to generate a public link.
  • Select a cloud document and click Get link.

Anyone with the link can view your creative work and post comments.

Work on Illustrator cloud documents when offline

No Internet access? Don't worry, you can create an offline copy of your cloud document and start working. Just ensure that you have the current version available on your device.

Files not available to work offline

  1. Go to Home screen and click Cloud documents.
  2. The cloud icon  for a cloud document indicates that it's available online only. Documents without the cloud icon  have already been downloaded to the cache on your device and are available offline.
Cloud document icons for online, offline, and conflict file

A. Online only B. Available offline C. Conflict file 

If all the changes cannot be synced for any reason, you will not lose your work. Illustrator creates a conflict file (backup file) on your device, from which you can recover your changes. Once the file starts syncing on the cloud, the conflict icon is changed to the   icon.

When you're back online, your updated document is automatically uploaded to the cloud and is available across all your devices.
See also: Why can’t I see my cloud documents offline?

If you need to work without Internet connection, see Prepare to work offline with cloud documents. To create an offline copy of your document, tap the  icon next to the cloud document and choose Make available offline always. The icon changes to indicate that the file is available offline.

Place Adobe Photoshop cloud documents

You can take your Illustrator designs further by placing Photoshop cloud documents (PSDCs) on Illustrator desktop and iPad.

From the desktop

To place Photoshop cloud documents on Illustrator, do the following:

  1. Open a new or an existing Illustrator document.

  2. Choose File > Place . A dialog appears that shows all your Illustrator cloud documents and cloud documents from other Creative Cloud apps. 
    If you're using both Illustrator on the iPad and desktop, your Adobe Fresco designs are also available in Illustrator on the desktop.

  3. Click Open Cloud Document and select the Photoshop cloud document (.psdc) that you want to place into your current Illustrator document.

  4. Select Linked to place a linked file, or deselect Linked to embed the artwork in the Illustrator document.

  5. Click Place and work with linked or embedded artwork in Illustrator.

From the iPad

Similarly, you can link or embed PSDC documents in Illustrator on the iPad. For more details, see Work with Photoshop and Fresco documents.


Related resources

Talk to us

Ask the community

We would love to hear from you. Share your thoughts with the Adobe Illustrator Community.

 Adobe

Get help faster and easier

New user?

Adobe MAX 2024

Adobe MAX
The Creativity Conference

Oct 14–16 Miami Beach and online

Adobe MAX

The Creativity Conference

Oct 14–16 Miami Beach and online

Adobe MAX 2024

Adobe MAX
The Creativity Conference

Oct 14–16 Miami Beach and online

Adobe MAX

The Creativity Conference

Oct 14–16 Miami Beach and online