- Substance 3D home
- Welcome to Dimension
- Getting Started
- Activation and licenses
- System requirements
- Accessibility
- Shortcuts
- Glossary
- Viewport navigation
- Supported formats
- Frequently asked questions
- Dimension 4.0
- Interface
- Objects
- Using Dimension
- Features
- Common issues
- Release notes
Apply images to models
Dimension lets you easily place images like branding and pattern graphics onto any model as a layer in the material system. Each image layer can have it's own material settings and can be placed in a number of ways on the surface of the object.
To place an image on a model
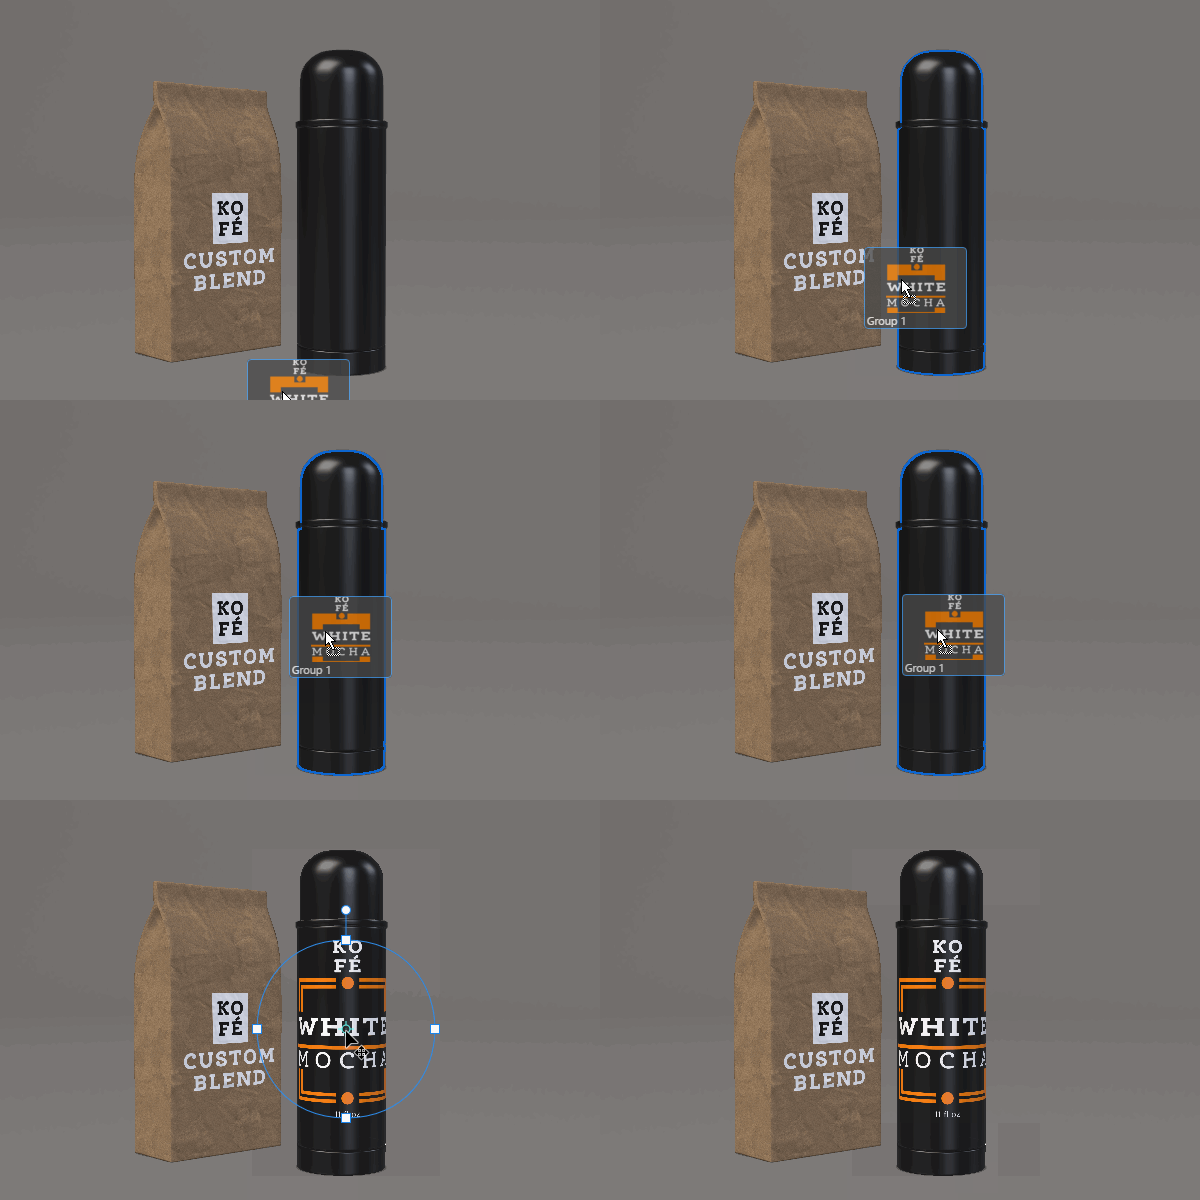
- Drag and drop an image onto the model
- Use File > Import > Place image on model


Editing image layers
Each image is placed as it's own layer and can have unique positioning. First, you can control the overall type of placement by choosing between decal and fill mode in the Properties panel.
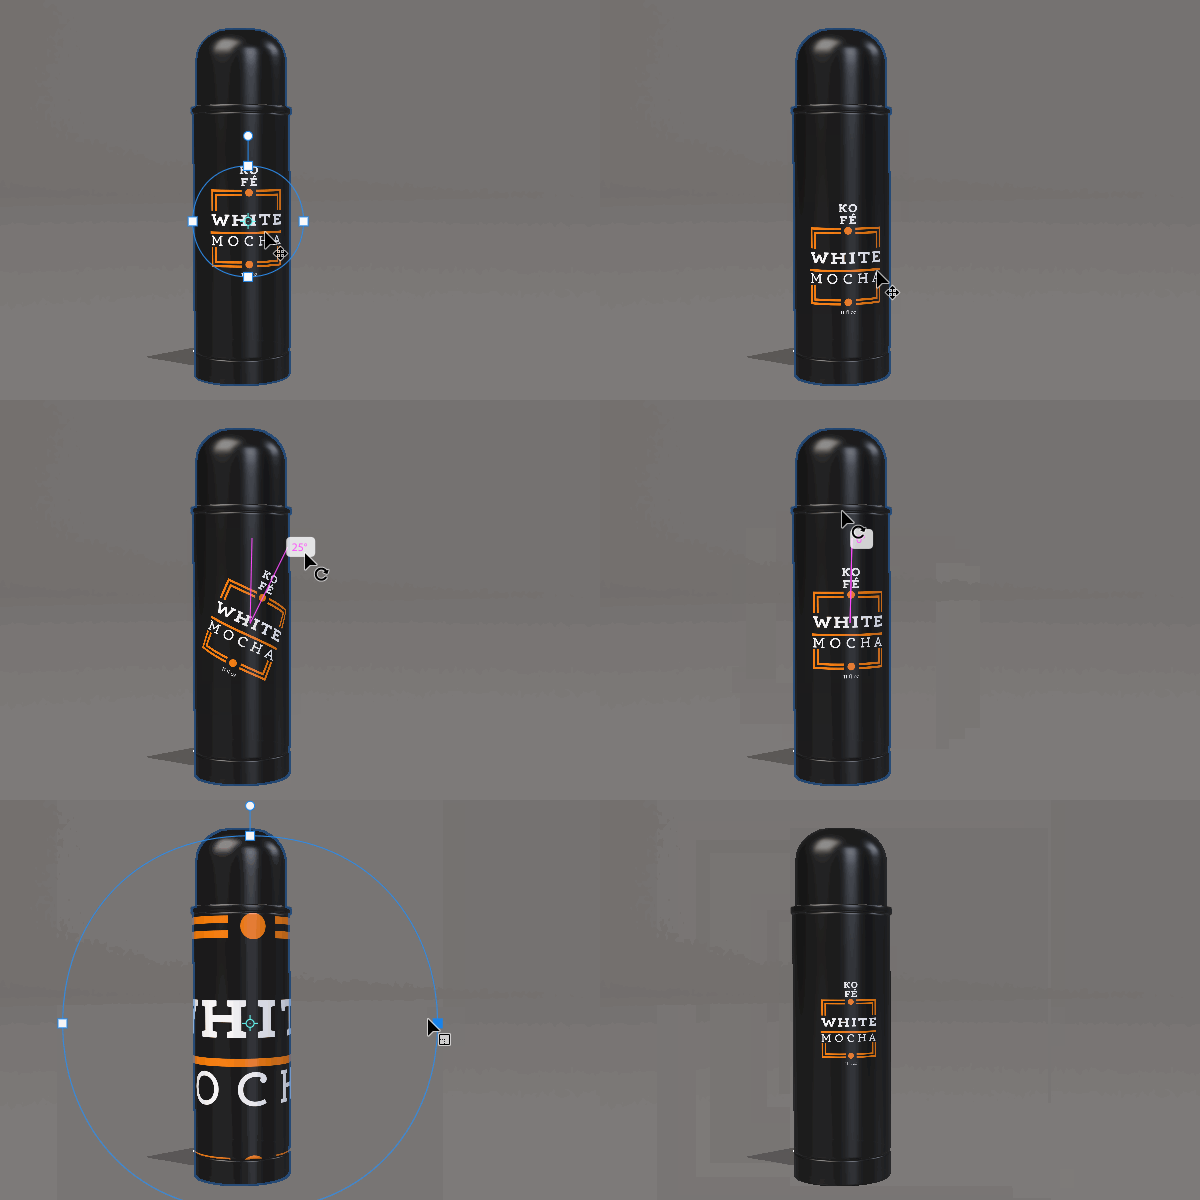
Decal mode will position the object along the surface as a floating graphic anchored by the center of the image. This mode works by locally unwrapping the UVs beneath the image and then projecting the result back to the original UVs of the object - allowing you to place the image across seams on any geometry. Decal mode is best for floating sticker-like graphics or local detail.


Fill mode will set the image to use the models original UVs from 0-1 space. Fill mode is best if you've designed the image for the models UVs (using the UV export feature or another texturing app such as Substance 3D Painter). Fill mode also works great for repeating pattern textures.


To adjust the graphic position you can activate the Select tool. With an image selected the tool gizmo will change to an image sizing interface. Use the gizmo to move, rotate, and scale the image in the viewport, directly on the surface of the model.
You can adjust the appearance of each layer with opacity, roughness, and metallic properties including using image textures.

