
- Captivate User Guide
- Get to know Captivate
- Adobe Captivate releases
- Adobe Captivate 13
- Adobe Captivate 12
- Project setup
- Import from PowerPoint
- Import from Captivate Classic
- Generative AI in Adobe Captivate
- Generative AI overview
- Generative AI FAQs
- Generative credits
- Generate text
- Generate images
- Generate avatar
- Generate transcripts
- Add and edit text
- Add and edit images
- Add and edit media
- Interactive components
- Create quizzes
- Add widgets
- Interactions and animations
- Enhance your e-learning project
- Simulation projects
- Timeline and TOC
- Review and collaborate
- Preview and publish
- Accessibility
- Design options in Adobe Captivate
- Additional resources
Overview
The all-new Adobe Captivate includes native audio editing capabilities, enabling you to perform audio tasks directly within the software without needing third-party tools. You can use audio in your Adobe Captivate projects for narration, voice-overs, background music, or generate text-to-speech using system or Captivate voices. Additionally, you can add and edit closed captions for your audio.
You can incorporate audio in various ways within a single Adobe Captivate project, such as:
- Add introductory audio at the start of your presentation or record narration.
- Including a background track that plays throughout the project.
- Adding sound to individual slides or objects.
Topics in this page:
-
Select Audio in the right toolbar.
-
Click the Import Audio dropdown.

-
Select Assets in the Import Audio dropdown.
-
Select a file in Assets.
-
Click Insert Audio.
If the duration of the audio exceeds the slide duration, you view a pop-up to extend the duration of the slide to which you're adding the audio.
-
Click Extend time.
-
Hover on the audio file and click the pencil icon to edit the audio.
-
You can change these audio settings:
- Fade in: Enter the time from where you want the audio to fade in.
- Fade out: Enter the time from where you want the audio to fade out.
- Loop audio: Select the checkbox to make the audio play continuously.
- Stop background audio: Select the checkbox to stop the background audio when the project ends.
Edit audio Edit audio -
In the Closed Captions section, click Add captions to add closed captions on the slide. For more information, view Add closed captions on a slide.


For recording system audio on macOS, there is an option in Preferences to select Virtual Audio driver.
-
Select Record in the Import Audio dropdown.
-
Select the ellipsis icon near Record Audio to choose your microphone. After choosing a microphone from the dropdown, the recommendation is to calibrate the audio. Select Audio Input Calibration and speak into the microphone. If you're satisfied with the audio quality, select Done.
You'll view a Good message on the audio calibration pop-up if the input volume level is optimal.
You can also select the microphone via Preferences.
-
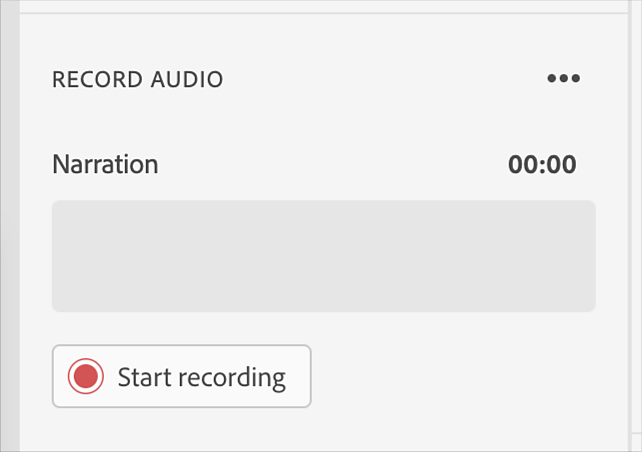
In the Record Audio section, click Start recording.
-
After recording, click Stop recording.
-
After you've recorded the narration, you can change these audio settings:
- Fade in: Enter the time from where you want the audio to fade in. Fade-in always starts from zero. If you enter 5, the audio will be faded between 0-5 seconds.
- Fade out: Enter the time from where you want the audio to fade out. Fade-out always starts from zero. If you enter 5, the audio's last five seconds will fade.
- Loop audio: Select the checkbox to make the audio play continuously. It loops the audio till the end of the slide. If the slide audio duration is less than the slide duration, then the audio loops till the end of the slide.
- Stop background audio: Select the checkbox to stop the background audio when the project ends. It stops the project audio (background audio) when the slide audio plays. It's specific to individual slides.
- Fade in: Enter the time from where you want the audio to fade in. Fade-in always starts from zero. If you enter 5, the audio will be faded between 0-5 seconds.
-
In the Closed Captions section, click Add captions to add closed captions on the slide. For more information, view Add closed captions on a slide.
Adobe does not store customer text or voice data. The Adobe Privacy team has reviewed and approved this process for external use. AI-generated voice processing occurs in the cloud.
Adobe Captivate allows you to convert closed captions into audio using both AI-generated voices and system voices. Authors can select from a variety of voice agents, enabling them to match the tone and style of their course to the needs of their target audience. This feature enhances the learning experience by offering a personalized, engaging environment that helps maintain learner interest and motivation.
- AI voices: These are voice options generated by AI, offering a broad selection of accents, languages, genders, and tones, ensuring a natural and authentic-sounding narration.
- System voices: These are built-in text-to-speech voices provided by Windows or macOS, designed to convert text into spoken audio
Enabling network access for AI Voices in closed environments
Organizations using closed network configurations must allow access to specific endpoints to enable the AI voices feature for text-to-speech (TTS) in Adobe Captivate. If users encounter issues with AI voice access or speech generation, check whether the required endpoints are whitelisted in the network settings. Your organization's IT team is responsible for ensuring these endpoints are accessible in the network configuration.
For Adobe Captivate versions 12.5 and 12.6
Feature Activation & Voice Listing:
- Endpoint: https://cpassets.adobe.com
- Purpose: This endpoint is required to enable the AI voice feature and display available voices.
Text-to-Speech Processing:
- Endpoint: https://api.elevenlabs.io
- Purpose: Required for processing TTS requests once voices are accessible.
For Adobe Captivate version 13
The following URLs must be allowed for all generative AI features and AI voices :
- https://*.adobe.io/*
- https://*.amazonaws.com/*
Add a voice agent to your captions
-
Select Audio from the Properties panel on the right.
-
From the Import Audio dropdown, select Generate Text-to-Speech. This will open the Closed Captions timeline, where you can add your captions. Learn more on how to add closed captions on a slide.
-
Select the caption(s) on the timeline and then select the voice dropdown menu and then select More voices.
-
Select AI or System voices from the drop-down.
NoteBy default, if there is an internet connection, an AI voice speech agent is applied to the captions. However, if offline, a system voice is assigned.
-
Select a voice from the list for each caption individually or apply a voice to all captions at once by choosing the Select all captions option and then the voice agent.
-
Select a speech agent and click the icon next to it to preview the audio. Test each speech agent to determine which voice best suits your project theme.
-
Use the filter options to to set your voice preference for your captions. You can filter the language, accent, tone, gender, and content.
-
You can also use the quick search option to easily find a speech agent, sort voices by name or tone, and mark a voice as a favorite by clicking the icon next to the speech agent.
-
Once you've added the voice agents to the captions, select Apply to confirm the changes and exit the voice panel.
-
Select Generate Audio on the closed captions timeline to complete the audio generation for the captions.
After generating the audio, the waveform is displayed, serving as a visual guide to align caption timings with the audio and remove silent segments.


The quick-access menu in the captions timeline displays the currently selected voice, two favorites, and two recently used voices. This feature allows you to swiftly change voices and generate audio for different captions.

Update audio after changing captions
Whenever the text of a caption or its corresponding speech agent is changed, the audio must be updated accordingly.
-
Edit the captions on the timeline or assign a new speech agent.
-
Select the Update Audio. This option gets enabled only when you change a caption text or its voice agent.


In the waveform editor, select the portion of audio that you want to edit. Use the options available in the Edit Audio section to edit the audio clip.

Make any necessary edits in the Edit Audio section.
You can cut, copy, and paste sections of the audio file, insert periods of silence to lengthen the audio file, adjust the volume, import different audio at the playhead position, and use more options.
- Cut selection: Cut the selected portion of the audio file.
- Copy selection: Copy the selected portion of the audio file.
- Paste selection: Paste information from the clipboard.
- Delete selection: Remove the selected portion of the audio file.
- Undo: Undo the last action.
- Redo: Redo the last action.
- Insert silence: In the Insert Silence dialog, select the portion of the audio file where you want to insert silence and select Insert Silence. Choose from:
- Playhead Position: This option is available only when you've not selected a portion of the audio file. Insert the time and position for the silence clip in the audio.
- Start of Audio: Add silence to the beginning of the audio file.
- End of Audio: Add silence to the end of the audio file.
- Playhead Position: This option is available only when you've not selected a portion of the audio file. Insert the time and position for the silence clip in the audio.
If you select a portion of the audio and select Insert silence, the selected portion of the audio becomes silent. To choose the playhead position, Start of Audio, and End of Audio, select Add silence without selecting the portion of the audio.
You can also record or import audio to insert into an existing audio clip on the panel.
Volume settings
Select the ellipsis icon in the Edit Audio panel and click Volume Settings. The Volume Settings dialog contains the following options:
Volume slider: You can manually change volume decibels (dB) using the slider.
Audio Recording options
- None
- Normalize: Select this option to have Adobe Captivate adjust the sound volume automatically. Normalizing audio helps keep the sound level consistent between slides and selects the best volume in the audio. Audio normalization applies a constant gain to an audio recording to bring the average or peak amplitude to a target level (the norm).
- Dynamic: Select this option to amplify quiet sections of the audio to help compensate for variations in audio volume. It reduces the loudness of the audio. After you select this option, you can further set the following:
- Ratio: Specifies the maximum amplification to use. The default setting of 2.0 sets the quietest sections of the audio to amplify by a factor of two. A higher setting can improve projects with large differences between quiet and loud sections, but can also amplify background noise.
- Threshold: Controls the amplification of background noise. Anything quieter than the noise threshold isn't amplified. If background noise is amplified too much, setting a higher noise threshold may help solve the problem.
- Ratio: Specifies the maximum amplification to use. The default setting of 2.0 sets the quietest sections of the audio to amplify by a factor of two. A higher setting can improve projects with large differences between quiet and loud sections, but can also amplify background noise.