- Introduction
- Aero desktop
- Aero Player (Beta) on Android
- Preparing assets for Adobe Aero
- Import AR-ready assets
- Design AR experiences
- Export and share
- Cloud documents and storage
- Examples, ideas, and inspirations
Adobe Aero will be discontinued on iOS, Android, and Creative Cloud Desktop effective November 6, 2025. Existing users can access the application and download their content until December 3, 2025. For more information, see Aero End of Support FAQs.
Learn how to scan the space to set a surface anchor to accurately place your digital assets in the real world.


Setting a surface anchor helps Adobe Aero understand your environment. A surface anchor is a trackable position in the physical environment that orients AR content to real world space so that content stays where you placed it.
For the best results your environment should be well-lit and has a variety of contrasting colors, textures and clearly defined edges.
It's best to avoid very shiny or reflective surfaces.
Set a surface anchor
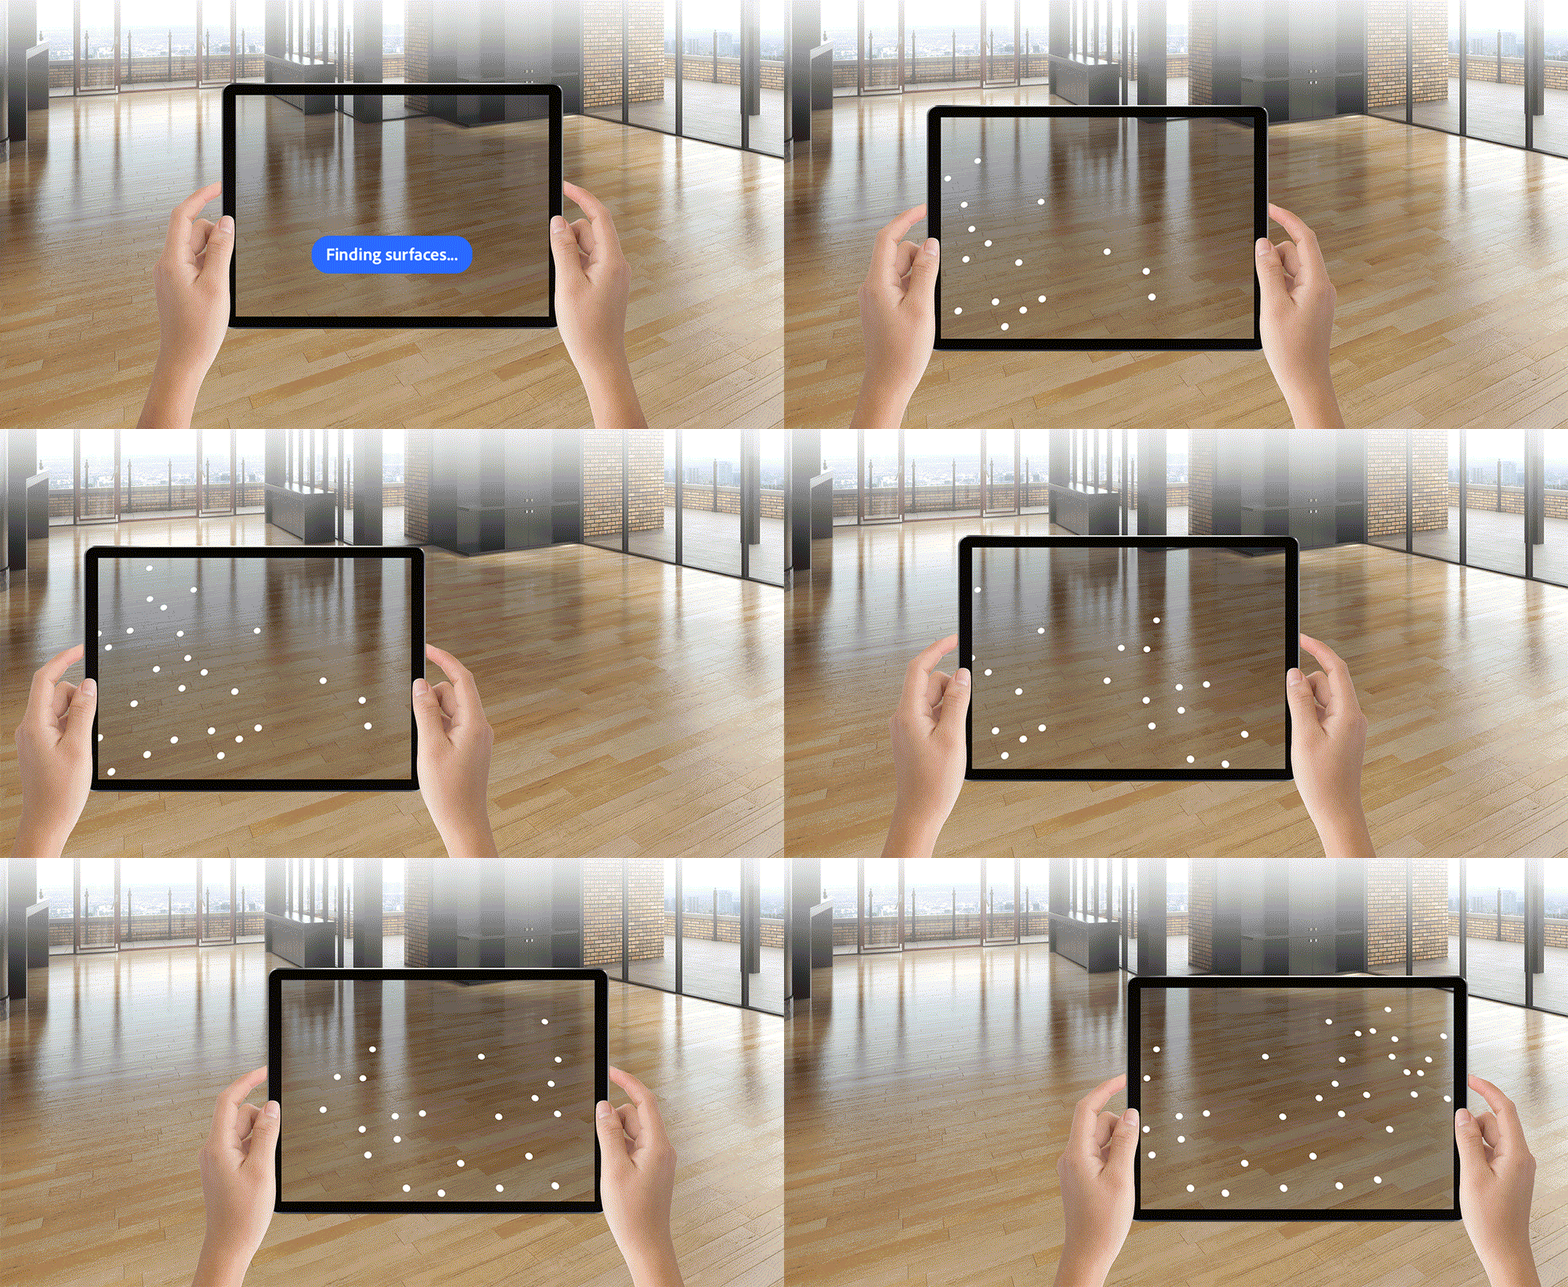
- In the Edit mode, pan the device slowly from left to right.
- The camera computes the location and you see white dots appearing. These dots indicate feature points.
- When there are enough feature points, they dissolve into a grid of hexagons.
- The surface anchor appears on the grid as a white, round circle with a pin in the middle. You can tap the screen to place the anchor on that point.


Reset a surface anchor
Tap the Settings icon and select Reset. The existing surface anchor is cleared and you can now set a new one.
What's next?
We've got you started with setting a surface anchor in Adobe Aero. After the anchor is set, you can go ahead and place assets in the space and edit the scene.
Have a question or an idea?
Ask questions or suggest ideas in Adobe Aero's Support Community.
Share your work or get inspired on Behance.