If you have a question to ask or an idea to share, come and participate in the Adobe Lightroom Classic community. We'd love to hear from you!
- Lightroom Classic User Guide
- Introduction to Lightroom Classic
- What's new in Lightroom Classic
- Lightroom Classic Release Notes
- Lightroom Classic technical requirements
- Keyboard shortcuts
- Lightroom Classic FAQ
- Lightroom Classic Key Concepts
- Lightroom Classic tutorials
- Set Preferences for working in Lightroom Classic
- Reset Preferences for working in Lightroom Classic
- Workspace
- Import photos
- Specify import options
- Set import preferences
- Import photos from a camera or card reader
- Import photos from a folder on a hard drive
- Import photos automatically
- Import photos from Photoshop Elements
- Import photos from a tethered camera
- Select best photos while importing with Assisted Culling
- The Filename Template Editor and Text Template Editor
- Set up tethered camera support for Fujifilm cameras
- Organize photos in Lightroom Classic
- Face recognition
- Work with photo collections
- Group photos into stacks
- Flag, label, and rate photos
- Use keywords
- Metadata basics and actions
- Save metadata to external sidecar files
- Find photos in the catalog
- Work with video in Lightroom Classic
- Advanced metadata actions
- Use the Quick Develop panel
- Select best photos with Assisted Culling
- Group your photos into a stack
- Process and develop photos
- Develop module basics
- Apply Presets
- Create panoramas and HDR panoramas
- Flat-Field Correction
- Correct distorted perspective in photos using Upright
- Improve image quality using Enhance
- Work with image tone and color
- Edit your images with Color Mixer tool
- Masking
- Apply local adjustments
- HDR photo merge
- Develop module options
- Retouch photos
- Cure red eye and pet eye effects
- Use the Radial Filter tool
- Adjustments with Lens Blur
- Edit and Export in HDR
- Remove Tool
- Remove distracting people
- Remove reflections
- Remove sensor dust in a photo
- Viewing photos
- Export photos
- Work with external editors
- Manage catalogs and files
- Maps
- Photo books
- Slideshows
- Print photos
- Web galleries
- Content Authenticity
- Lightroom and Adobe services
- Troubleshooting
- Technical Support
- Performance Guidelines
- Technical issues
- GPU Issues
- Startup Issues
- Rendering Issues
- Stability Issues
- Miscellaneous Issues
- Workflow Issues
High Dynamic Range (HDR) displays offer greater brightness and contrast than Standard Dynamic Range (SDR) displays. Photos optimized for HDR displays have brighter highlights and more detailed shadows, resulting in an increased sense of realism and greater impact.

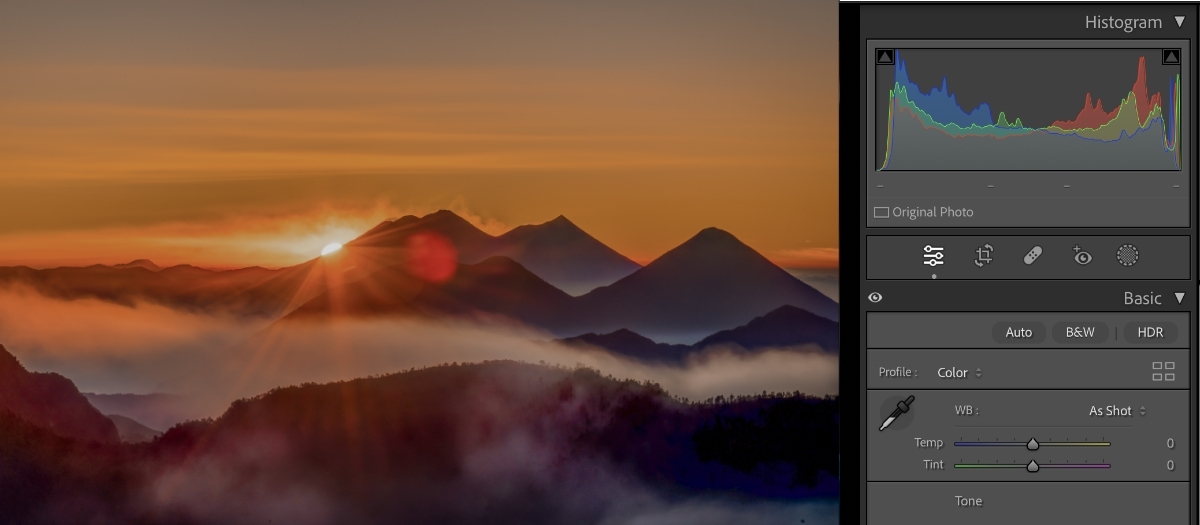
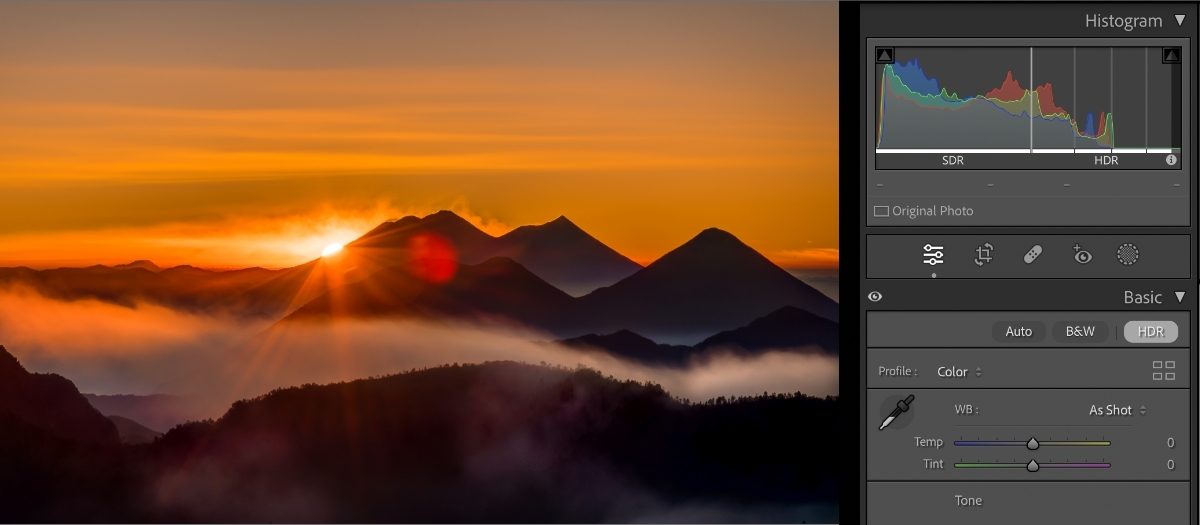
Use the slider to view the image before (left) and after (right) applying HDR Output.
Lightroom Classic already offers related HDR features, such as Merge to HDR, which blends multiple photos to create an HDR photo. However, in previous Lightroom Classic versions, the rendered results have always been limited to SDR. For instance, the final 8-bit pixel values were always limited to 0 to 255, and the on-screen results were restricted to the standard brightness range of the user interface.
Lightroom Classic now introduces High Dynamic Range Output giving the ability to view and edit HDR photos on compatible HDR displays.

A. Extended Histogram B. Display compatibility marker C. Enable HDR button D. HDR Limit E. Visualize HDR F. Preview and adjust SDR display settings

To enable HDR Output, select Develop > Basics > HDR, selecting HDR will enable all options across various editing tools, histograms and sliders to optimize images for HDR screens.
To enable HDR by default, select Edit > Preferences > Presets and select Enable HDR editing by default for HDR photos.
When this setting is enabled, some image types for HDR editing are enabled by default:
- DNG created using Merge to HDR in Camera Raw or Lightroom apps.
- Apple HEIC and JPEG files from iPhone 12 or later.
- JPEG images exported from Camera Raw or Lightroom apps that are:
- Edited with the HDR button On.
- Have Enable HDR Display enabled in the Export dialog.
- Canon HDR HEIF files.
- Sony HDR HEIF files.
To use the HDR Output feature, you need the following:
- macOS or Windows system
- Supported HDR display. Recommended HDR displays for macOS include:
- Apple MacBook Pro 14” with XDR display (November 2021 or later)
- Apple MacBook Pro 16” with XDR display (November 2021 or later)
- Apple Pro Displays XDR
- Recommended HDR displays for Windows include VESA Certified Display HDR level 1000 or higher.
- Graphics processor (GPU) support.
When HDR Output is enabled, Lightroom Classic offers the following additional capabilities:
- Open and save photos in various file formats, including JPEG, AVIF, JPEG XL formats.
- Open other HDR formats, such as 10-bit HEIF (.HIF file extension) files from recent Canon and Sony cameras or, HEIC files from iPhone.
The HDR button is enabled for HDR photos (for instance, DNG files created from the Merge to HDR feature) and off by default for other photos.
Most options in the Develop module work similarly in SDR and HDR modes. However, they may need different settings for optimal appearance. HDR processing requires Process Version 3 or later.
Lightroom Classic supports HDR content for the following views and displays:
- Develop loupe view.
- Develop full-screen view, including side-by-side and split viewing options.
- Library loupe view for primary and secondary windows.
- Library compare view for primary and secondary windows.
- Library full-screen view.
HDR display isn't supported in the Library Grid view, Slideshow module, Filmstrip thumbnails, or in dialogs that display photo content, such as the Merge to HDR, Merge to Panorama, or Enhance dialogs.
Starting with the October release of Lightroom Classic 14.0, if an image edited in HDR is in your Library, you'll receive a pop-up message to Enable rendering of HDR content in Library views. It will allow you to change your preferences and render the images in HDR by clicking the Enable button. You’ll also get a pop-up message to regenerate previews of HDR-edited images. When clicking the Regenerate button, Lightroom will regenerate previews for HDR-edited images.
To manually enable HDR display in the Library, select Edit > Preferences > Performance > Enable HDR in Library.
After enabling HDR display for the Library, rebuild the preview of all HDR images for a seamless experience.
- If Use Graphics Processor is set to Off in the Preferences dialog, you can continue to edit HDR photos, but the result will not be displayed correctly within the main image view.
- By default, the HDR view in the Library module is turned off. To turn it on, select Preferences > Performance > Enable HDR in Library.
Once you've finished editing a photo in HDR mode, select File > Export > File Settings > Select the file format from the drop-down menu > Enable HDR Output checkbox and then select Export.
Supported non-Raw HDR file formats include:
- AVIF
- JPEG XL
- TIFF
- PSD
- PNG


Recommendations
- Use AVIF or JPEG XL for sharing and web applications, such as online web galleries.
- Use TIFF or PSD for workflows where additional HDR work is required, such as compositing.
Converting a raw photo to DNG preserves all the raw information and enables the DNG to be edited in HDR mode too.
The new AVIF and JPEG XL format offers several advantages over JPEG, including higher bit depth support and smaller file sizes, making it a great choice for HDR photos.
When the HDR Output feature is enabled, Lightroom Classic 13 and later supports opening and saving photos using AVIF, JPEG or JPEG XL.
When you save HDR images in JPEG, it reads the screen used and renders SDR or HDR images accordingly.
AVIF and JPEG XL are new formats and therefore, support across apps and platforms is limited.
Lightroom Classic currently supports three color spaces when editing, opening, or saving a photo in HDR mode:
- HDR sRGB (Rec. 709)
- HDR P3
- HDR Rec. 2020
These are HDR-enabled versions of the existing sRGB, Display P3, and Rec. 2020 color spaces. sRGB has the smallest color gamut, and Rec. 2020 has the largest.
When editing a photo in HDR mode, the histogram is split into two parts- an SDR section on the left and an HDR section on the right. A vertical gray line between the two parts indicates the standard graphics white level, the white of the user interface. If the histogram extends to the right of this divider, the photo contains HDR content, and will require an HDR display to show correctly.


The dashed gray vertical lines mark zones above graphics white in increments of 1 exposure value or f-stop.
RGB color readouts use the 0 to 255 range for pixel components within the SDR range. However, they use the exposure value (or f-stop) convention for values in the HDR range. For example, a value of +0.5 means 1/2 stop above graphics white. This convention applies to both live and sampled readouts. Yellow values indicate pixels within the display's current capabilities, and red values indicate pixels beyond the display's current capabilities.
Lab color readouts are not supported in HDR mode.
Tone Curve value extends from 0 to 500 in HDR mode against 0 to 255 in SDR.


The highlight clipping warning indicator (small triangle button in the upper-right corner of the histogram) uses the same color scheme as the histogram's HDR range. Yellow indicates highlight areas in the HDR range that are within the display's current capabilities, and red indicates pixels beyond the display's current capabilities.
In addition, the Visualize HDR Ranges option provides a color-coded visualization of different HDR ranges in f-stop increments. To toggle this option, select Visualize HDR from the Basic panel within the Develop module.
You can use the HDR Limit slider to fine-tune the highlight headroom to control the dynamic range.
When an HDR photo is viewed on an SDR display, it must be adjusted or tone-mapped to preserve its appearance as closely as possible. The SDR Rendition Settings section at the bottom of the Basic panel provides additional options for previewing a photo on an SDR display and adjusting its appearance. These controls affect how Lightroom Classic saves an HDR photo when the Enable HDR Display box is unchecked in the Export dialog. They also influence the appearance of the filmstrip thumbnail in the Lightroom Classic dialog and for previews in other apps.


You can copy and paste HDR edit and SDR preview in preset and sync settings. Select Settings > Copy Settings and tick the High Dynamic Range checkbox.


Google Chrome supports AVIF photos and the proper display of HDR photos.
This makes it possible to make standard web galleries that contain HDR photos. It is recommended to use Chrome version 108 or later.
Other apps on your macOS system such as Finder, Preview, and Safari may not currently support reading AVIF or JPEG XL photos. Even if they do, they may not support displaying HDR content. The same is applicable to apps on other platforms, such as Windows, Android, and iOS.
Software support for HDR photos across is limited. Currently, you can use the HDR Output feature in Lightroom Classic to view and edit HDR photos, open them in Camera Raw and Photoshop for additional work, and save them to disk in the AVIF, JPEG and JPEG XL format to be viewed in Google Chrome.
HDR in Lightroom Classic works on photos only.
Have a question or an idea?


