In the Timeline panel, expand the outline for the keyframe you want to adjust.
- After Effects User Guide
- Beta releases
- Getting started
- Workspaces
- Projects and compositions
- Importing footage
- Preparing and importing still images
- Importing from After Effects and Adobe Premiere Pro
- Importing and interpreting video and audio
- Preparing and importing 3D image files
- Importing and interpreting footage items
- Import SVG files
- Working with footage items
- Detect edit points using Scene Edit Detection
- XMP metadata
- Text and Graphics
- Text
- Motion Graphics
- Work with Motion Graphics templates in After Effects
- Use expressions to create drop-down lists in Motion Graphics templates
- Work with Essential Properties to create Motion Graphics templates
- Replace images and videos in Motion Graphics templates and Essential Properties
- Animate faster and easier using the Properties panel
- Variable Font Axes
- Drawing, Painting, and Paths
- Overview of shape layers, paths, and vector graphics
- Paint tools: Brush, Clone Stamp, and Eraser
- Taper shape strokes
- Shape attributes, paint operations, and path operations for shape layers
- Use Offset Paths shape effect to alter shapes
- Creating shapes
- Create masks
- Remove objects from your videos with the Content-Aware Fill panel
- Roto Brush and Refine Matte
- AI-powered Object Matte
- Create Nulls for Positional Properties and Paths
- Layers, Markers, and Camera
- Animation, Keyframes, Motion Tracking, and Keying
- Animation
- Keyframe
- Motion tracking
- Keying
- Transparency and Compositing
- Adjusting color
- Effects and Animation Presets
- Effects and animation presets overview
- Effect list
- Effect Manager
- Simulation effects
- Stylize effects
- Audio effects
- Distort effects
- Perspective effects
- Channel effects
- Generate effects
- Time effects
- Transition effects
- The Rolling Shutter Repair effect
- Blur and Sharpen effects
- 3D Channel effects
- Utility effects
- Matte effects
- Noise and Grain effects
- Detail-preserving Upscale effect
- Obsolete effects
- Cycore plugins
- Expressions and Automation
- Expressions
- Expression basics
- Understanding the expression language
- Using expression controls
- Syntax differences between the JavaScript and Legacy ExtendScript expression engines
- Editing expressions
- Expression errors
- Using the Expressions editor
- Use expressions to edit and access text properties
- Expression language reference
- Expression examples
- Automation
- Expressions
- Immersive video, VR, and 3D
- Construct VR environments in After Effects
- Apply immersive video effects
- Compositing tools for VR/360 videos
- Advanced 3D Renderer
- Import and add 3D models to your composition
- Import 3D models from Creative Cloud Libraries
- Create parametric meshes
- Image-Based Lighting
- Animated Environment Lights
- Enable lights to cast shadows
- Extract and animate lights and cameras from 3D models
- Tracking 3D camera movement
- Adjust Default Camera Settings for 3D compositions
- Cast and accept shadows
- Embedded 3D model animations
- Shadow Catcher
- 3D depth data extraction
- Enable in‑engine Depth of Field in Advanced 3D
- Modify materials properties of a 3D layer
- Apply Substance 3D materials
- Work in 3D Design Space
- 3D Transform Gizmos
- Single 3D Gizmo for multiple 3D layers
- Do more with 3D animation
- Preview changes to 3D designs real time with the Mercury 3D engine
- Stereoscopic 3D in After Effects
- Add responsive design to your graphics
- Views and Previews
- Rendering and Exporting
- Basics of rendering and exporting
- H.264 Encoding in After Effects
- Export an After Effects project as an Adobe Premiere Pro project
- Converting movies
- Multi-frame rendering
- Automated rendering and network rendering
- Rendering and exporting still images and still-image sequences
- Using the GoPro CineForm codec in After Effects
- Working with other applications
- Collaboration: Frame.io, and Team Projects
- Memory, storage, performance
- Knowledge Base
When you animate a property in the Graph Editor, you can view and adjust the rate of change (speed) of the property in the speed graph. You can also adjust speed for spatial properties in the motion path in the Composition or Layer panel.
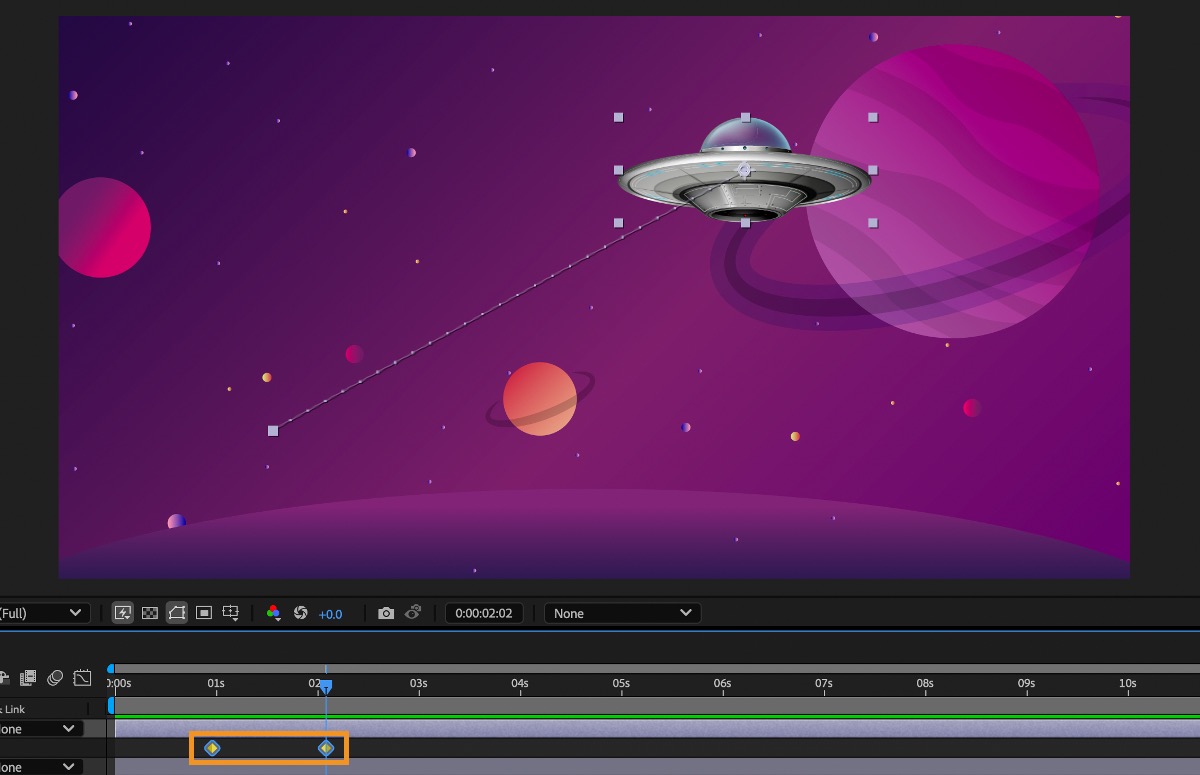
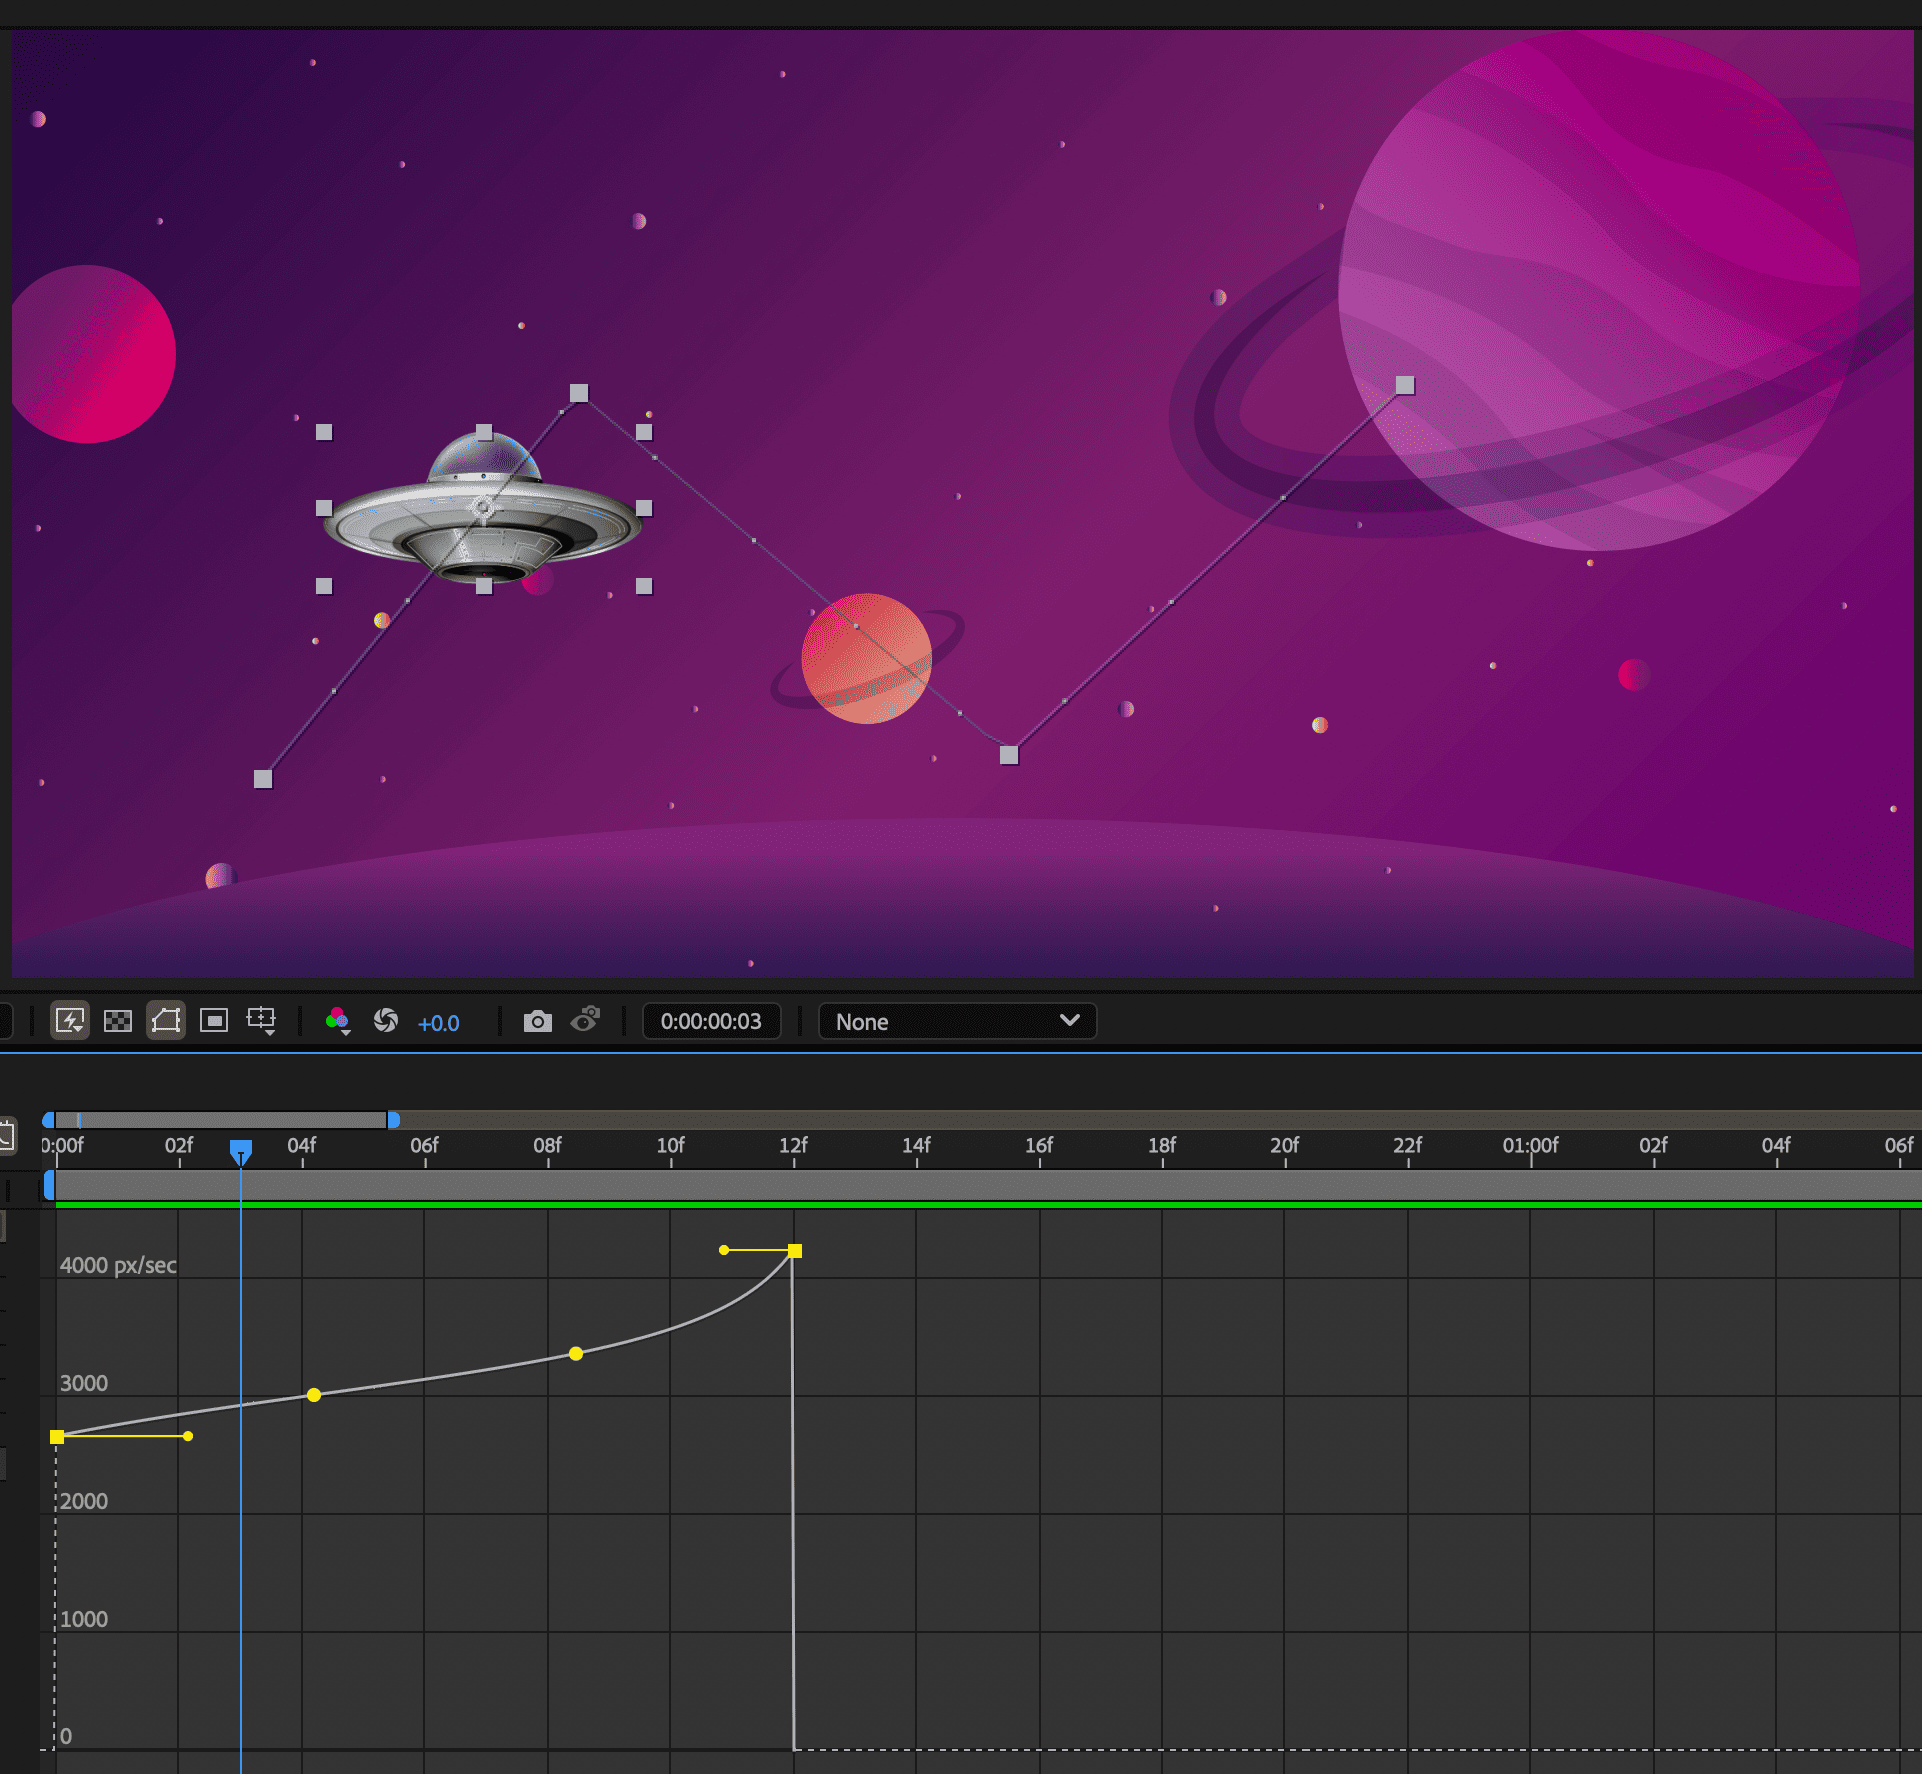
In the Composition or Layer panel, the spacing between dots in a motion path indicates speed. Each dot represents a frame, based on the frame rate of the composition. Even spacing indicates a constant speed and wider spacing indicates a higher speed. Keyframes using Hold interpolation display no dots because there is no intermediate transition between keyframe values– the layer simply appears at the position specified by the next keyframe.

A. Dots are close together, indicating lower speed. B. Dots are far apart, indicating greater speed. C. Inconsistent spacing of dots indicates changing speed.


A. Speed is constant. B. Speed is constant. C. Speed decreases and then increases.

For information about keyframe interpolation, refer to Keyframe interpolation.
The following factors affect the speed at which a property value changes:
The time difference between keyframes in the Timeline panel. The shorter the time interval between keyframes, the more quickly the layer has to change to reach the next keyframe value. If the interval is longer, the layer changes more slowly, because it must make the change over a longer period of time. You can adjust the rate of change by moving keyframes forward or backward along the timeline.
The difference between the values of adjacent keyframes. A large difference between keyframe values, such as the difference between 75% and 20% opacity, creates a faster rate of change than a smaller difference, such as the difference between 30% and 20% opacity. You can adjust the rate of change by increasing or decreasing the value of a layer property at a keyframe.
The interpolation type is applied for a keyframe. For example, it's difficult to make a value change smoothly through a keyframe when the keyframe is set to Linear interpolation, but you can switch to Bezier interpolation at any time, which provides a smooth change through a keyframe. If you use Bezier interpolation, you can adjust the rate of change even more precisely using direction handles.
Linear interpolation (before) causes sharp changes, and Bezier interpolation (after) creates smoother changes.
Linear interpolation causes sharp changes and Bezier interpolation creates smoother changes.
- In the Composition or Layer panel, adjust the spatial distance between two keyframes on the motion path. Increase speed by moving one keyframe position farther away from the other or decrease speed by moving one keyframe position closer to the other.

In the Layer panel, you can change the animation speed by adjusting the distance between two keyframes– move one keyframe farther away to speed it up or closer together to slow it down.
- In layer bar mode or the Graph Editor, adjust the time difference between two keyframes. Decrease speed by moving one keyframe farther away from the other or increase speed by moving one keyframe closer to the other.
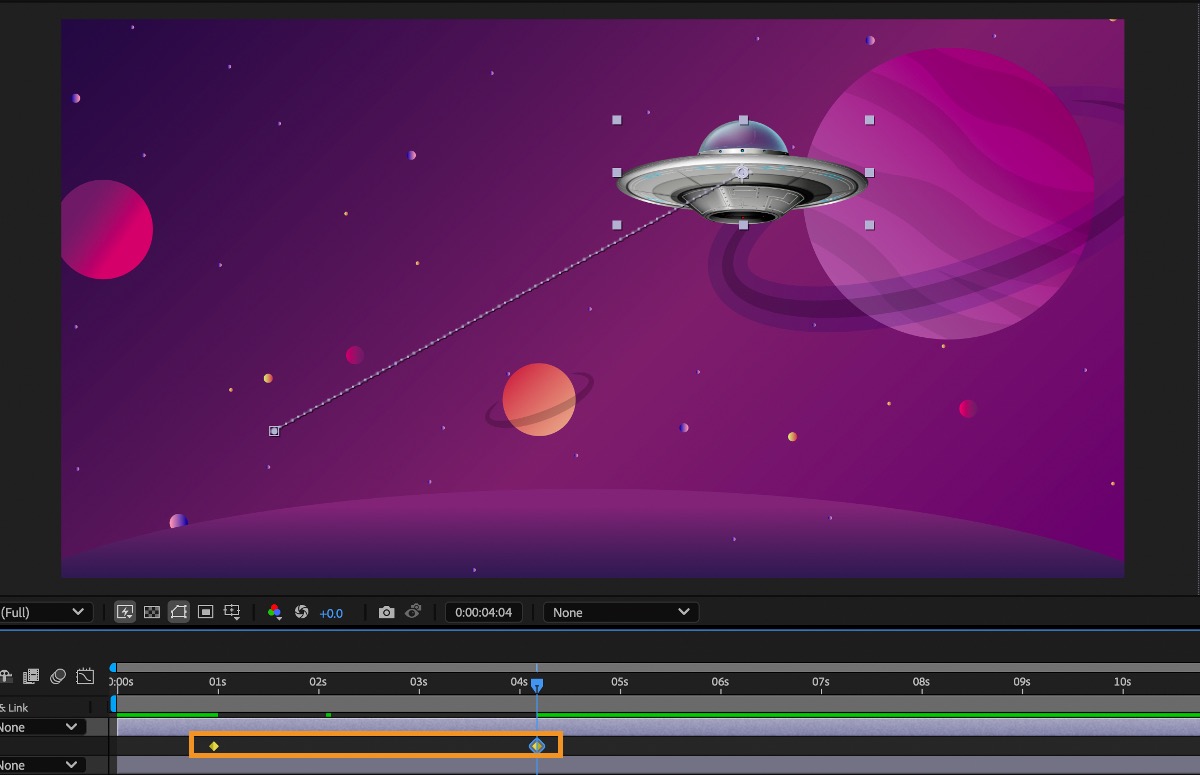
A shorter temporal distance between keyframes increases layer speed.
- Apply the Easy Ease keyframe assistant, which automatically adjusts the speed of change as motion advances toward and retreats from a keyframe.
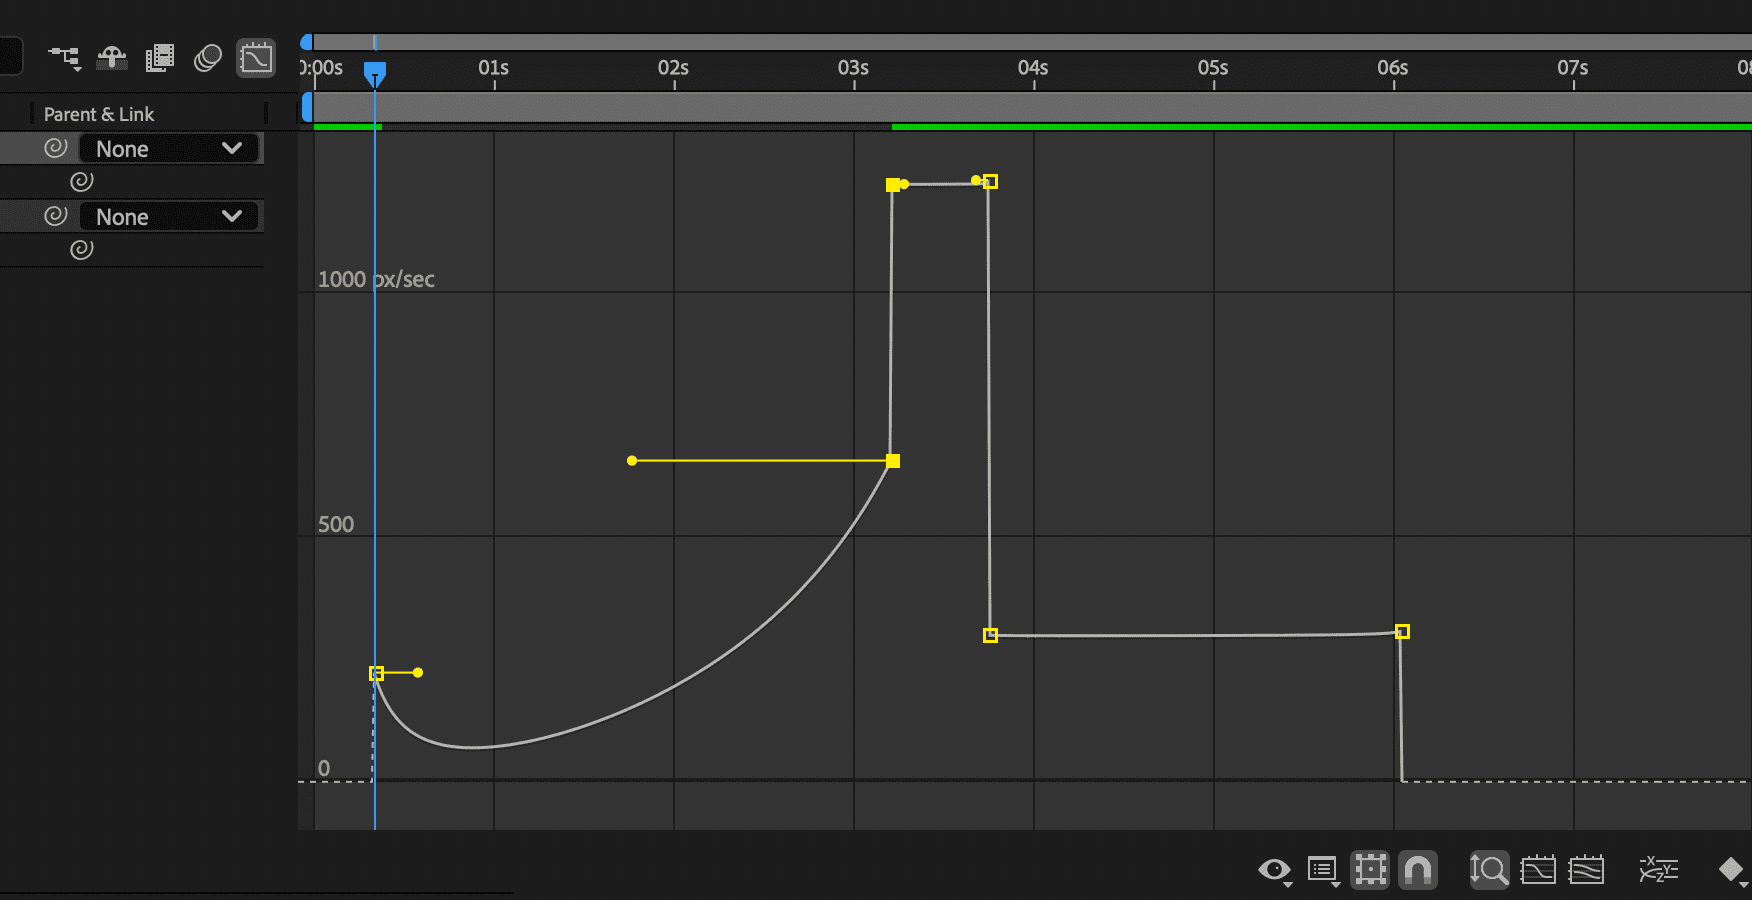
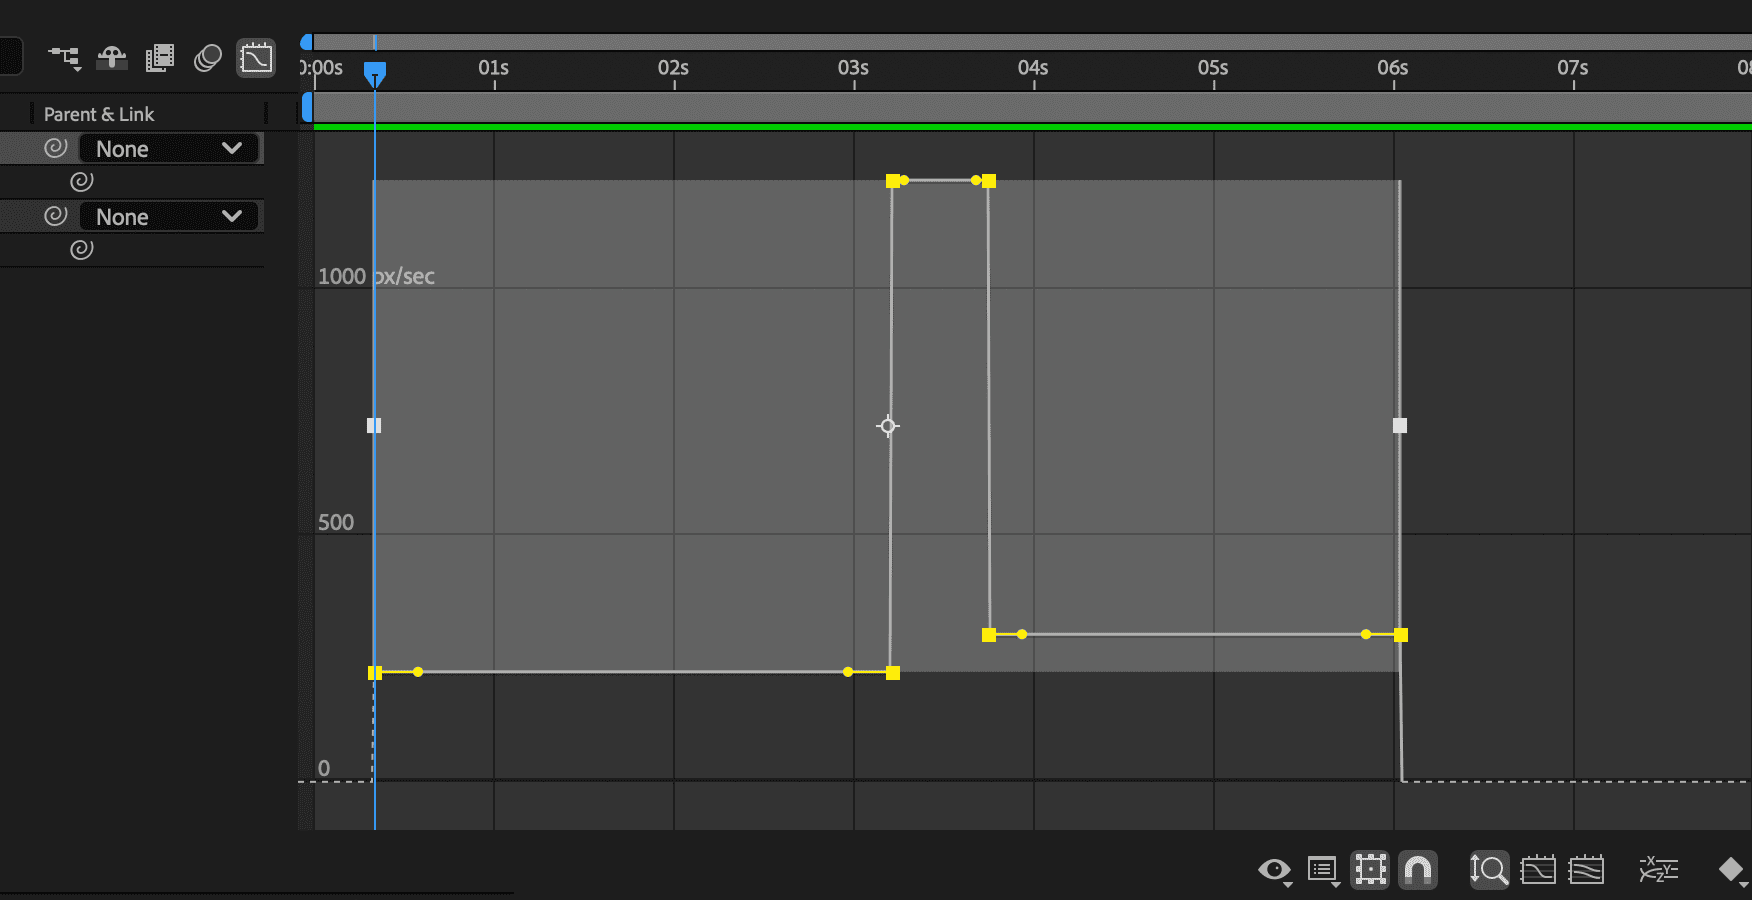
You can fine-tune changes over time using the speed graph in the Graph Editor. The speed graph provides information about and controls of the value and rate of change for all spatial and temporal values at any frame in a composition.
In the speed graph, changes in the graph height indicate changes in speed. Level values indicate constant speed– higher values indicate increased speed.
To view the speed graph, select Edit Speed Graph from the Choose graph type and options menu.

A. Value at the current-time indicator B. Speed Graph C. Direction handle (controls speed)

By adjusting the rise and fall of the speed graph, you can control how quickly or slowly a value changes from keyframe to keyframe. You can control the values approaching and leaving a keyframe together, or you can control each value separately. The incoming handle increases the speed or velocity when you drag it up and decreases the speed or velocity when you drag it down. The outgoing handle influences the next keyframe in the same way. You can also control the influence on speed by dragging the handles left or right.

A. Incoming direction handle B. Speed control C. Outgoing direction handle

If you want a handle to have influence over more than one keyframe, use roving keyframes.
-
-
Select the Graph Editor button and select Edit Speed Graph from the Choose graph type and options menu.
Use Edit Speed Graph to control the acceleration and deceleration of animations, resulting in smoother and more dynamic motion. Use Edit Speed Graph to control the acceleration and deceleration of animations, resulting in smoother and more dynamic motion. -
Using the Selection tool, select the keyframe you want to adjust.
-
(Optional) Do one of the following:
To split the incoming and outgoing direction handles, Alt-drag (Windows) or Option-drag (macOS) a direction handle.
To join the direction handles, Alt-drag (Windows) or Option-drag (macOS) a split direction handle up or down until it meets the other handle.
-
Do any of the following:
Drag a keyframe with joined direction handles up to accelerate or down to decelerate entering and leaving the keyframe.
Drag a split direction handle up to accelerate or down to decelerate the speed entering or leaving a keyframe.
To increase the influence of the keyframe, drag the direction handle away from the center of the keyframe. To decrease the influence, drag the direction handle toward the center of the keyframe.
NoteWhen you drag a direction handle beyond the top or bottom of the Graph Editor with Auto-zoom graph height icon, After Effects calculates a new minimum or maximum value based on how far you dragged outside the graph, and it redraws the graph so that all the values you specify for that layer property are visible in the graph by default.
Use direction handles to simulate the type of acceleration seen in a bouncing ball. When you create this type of result, the speed graph appears to rise quickly and peak.
-
In the Timeline panel, expand the outline for the keyframe you want to adjust.
-
Select the Graph Editor button and display the speed graph for the property.
-
Make sure the interpolation method for the keyframe you want to peak is set to Continuous Bezier or Bezier. Right-click on the keyframe and use the Keyframe Interpolation option to set the interpolation method.
-
Drag the identified keyframe (with joined direction handles) up until it's near the top of the graph.
Moving the handles up increases the speed at which the property changes at the selected keyframe. Moving the handles up increases the speed at which the property changes at the selected keyframe. -
Drag the direction handles on either side of the keyframe toward the center of the keyframe.
Create a more abrupt transition between keyframes by dragging the direction handles on either side of a keyframe toward the center. Create a more abrupt transition between keyframes by dragging the direction handles on either side of a keyframe toward the center.
Direction handles can create gradual starts and stops, such as a boat slowing to a stop and then starting again. When you use this technique, the speed graph resembles a smooth U shape.
-
In the Timeline panel, expand the outline for the keyframe you want to adjust.
-
Select the Graph Editor button and display the speed graph for the property.
-
Make sure the interpolation method for the keyframe you want to adjust is set to Continuous Bezier or Bezier.
-
At the desired keyframe, drag the direction handle down until it is near the bottom of the graph.
-
Drag the direction handles on either side of the keyframe away from the center of the keyframe.
Dragging the direction handle to make a gradual change. Dragging the direction handle to make a gradual change.
Along with controlling the level of acceleration and deceleration, you can also extend the influence of a keyframe outward or inward in relation to an adjacent keyframe. Influence determines how quickly the speed graph reaches the value you set at the keyframe, giving you an additional degree of control over the shape of the graph. The direction handle increases the influence of a keyframe value in relation to the neighboring keyframe when you drag it toward the neighboring keyframe, and it decreases the influence on the neighboring keyframe when you drag it toward the center of its own keyframe.
-
In the Timeline panel, expand the outline for the keyframe you want to adjust.
-
Select the Graph Editor button and display the speed graph for the property.
-
Using the Selection tool, select a keyframe and drag the direction handle left or right.
You may want to specify speed more precisely than you can by dragging keyframes in the speed graph. In such cases, specify speed numerically in the Keyframe Velocity dialog box.
The options and units in the dialog box vary depending on the layer property you are editing and may also vary for plug-ins.
-
Display the speed graph for the keyframe you want to adjust.
-
Select the keyframe you want to edit, and then select Animation > Keyframe Velocity.
-
Enter values for Speed for Incoming Velocity and Outgoing Velocity sections.
-
Enter a value for Influence to specify the amount of influence toward the previous keyframe (for incoming interpolation) or the next keyframe (for outgoing interpolation).
-
To create a smooth transition by maintaining equal incoming and outgoing velocities, select the Continuous (Lock Outgoing and Incoming) option.
By default, the proportions of the current Scale or Mask Feather values are preserved as you edit the values. If you don’t want to preserve proportions, select the link icon next to the property values in the Timeline panel to remove the icon.
Although you can manually adjust the speed of a keyframe by dragging direction handles, using Easy Ease automates the work.
After you apply Easy Ease, each keyframe has a speed of 0 with an influence of 33.33% on either side. When you ease the speed of an object, for example, the object slows down as it approaches a keyframe, and gradually accelerates as it leaves. You can ease speed when coming into or out of a keyframe, or both.
-
In the Graph Editor or in layer bar mode, select a range of keyframes.
-
Do one of the following:
Select Animation > Keyframe Assistant > Easy Ease (to ease speed coming both into and out of selected keyframes), Easy Ease In (to ease speed coming into selected keyframes), or Easy Ease Out (to ease speed coming out of selected keyframes).
Select the Easy Ease , Easy Ease In , or Easy Ease Out button located at the bottom of the Graph Editor.
Control the animation's timing and smoothness with Easy Ease options. Control the animation's timing and smoothness with Easy Ease options.
Using roving keyframes, you can easily create smooth movement across several keyframes at once. Roving keyframes are keyframes that are not linked to a specific time; their speed and timing are determined by adjacent keyframes. When you change the position of a keyframe adjacent to a roving keyframe in a motion path, the timing of the roving keyframe may change.
Roving keyframes are available only for spatial layer properties, such as Position, Anchor Point, and effect control points. In addition, a keyframe can rove only if it isn't the first or last keyframe in a layer because a roving keyframe must interpolate its speed from the previous and next keyframes.
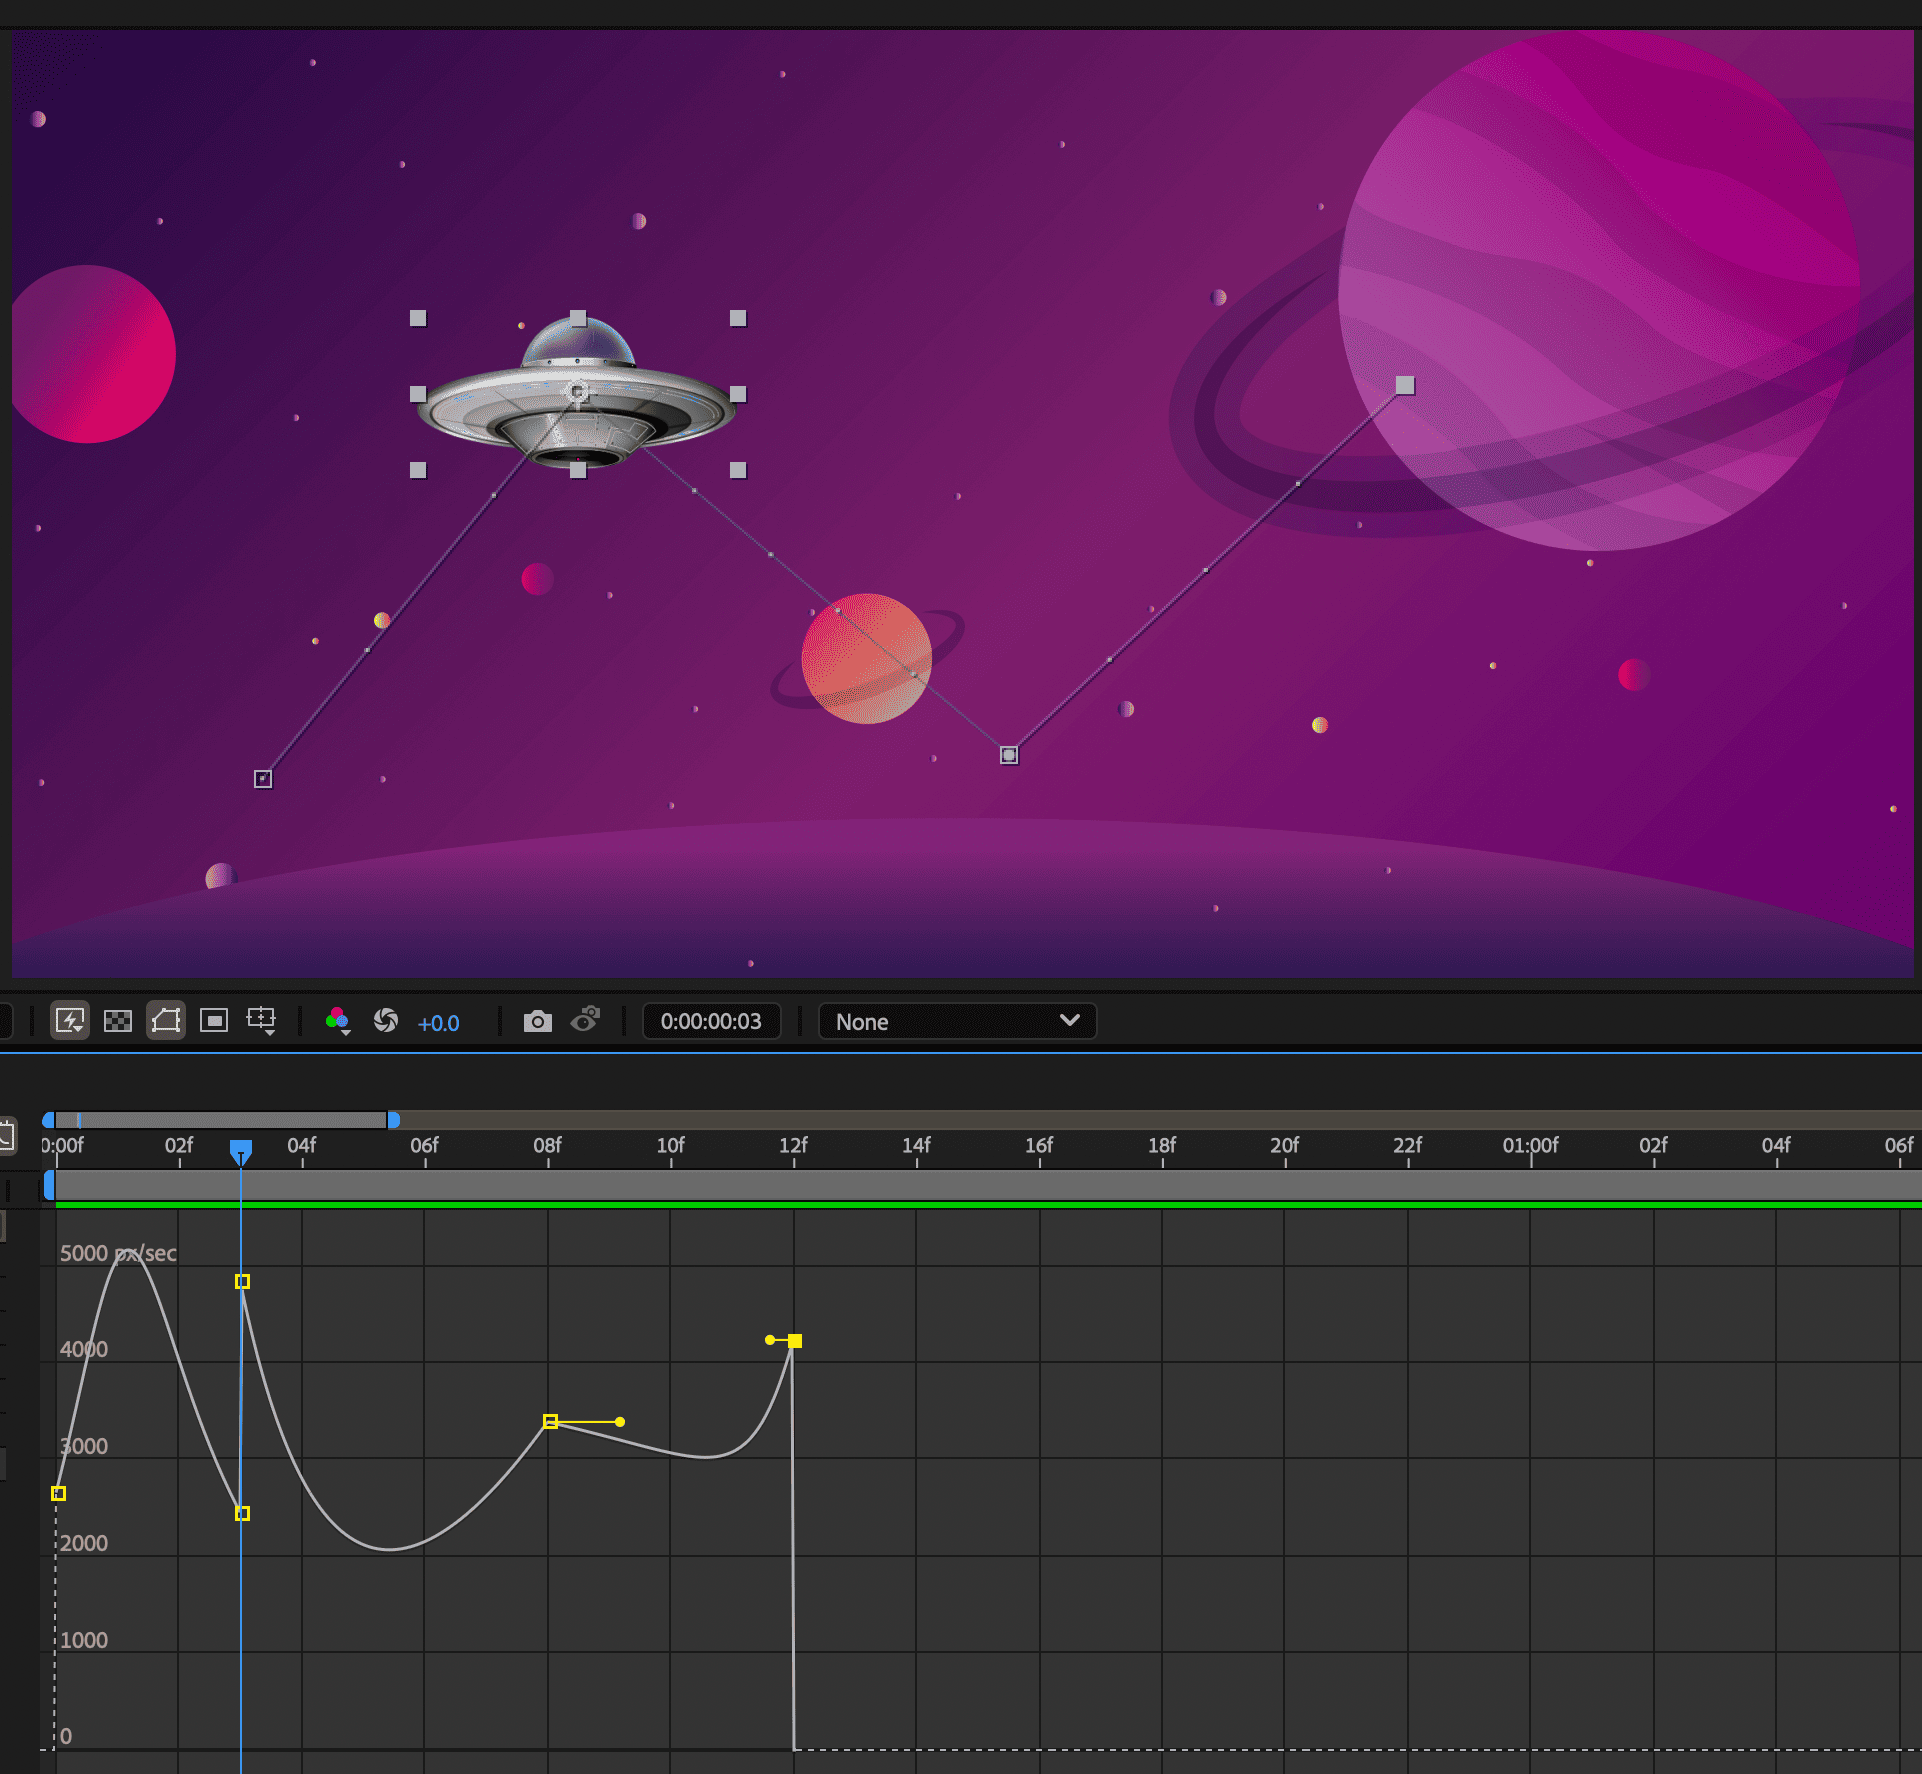
The original motion path (before) shows different velocities between keyframes. After the keyframes are set to rove (after), the motion path shows consistent speed over the range of keyframes.
-
In layer bar mode or in the Graph Editor, set up the keyframes for the motion you want to smooth.
-
Determine the beginning and ending keyframes for the range you want to smooth.
-
Do one of the following:
For every keyframe in the range (except the beginning and ending keyframes), select Rove Across Time in the Edit selected keyframes menu .
Select the keyframes you want to rove and select Animation > Keyframe Interpolation. Then select Rove Across Time from the Roving dropdown menu.
Use Rove Across Time to let a keyframe interpolate smoothly between surrounding keyframes for more organic motion. Use Rove Across Time to let a keyframe interpolate smoothly between surrounding keyframes for more organic motion.
The intermediate keyframes adjust their positions on the timeline to smooth the speed curve between the beginning and ending keyframes.
- Select the roving keyframe option from the keyframe menu or drag the roving keyframe left or right.
- Select the keyframes you want to change, select Animation > Keyframe Interpolation, and then select Lock To Time from the Roving menu.
You can simulate a realistic acceleration of a zoom lens when working with 2D layers by using Exponential Scale, which converts linear scaling of a layer to exponential scaling. Exponential Scale is useful for creating a cosmic zoom, for example. Zooming optically with a lens is not linear—the rate of change of scaling increases as you zoom in.
-
In layer bar mode or in the Graph Editor, hold down the Shift key and select starting and ending keyframes for the scale property.
-
Select Animation > Keyframe Assistant > Exponential Scale.
Exponential Scale replaces any existing keyframes between the selected starting and ending keyframes.
