Import a .hdr or .exr file or footage into your project.
- After Effects User Guide
- Beta releases
- Getting started
- Workspaces
- Projects and compositions
- Importing footage
- Preparing and importing still images
- Importing from After Effects and Adobe Premiere Pro
- Importing and interpreting video and audio
- Preparing and importing 3D image files
- Importing and interpreting footage items
- Import SVG files
- Working with footage items
- Detect edit points using Scene Edit Detection
- XMP metadata
- Text and Graphics
- Text
- Motion Graphics
- Work with Motion Graphics templates in After Effects
- Use expressions to create drop-down lists in Motion Graphics templates
- Work with Essential Properties to create Motion Graphics templates
- Replace images and videos in Motion Graphics templates and Essential Properties
- Animate faster and easier using the Properties panel
- Variable Font Axes
- Drawing, Painting, and Paths
- Overview of shape layers, paths, and vector graphics
- Paint tools: Brush, Clone Stamp, and Eraser
- Taper shape strokes
- Shape attributes, paint operations, and path operations for shape layers
- Use Offset Paths shape effect to alter shapes
- Creating shapes
- Create masks
- Remove objects from your videos with the Content-Aware Fill panel
- Roto Brush and Refine Matte
- AI-powered Object Matte
- Create Nulls for Positional Properties and Paths
- Layers, Markers, and Camera
- Animation, Keyframes, Motion Tracking, and Keying
- Animation
- Keyframe
- Motion tracking
- Keying
- Transparency and Compositing
- Adjusting color
- Effects and Animation Presets
- Effects and animation presets overview
- Effect list
- Effect Manager
- Simulation effects
- Stylize effects
- Audio effects
- Distort effects
- Perspective effects
- Channel effects
- Generate effects
- Time effects
- Transition effects
- The Rolling Shutter Repair effect
- Blur and Sharpen effects
- 3D Channel effects
- Utility effects
- Matte effects
- Noise and Grain effects
- Detail-preserving Upscale effect
- Obsolete effects
- Cycore plugins
- Expressions and Automation
- Expressions
- Expression basics
- Understanding the expression language
- Using expression controls
- Syntax differences between the JavaScript and Legacy ExtendScript expression engines
- Editing expressions
- Expression errors
- Using the Expressions editor
- Use expressions to edit and access text properties
- Expression language reference
- Expression examples
- Automation
- Expressions
- Immersive video, VR, and 3D
- Construct VR environments in After Effects
- Apply immersive video effects
- Compositing tools for VR/360 videos
- Advanced 3D Renderer
- Import and add 3D models to your composition
- Import 3D models from Creative Cloud Libraries
- Create parametric meshes
- Image-Based Lighting
- Animated Environment Lights
- Enable lights to cast shadows
- Extract and animate lights and cameras from 3D models
- Tracking 3D camera movement
- Adjust Default Camera Settings for 3D compositions
- Cast and accept shadows
- Embedded 3D model animations
- Shadow Catcher
- 3D depth data extraction
- Enable in‑engine Depth of Field in Advanced 3D
- Modify materials properties of a 3D layer
- Apply Substance 3D materials
- Work in 3D Design Space
- 3D Transform Gizmos
- Single 3D Gizmo for multiple 3D layers
- Do more with 3D animation
- Preview changes to 3D designs real time with the Mercury 3D engine
- Stereoscopic 3D in After Effects
- Add responsive design to your graphics
- Views and Previews
- Rendering and Exporting
- Basics of rendering and exporting
- H.264 Encoding in After Effects
- Export an After Effects project as an Adobe Premiere Pro project
- Converting movies
- Multi-frame rendering
- Automated rendering and network rendering
- Rendering and exporting still images and still-image sequences
- Using the GoPro CineForm codec in After Effects
- Working with other applications
- Collaboration: Frame.io, and Team Projects
- Memory, storage, performance
- Knowledge Base
Use any image as a light source to realistically place 3D models into a scene with complementary lighting and shadows.
Image-Based Lighting (IBL) uses an image to produce realistic reflections and ambient lighting in a 3D scene. It gives subtle lighting effects that help make the objects appear as though they naturally belong in an environment. Environment Lights in After Effects create realistic lighting, reflections, and shadows on 3D layers by surrounding the scene with an image-based environment map.
Use an image to create realistic reflections and ambient lighting in a 3D scene.
Environment lights currently work only in the Advanced 3D renderer.
Add an environment light
To add an environment light, choose Layer > New > Light, and set the Light Type to Environment.


After Effects uses a default environment map once you set Environment as the Light Type under Light Settings. This can be changed to an image layer with an HDRI file (such as .hdr or .exr), footage, or a composition layer, which can be used as an environment light source in 3D space. However, EXR and HDR files are particularly useful because they support high dynamic range (HDR) lighting, even in 8-bit projects, enabling more accurate lighting and reflections in 3D scenes.
-
Tip
Apart from an image and footage, you can also point Environment Light to animated compositions or precomposed layers.
-
Add the imported file to a composition by dragging and dropping it to the Timeline panel.
-
Twirl open the Environment Light properties in the Timeline panel.
-
Under the Light Options, set the Source property to the layer with .hdr or .exr file, footage, or animated composition.
Select the layer with the HDRI file from the Source drop-down list. Select the layer with the HDRI file from the Source drop-down list.
- Use the Create 3D Environment Background Layer command to create a solid layer at the bottom of the composition, with the CC Environment linked to the selected light's Source map and a 5px Fast Box Blur applied to soften the background.
- You can also exclude a 3D layer from interacting with the scene lighting by disabling the Accepts Lights under Compositing Options.
- HDRI environment maps can be downloaded from sources such as Adobe Stock, or you can create your own using Substance 3D Sampler.
The source layer’s visibility will be disabled when chosen as an environment map. You can re-enable this if you want.
To simulate the layer with the source as a background scene layer, use the Layer > Light > Create Environment Light Background Layer to create a solid at the bottom of the composition, with the CC Environment linked to the selected light's Source map and a 5px Fast Box Blur applied to soften the background.
The existing Layer > Environment Layer switch does not work with the Advanced 3D renderer. This option works only with the Cinema 4D renderer.
Convert image file to HDR file using After Effects
While environment lights only accept HDR format files as environment maps, you can easily convert other image file formats to HDR using After Effects.
-
Import an image file by selecting File > Import > File.
-
With the file selected in the Project panel, select File > New Comp from Selection.
-
Select File > Project Settings to launch the Project Settings dialog box.
-
In the Color tab, under the Color Settings section, select the Bit Depth as 32 bits per channel (float), and select OK.
-
With the composition or timeline active, select Composition > Save Frame As > File.
-
In the Render Queue panel, select the linked text next to the Output Module option.
-
In the Output Module Settings dialog box, specify the Format as Radiance Sequence and select OK.
-
Select Render.
Convert image file to HDR file using Adobe Photoshop
-
Open the image file in Photoshop.
-
Choose Image > Mode > 32 Bits/Channel. (Radiance format requires 32 bits per channel.)
-
Choose File > Save As or Save a Copy.
-
Set the Format to Radiance.
Add Environment light shadows
The default environment light doesn’t cast shadows. You must add an environment light layer and enable the Casts Shadows option to cast shadows. Once enabled, all 3D layers in the scene will cast voxel shadows except for the following instances:
- If the layer has the Casts Shadows property turned off.
- If the layer is outside the shadow volume.
- If a layer has the Receive Shadows property off, it will not be affected by shadows even if the Casts Shadows property is turned on and is inside the shadow volume.
-
Select the Light layer and choose Layer > Light Settings.
-
In the Light Settings dialog, check the Cast Shadows check box and set the Shadow Darkness amount.
Enable the Cast Shadows option to add shadows to your 3D environment. Enable the Cast Shadows option to add shadows to your 3D environment. You can also use the Cast Shadows property in the Timeline panel to enable shadows. Learn more about configuring 3D layers' cast and receive shadows properties.
Use the Cast Shadows property in the Timeline panel to enable shadows. Use the Cast Shadows property in the Timeline panel to enable shadows.
Voxel shadows are memory intensive. The shadow settings are controlled in the Renderer Options dialog, which you can open from either Composition Settings > 3D Renderer or the 3D Renderer drop-down list at the bottom of the Composition panel.


Render Quality
Control the overall quality of the rendered output, including smoothness, lighting, and shadows. Higher values can use large amounts of memory.
Render Quality
Adjust how blocky the shadows look. Higher values can use large amounts of memory.
Smoothness
Reduce or increase the amount of noise in the shadows. The default is 3. There is an inverse relationship between Smoothness and Render Quality. When Render Quality is set lower, you'll want a higher Smoothness value, and vice versa.
Keep the Smoothness value low and rely on render quality until non-shadow scene quality looks good, and then, if necessary, gradually increase the smoothness.
Casting Box Size and Casting Box Center
Adjust these properties to define the area within which shadows can be cast onto a layer. Voxel shadows are only cast from layers inside a limited box to limit memory use. Making the box larger spreads the voxel resolution across a bigger area, causing shadows to get softer. While the Advanced 3D Render Options dialog is open, a magenta outline represents the cube in the composition.
Shadows are only cast from layers with Cast Shadows enabled to layers with Accepts Shadows enabled.
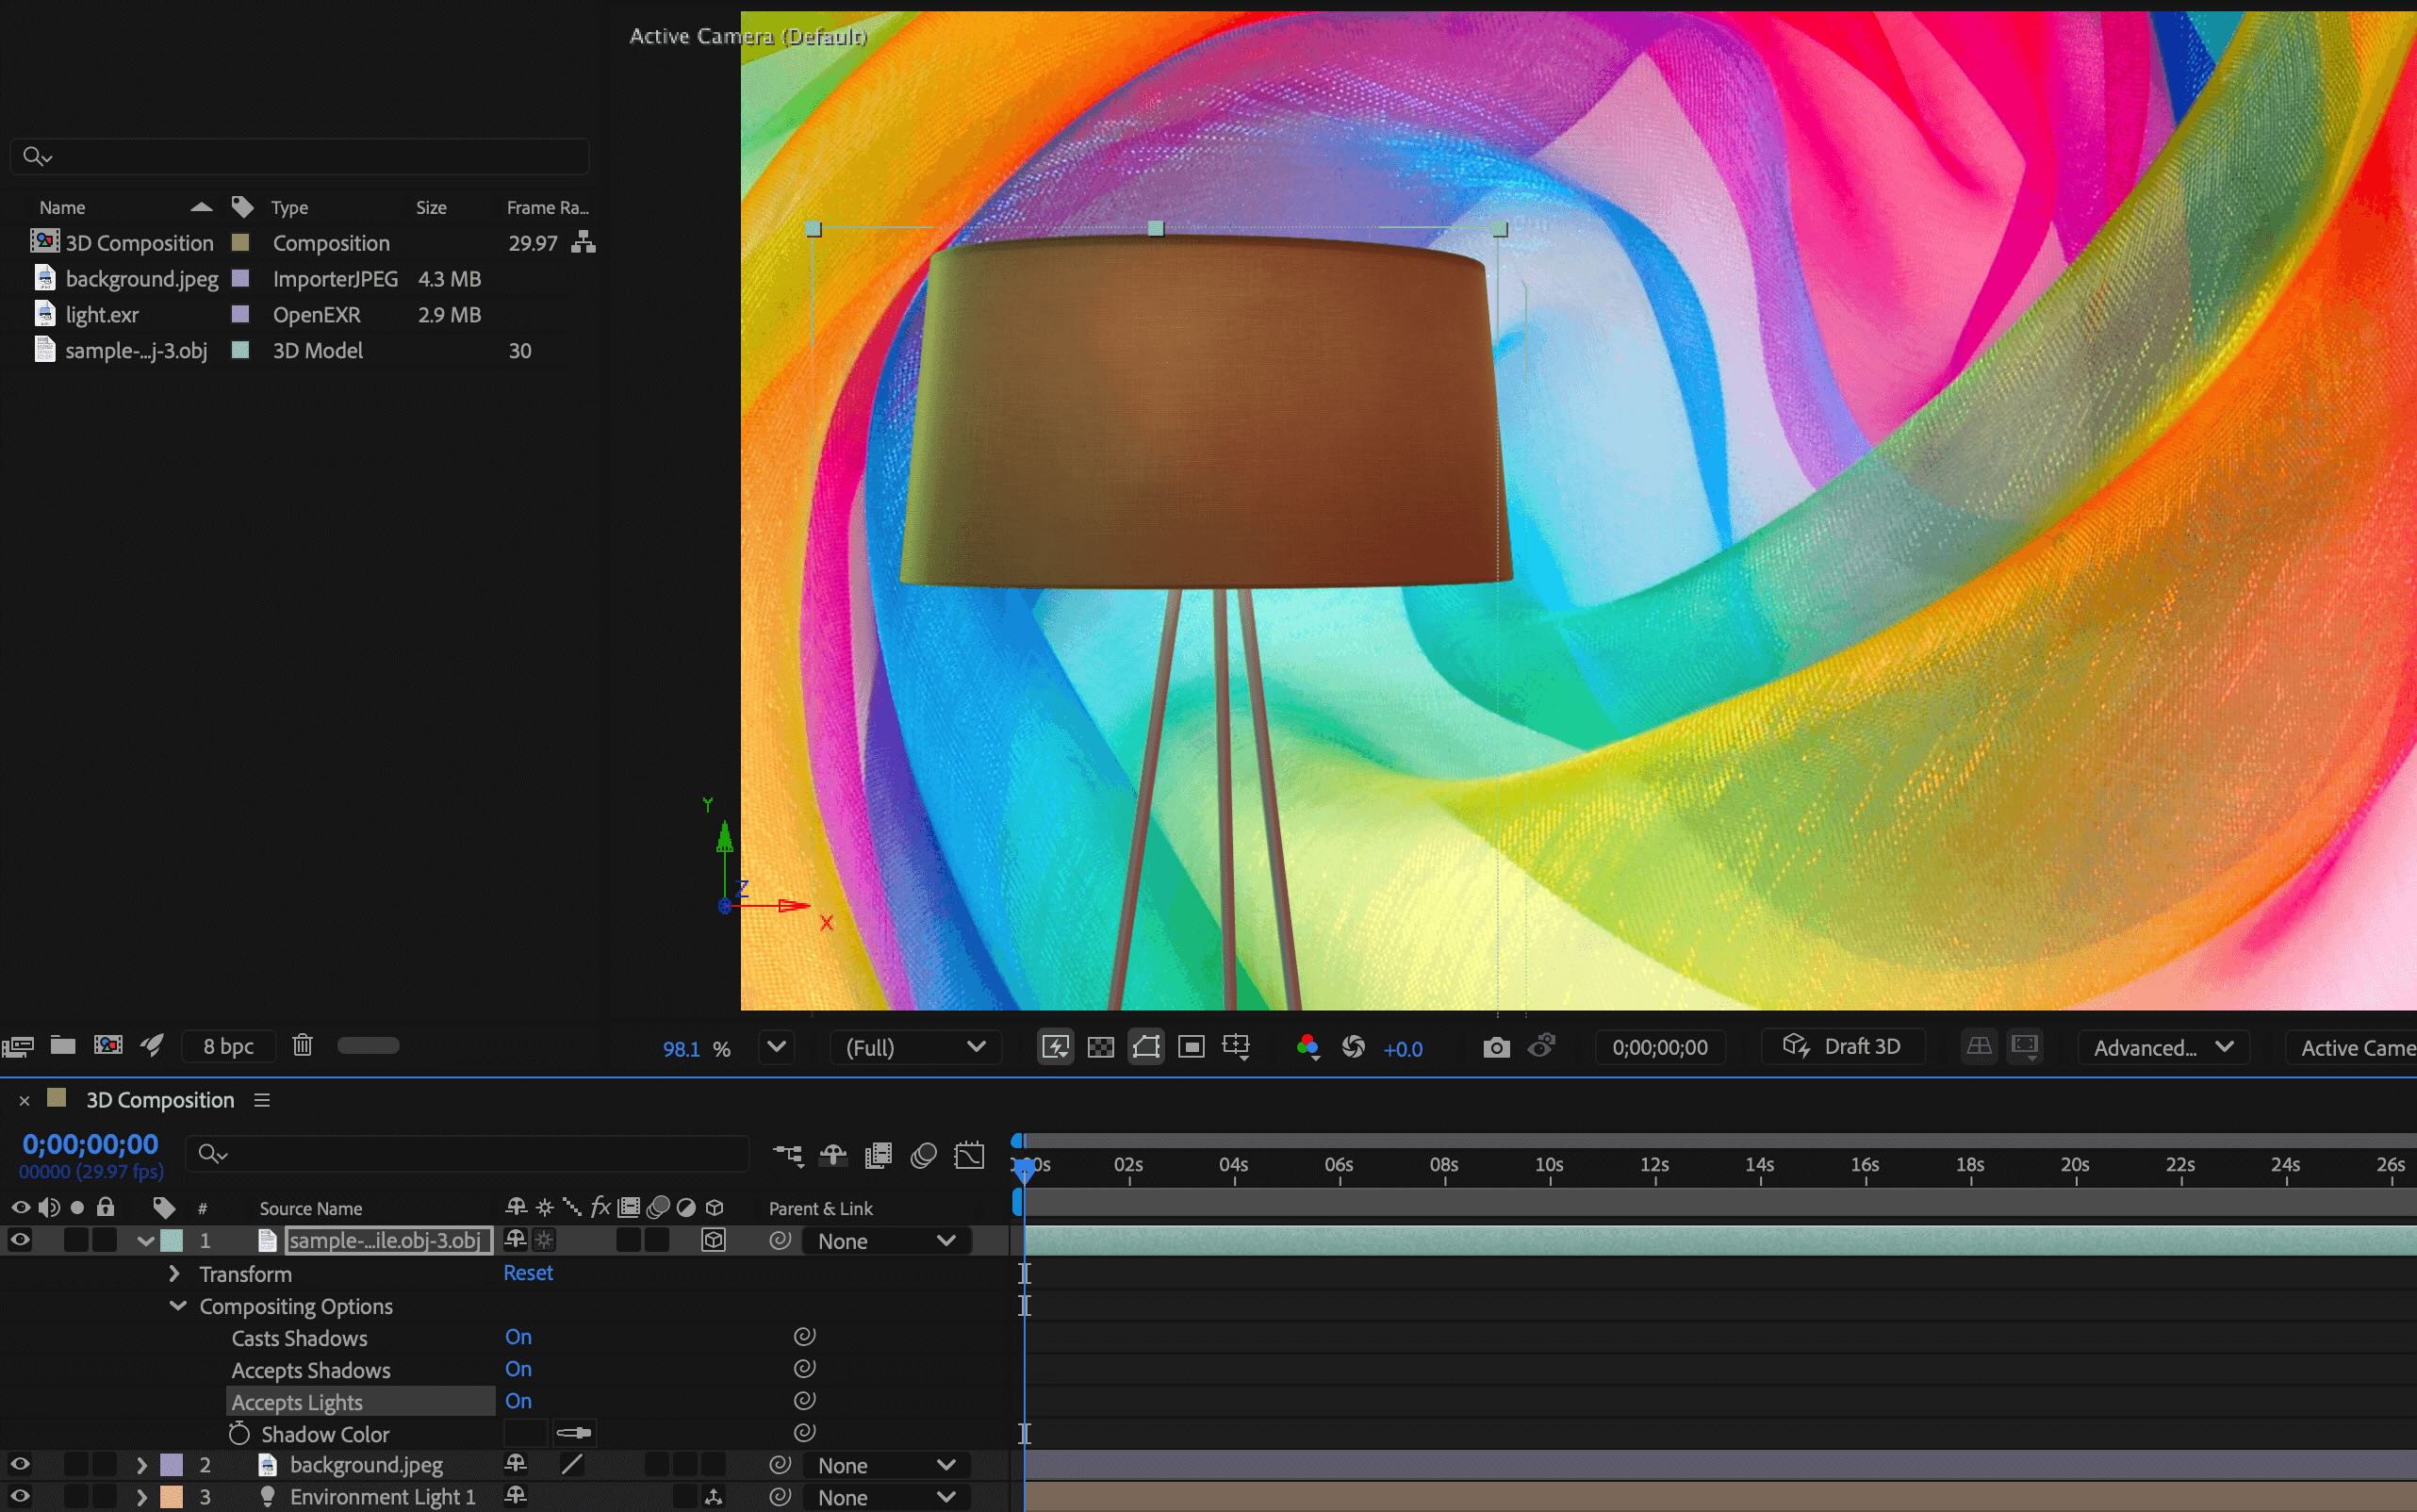
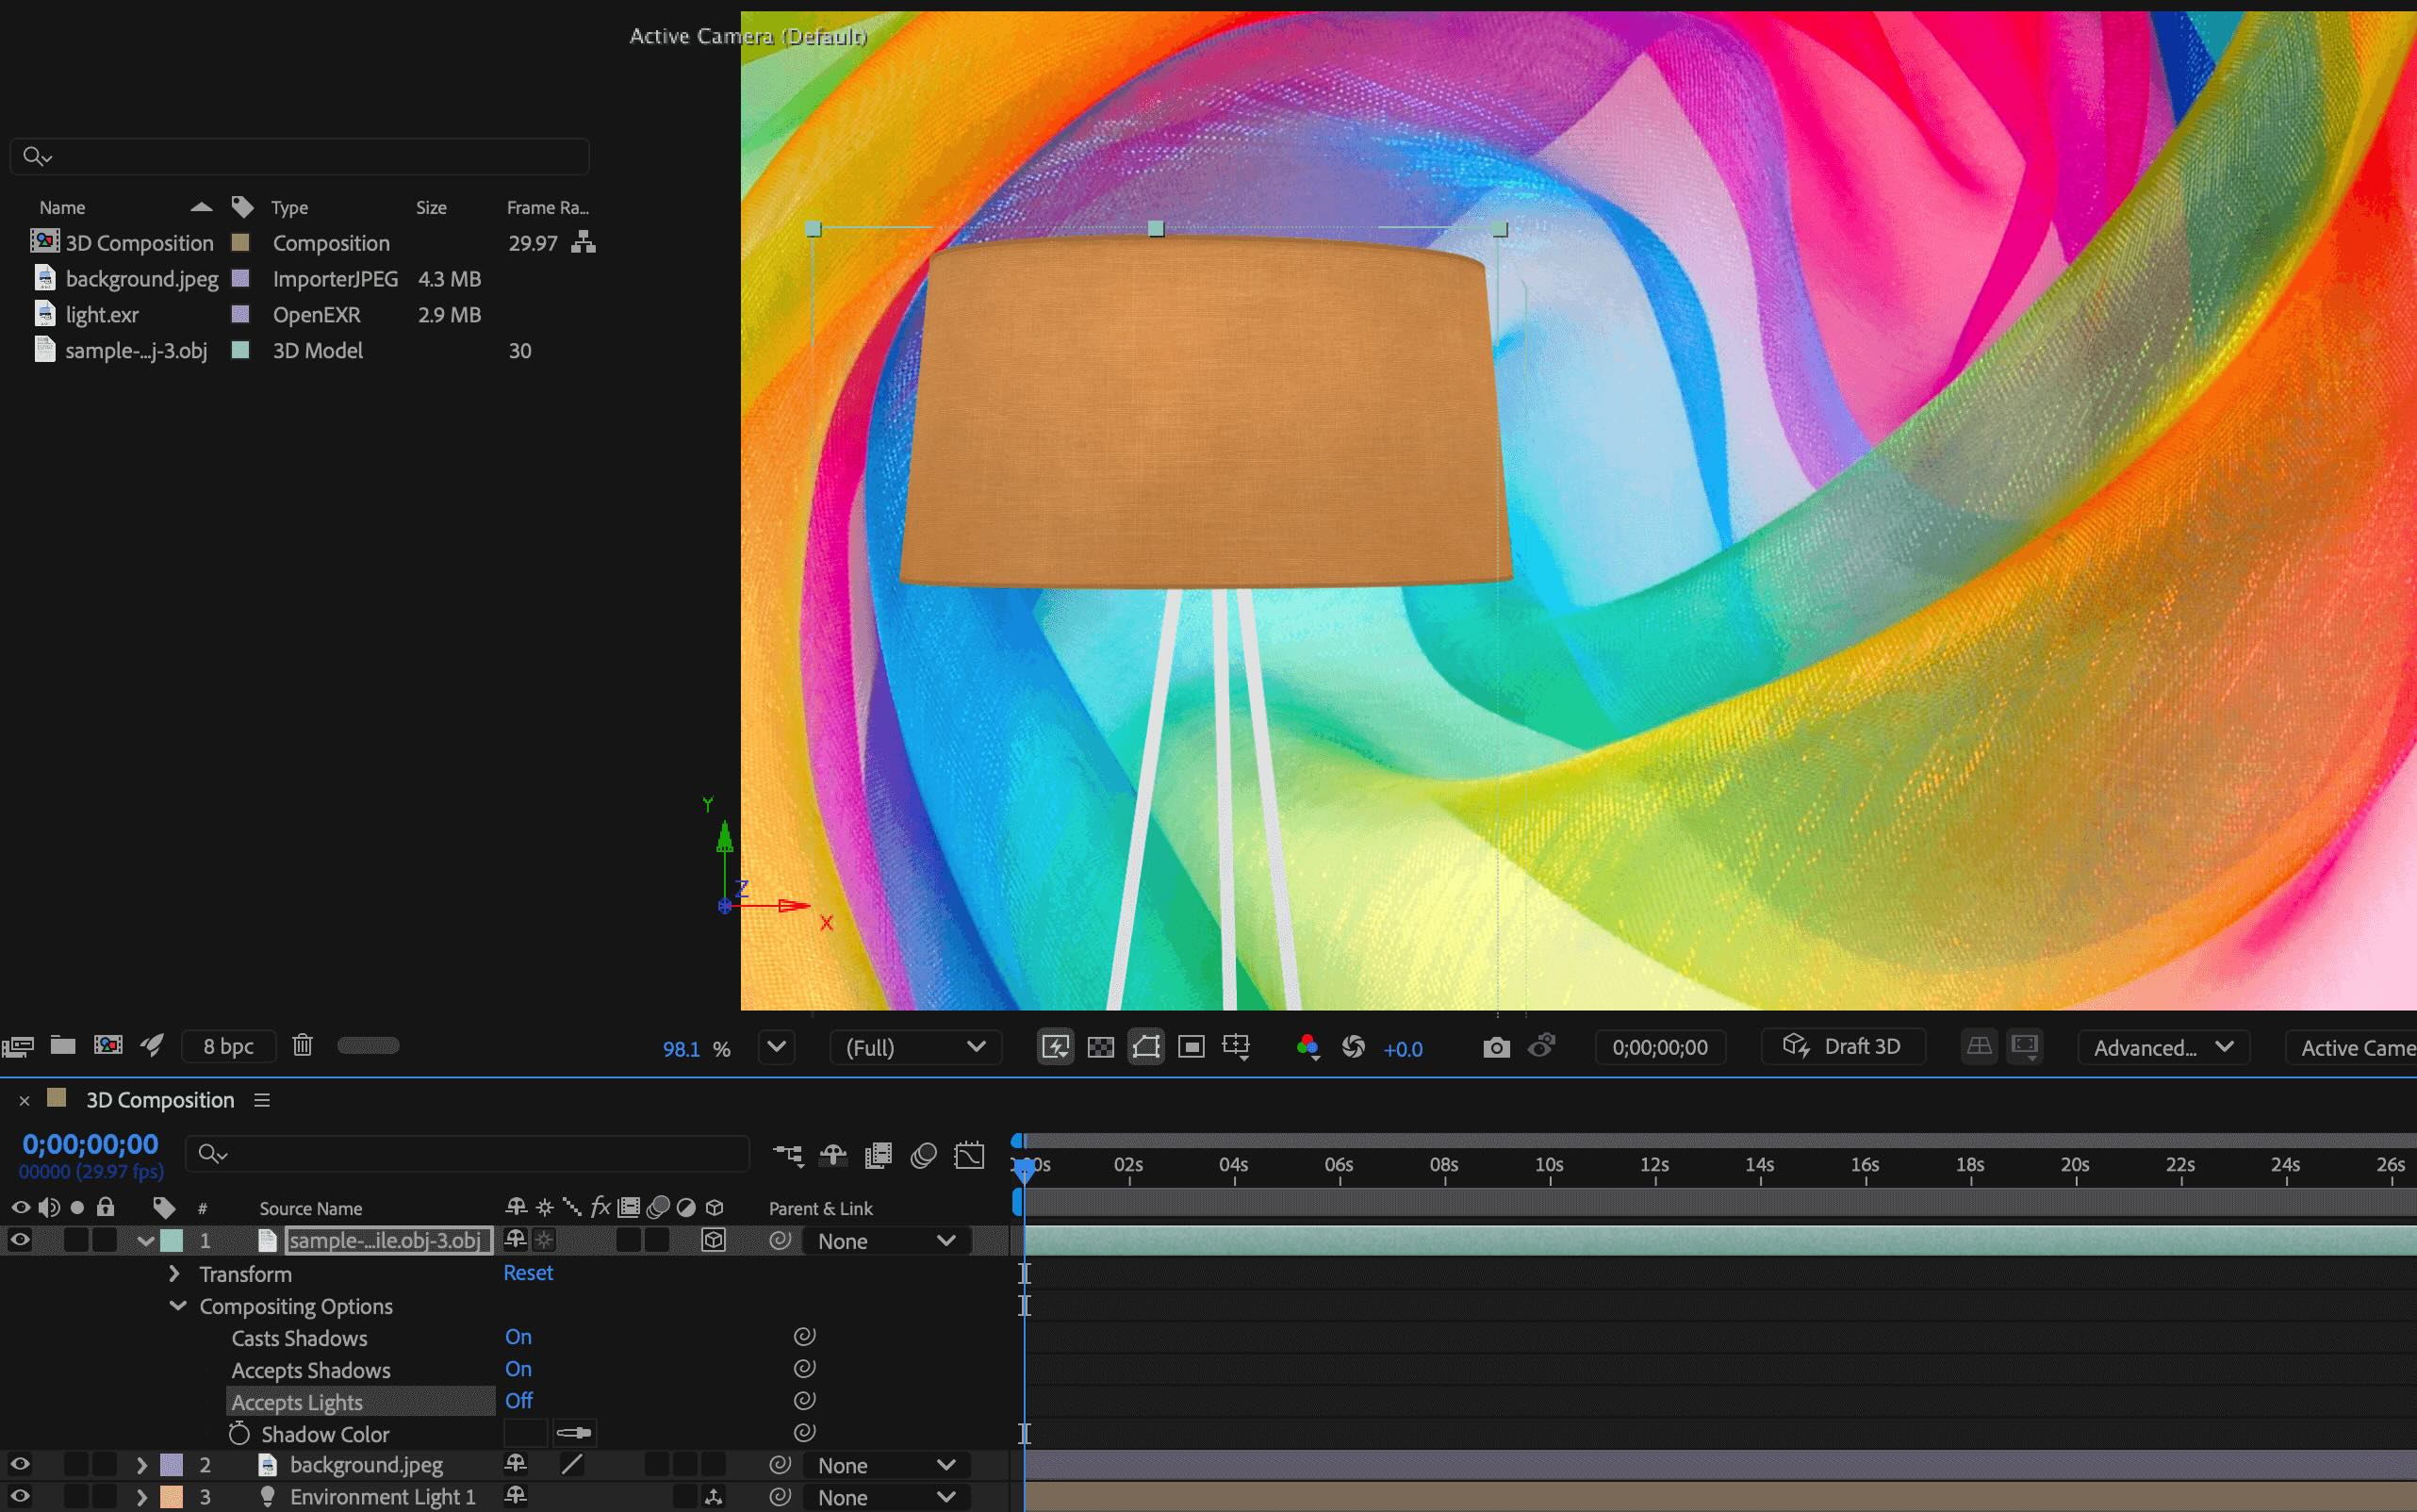
When you turn off Accepts Lights on a 3D layer in a 3D composition, the layer is no longer affected by any light sources in the scene. The objects in these layers will be lit by basic ambient illumination, showing only their base color and emissive textures. This can be useful if you want the layer to maintain its original appearance without being affected by lighting changes, shadows, or highlights from other light sources. It makes the layer look self-illuminated and consistent regardless of the surrounding lighting environment.


Accepts Lights can be beneficial when working with a 3D composition that includes self-illuminated 3D objects like phone screens and neon lights.

An example of how a lit lamp 3D model is affected when the Accepts Lights option is toggled on and off.
When a 3D model is selected in the composition, you can also toggle the Accepts Lights option On or Off in the Properties panel.


Accepts Lights is also supported in the Classic 3D and Cinema 4D renderers.
Scripting access to Environment layer Light Type
Using scripting to read the lightType property of a LightLayer object will return LightType.ENVIRONMENT for an environment light.


