
Calibrate the video or audio inputs, as needed:
Last updated on
May 24, 2023
- Character Animator User Guide
- Introduction
- Creating and controlling puppets
- Rigging
- Behaviors
- Recording and playback
- Export projects
Your performance of a scene’s puppets can be captured during recording. Each recording of a specific armed behavior parameter for a puppet is called a take.
A scene’s timeline (shown in the Timeline panel) represents each puppet instance as a selectable track item. When selected, the Properties panel shows the behaviors for the source (primary definition) of the puppet, plus any overridden behavior parameter values for this specific instance. For example, the same puppet can be added multiple times to a scene, with each puppet’s track item having a different Position transform for placement within the scene.
A scene has three modes:
- Stop: Scenes open in this mode. Behaviors (except for Breathe, Cycle Layers, Physics, Handle Fixer, Transform, and Wiggler) do not affect the puppet unless armed for record . When not armed, the latest recorded take for a behavior at the current time indicator ( playhead ) is used. While stopped, no imported audio, including audio in takes , play back . You can rehearse behaviors in this mode — nothing is recorded.
- Play: This mode plays back takes and audio. The current time indicator moves in time. Changes to behavior parameter values do not affect the results if a take of the same parameter exists at a given time; if no take data exists, the parameter’s value is used but not recorded.
- Record: While recording, values for armed behavior parameters are captured as a take for each parameter, and any existing takes are played back. You can also record at a slower speed for finer capture of a performance. Playback is always at normal speed.
There are transport controls for these modes. Using these modes, you can perform basic recording of a performance, playback, and reviewing of recorded takes, and re-recording of a performance to correct mistakes. This lets you do a multi-track recording of different inputs and layer several takes.
The Go to Start button moves the current time back to the start of the scene (if stopped) or the start of playback (if in Play). The Go to Previous Frame and Go to Next Frame buttons move one frame backward or forward in time (when stopped).
When you open the Rig or the Stream workspaces, transport controls don’t appear as part of the default panel controls. To view transport controls, select Always Show Play and Record Controls option in the Rig or the Stream workspace menu.
Note
Your audio input and output hardware must share sample rate.
Camera selection
To select a camera, choose it from the panel menu in the Camera & Microphone panel. The available camera sources are listed by name.
If no compatible camera is available, the panel menu will show No Camera Detected. If there are issues with the camera input, the panel will show one of the following errors:
- If there is a delay in receiving the first frame of video, the error message says Waiting for camera .
- If a camera needs to be selected from the panel menu, or if there is no camera available, the message says No camera selected.
- If another application is using the camera when Character Animator launches, the message says Selected camera is unavailable.
- If the selected camera is no longer available, such as if it was unplugged, the error message reads Camera was disconnected.
If the Camera Input button gets disabled due to an issue, clicking (enabling) it will attempt to reacquire video from the selected camera.
Automatic lighting compensation for camera input (Windows only)
The accuracy of face tracking and body tracking is affected by the quality of the image captured by the webcam. To enhance the image quality, enable automatic camera adjustment based on real-time analysis of lighting conditions, as follows:
- Select the Automatic Lighting Compensation option from the Camera & Microphone panel menu. This option is enabled by default.
Note
This lighting adjustment is not used in Characterizer or on macOS.
Record takes
The movement of your head and body to control a puppet, the dragging of a character’s hand to make it wave, and other actions to capture a performance is done by recording a take. You can perform these tasks in the Record workspace.
Countdown to record
A three-second countdown starts by default before recording starts. Use this time to prepare for recording or capture of a specific pose for your puppet. The countdown changes to a five-second countdown when Body Tracker Input is enabled.
- To enable or disable countdown, open Timeline and enable the Countdown Before Recording option.
- To change the countdown duration when Body Trakcer is enabled, choose Timeline > Body Tracker Countdown.
Record a performance of your puppets
-
- To control puppets via webcam. To improve face and body tracking results, set your rest pose using the Calibrate button.
- To record audio during the performance, make sure that the Microphone Input button Camera & Microphone panel is enabled (the default setting). When enabled, the Audio Level meter monitors audio input levels from –48 dB to 0 dB. The meter turns red at 0 dB. If the meter displays “Audio Level Too Low”, try boosting your microphone levels in the operating system’s Sound control panel or move closer to the microphone.
-
To arm the track for recording, select the puppet (either its track item or puppet name in the track header on the left side of the panel).
A selected/armed puppet allows you to isolate recording to ajust its track. By default, clicking a puppet track item or header, or adding a puppet to a scene, deselects/disarms other puppets in the scene. To select multiple puppets to arm for record, press Command/Ctrl-click. An armed puppet track appears with a red background in the track header.
-
In the Properties panel, enable the Arm for Record button (small circle next to the behavior’s name) for all behaviors you want to record for the puppet. Also enable the Arm for Record buttons for individual behavior parameters you want to capture in the take.
Armed behaviors appear with a filled red circle (like a small record button). For an armed behavior, its armed parameter also appears with a filled red circle next to the parameter’s name. Values for the armed behavior parameters on the armed tracks are captured. You can switch between different puppets to capture by selecting (arming) a puppet’s track item or header without needing to disarm behaviors on other puppets.
When a behavior’s Arm for Record button is a dim red, it means that none of its parameters are armed. Disarmed behaviors are not included in the next recording.
-
(Optional) To capture detailed movements of Dragger or other behaviors, set the Recording Speed to lower than normal speed. For example, choose half (0.5x) speed.
Recording occurs at a slower speed, but playback is at normal speed.
-
Set the start time for the recording.
You can start at the beginning of the scene by clicking the Go to Start button, play, and then stop at a specific time. You can also click or scrub along the time ruler at the top of the Timeline panel.
NoteTo “punch in” during playback, you can start recording (described next) without first pausing.
-
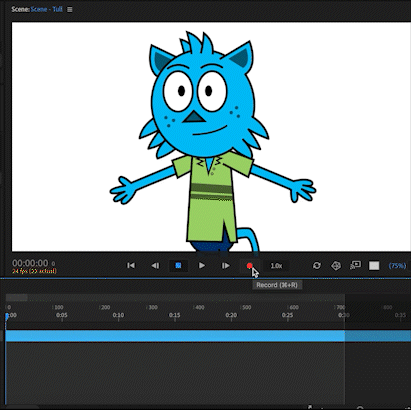
Start recording by clicking the Record button in the Scene panel.
NoteIf you rerecord a scene and don’t want previous audio takes included, use headphones during recording.
-
Do your performance using webcam, microphone, keyboard, and mouse inputs, and adjustments to armed behavior parameter values.
NoteIf you armed Camera Input or Audio Input parameters for behaviors but the respective Camera Input and Microphone Input buttons (in the Camera & Microphone panel) are disabled, no takes are captured for those parameters. Similarly, if you armed Mouse Input and Keyboard Input parameters but don’t actually click in the Scene panel or press a key, takes are not captured.
-
Stop recording by clicking Record again or Stop.
The recorded take is saved to a Recordings folder on disk (in the Ch Media subfolder of the current project folder). The take is also imported into the Project panel in the Recordings folder and added into the scene. If microphone input was recorded, the WAV file for it appears as an audio track item.
The puppet’s track is collapsed by default. A lighter-colored take summary bar indicating the presence of recorded takes appears along the bottom of the puppet track item’s bar.
Note
macOS only- to automatically switch to changes in the OS audio device settings, choose System Default in the Audio Hardware preferences. This can be configured separately for input and output devices.
Note
To select a camera, choose it from the panel menu in the Camera & Microphone panel. The available camera sources are listed by name.
- If no compatible camera is available, the panel menu will show the message No Camera Detected.
- If there is a delay in receiving the first frame of video, the panel menu message will show Waiting for camera .
- If a camera needs to be selected from the panel menu, or if there is no camera available, the panel menu message will show No camera selected.
- If another application is using the camera when Character Animator launches, the message says Selected camera is unavailable.
- If the selected camera is no longer available, for example, if it was unplugged, the message shows Camera was disconnected.
If the Camera Input button gets disabled due to an issue, clicking (enabling) it will attempt to reacquire video from the selected camera.
Puppet track behavior menu
When a puppet track is selected in the timeline, each behavior in the Properties panel includes a menu button with the following commands:
- Reveal in Puppet Panel opens the puppet that has this behavior applied in the Puppet panel. When a behavior is applied to a layer of a puppet, that layer is selected in the Puppet panel.
- Push Behavior Parameter Changes to Source Puppet updates the source puppet to use the same values for this behavior. This command is like the Push Parameter Changes to Source Puppet button (which updates all behaviors) and the Push Value to Source Puppet command in the behavior parameter menu.
Behavior parameter menu
When a puppet track is selected in the timeline, and you hover over a behavior’s noninput parameters in the Properties panel, the parameter menu (“…”) button appears to the left of the parameter name. Various operations for a behavior parameter are available in the parameter menu. For more information about these commands, see Behavior parameter menu.
Arm puppet for record
Each puppet track has its own Arm for Record button that can be controlled separately from the puppet track being selected.

Clicking puppet track items or track headers still switches arming to that puppet. Deselecting a puppet track by clicking away from it (for example, by editing a take or viseme bar on a different puppet track) does not disarm the previously armed puppet tracks.
You can arm multiple puppet tracks by Shift-clicking or Command/Ctrl-clicking the Arm for Record buttons for those tracks. To ensure that puppet tracks do not get disarmed, select only the takes or visemes on puppet tracks or audio tracks.
Recording speed
To capture the finer movements, you can record and perform at a speed slower than the frame rate of the scene.
To change the recording speed for a scene, do the following:
- Open the scene in the Scene panel, then change the Recording Speed setting at the bottom of the panel.
These scene settings will be used for the next scene created.
Speech-Aware Animation
Compute Head Movement from Speech
Note
This feature requires Windows 10, or macOS 10.15 or later.
Using the power of Adobe Sensei you can create automatic animation from speech. Character Animator will generate head and eyebrow movements corresponding to a recorded voice. To use Speech-Aware Animation, follow these steps:
-
Import an audio file and add it to a scene with your puppet.
-
Choose Timeline > Compute Head Movement from Speech. A Camera Input take for the puppet’s Face and/or Head & Body Turner behavior (whichever ones are currently being used on the puppet) will be created with the automatically generated head movement.

The computed head movement can be blended with manual Face and Head & Body Turner recordings for more refinement.
Controls
Exaggerate or minimize the computed head movement by adjusting the following parameters:
Face behavior:
- Head Position Strength
- Head Scale Strength
- Head Tilt Strength
- Eyebrow Strength
- Parallax Strength
Head & Body Turner behavior:
- Sensitivity
For more information on these parameters, see the Face behavior and Head & Body Turner behavior.
Note
The Compute Head Movement from Speech does not change mouth shapes. Use the Timeline > Compute Lip Sync Take from Scene Audio menu command to generate lip sync for your puppet.
Playback speed
The Playback Speed setting allows you to review finer movements or changes in a performance by playing back the scene at a slower speed. You can use this control with the controllable recording speed.
To change the playback speed for a scene, open the scene in the Scene panel, and change the Playback Speed setting from the Playback and Recording Speed control. This option is present at the bottom of the panel.
When playback and recording speeds are different, both values are indicated, with recording speed in red. When they’re the same, only that value is shown.
Unlike other scene properties but like recording speed, new scenes always default to normal (1.0x) playback speed, instead of the last-used playback speed.
Play back a recorded performance
After recording takes, play back the recordings to check your work.
To start at a specific time in the scene
Click or drag along the time ruler (at the top of the Timeline panel). Dragging also scrubs audio in the scene.
To start playback
Click Play or press Spacebar. Recorded takes play back, and the displayed time code updates accordingly.
To control playback speed for a scene
Open the scene in the Scene panel, then change the Playback Speed setting in the Playback and Recording Speed control at the bottom of the panel.
When playback and recording speeds are different, both the values are indicated, with recording speed in red. When both the speeds are the same, only that value is shown.
To stop playback
Click Stop or press Spacebar again.
The playhead snaps to frame boundaries by default, and when zoomed in time in the Timeline panel you can see the duration of a frame shaded in a light blue (similar to the shading seen in After Effects and Photoshop).
Note
The Scene panel shows the middle time within this frame duration, but audio can still play across the frame duration. Track and take operations, such as recording, split, and snapping, still happen at the red line (left edge).
To unsnap the playhead from frame boundaries for finer positioning or audio scrubbing, hold down Command (mac) or Ctrl (Windows) as you drag the playhead.
Replaying the same range of time
By default, stopping playback leaves the playhead where it stopped, but you can have the playhead return to its previous start time so that you can repeat the same range of time by pressing Space. This option is helpful when refining the timing of visemes for a word or phrase.
To return the playhead to its previous start time when the playback stops, follow this step:
- Select Timeline > Return to Start Position on Stop option.
Scrolling through time via keyboard
To scroll through time in a scene, you can use the following keyboard shortcuts.
- Page Up or Page Down: Scrolls left or right one “page” at a time within visible range of time.
- Command/ Control+ Page Up or Command/ Control + Page Down: Scrolls left or right less than a page at a time.
Scrolling the timeline panel’s content during playback and recording
In order to keep the playhead visible, the Timeline Panel’s content scrolls during playback or recording.
To prevent scrolling in time during playback and recording, follow this step:
- Deselect the Timeline > Scroll During Playback option.
Audio track volume control
Each audio track in a scene’s timeline has its own Volume setting. Fore more information, see Audio track volume control.
Step record to capture one- or two-frame takes
You can capture the current pose of a character, specifically the behavior parameters armed for record, as one- or two-frame takes to animate “on ones” or “on twos.” For example, if you have the Dragger behavior’s After Move parameter set to Hold in Place, you can pose a character’s arms, record a one-frame take, change the pose, record another one-frame take, and so on. Like any recorded take, you can extend its duration afterwards to, for example, hold a pose longer.
To record one- or two-frame takes for armed parameters, choose either Timeline > Record 1-frame Take (Command/Ctrl+1) or Record 2-frame Take (Command/Ctrl+2).
You can blend performances at the beginning and the end of a take to smoothly transition between existing takes or the default appearance. You can also customize blend durations or quickly set a take to blend with the default duration. For more information, see Blend performances together.
Hold Takes
If you want to extend the pose of a character’s recorded performance (takes) at the current time, create hold takes. Hold takes duplicate the values of the selected takes at the playhead , allowing you to extend them to the required duration and optionally blend them with the earlier recorded takes. To create hold takes, follow these steps:
-
Move the playhead to the frame showing the pose you want to hold.
Tip: Disarm the puppet track to see the results of the recorded takes.
-
Select one or more takes whose values at the current time you want to hold.
-
Choose Timeline > New Hold Take (Command+Shift+Option+D / Ctrl+Shift+Alt+D).
Each selected take has a new, one-second hold take above it. You can lengthen and move hold takes as needed, and even blend them into the takes below them for smoother transitions. The tick marks along the bottom edge of each hold take indicate that the value is constant, extending both earlier and later in time.
Note
Hold takes for Lip Sync or Trigger takes can be lengthened from either end, but the start of the viseme or trigger bar doesn’t extend automatically. You can still drag it manually as needed.
Replays: Reusable and triggerable recordings
Replays let you trigger the recorded takes for a puppet, either live or for rerecording. Use it for making record and replay easier and more efficient. For information about replays, see Replays: Reusable and triggerable recordings.