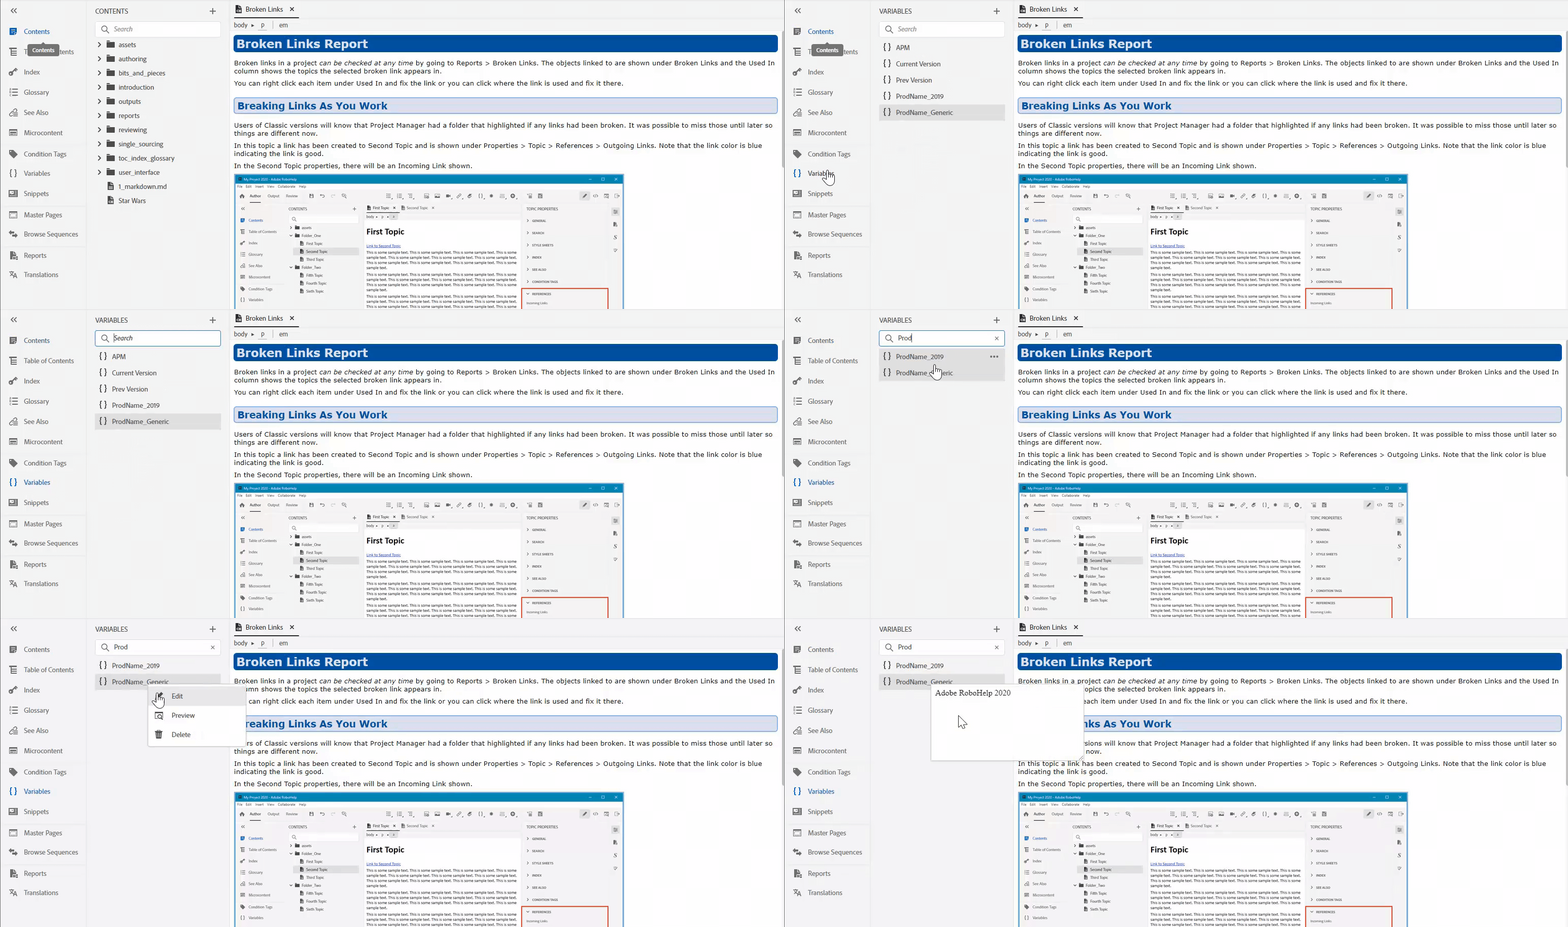
In the Author tab, select Variables. The Variables panel opens.
- RoboHelp User Guide
- What’s new
- Introduction
- Projects
- Collaborate with authors
- PDF Layout
- Editing and formatting
- Format your content
- Create and manage cross-references
- Create and manage links
- Single-source with snippets
- Work with images and multimedia
- Create and use variables for easy updates
- Work with Variable Sets
- Use Find and Replace
- Auto save your content
- Side-by-side editing in Split View
- Use the Spell Check feature
- Create and Edit Bookmarks
- Insert and update fields
- Switch between multiple views
- Autonumbering in CSS
- Import and linking
- TOCs, indexes, glossaries, and citations
- Conditional content
- Microcontent
- Review and Collaboration
- Translation
- Generating output
- Publish output
- Publish to a RoboHelp Server
- Publish to an FTP server, a Secure FTP server, or a File System
- Publish to SharePoint Online
- Publish to Zendesk Help Center
- Publish to Salesforce Knowledge Base
- Publish to ServiceNow Knowledge Base
- Publish to Zoho Knowledge Base
- Publish to Adobe Experience Manager
- Publish to Atlassian Confluence Knowledge Base
- Publish to a RoboHelp Server
- Appendix
Learn how to create, edit, and manage a variable, and insert a variable in a topic in RoboHelp.
A variable is a text phrase or word that serves as a reusable piece of information, simultaneously used across multiple topics in your project. This makes your content portable and easy to update. When you modify a variable or its value, every occurrence of that variable or value is updated across the project.
Create a variable
A variable is a text phrase to which you assign a value. Follow these steps to create a variable in your open project:
-
-
In the Variables panel, select to open the Variables editor.
-
Enter the variable name in the Name column and its value in the Value column.
-
Select to add a new variable.
You can add multiple variables by repeating the process and then select Save. The variables get added to the list in the Variables panel.
The variable created does not get removed by Undo (Ctrl + Z).
Edit a variable
To edit a variable in RoboHelp, follow these steps:
-
In the Author toolbar, select Variables. The Variables panel opens.
-
In the Variables panel, select
 next to the desired variable.
 -
Select Edit in the given Options list.
-
In the Edit variable dialog box, you can edit the Name and Value of the selected variable.
-
Click Done.
If you rename any variable, RoboHelp simultaneously updates all the references wherever applicable. For example, Topic titles, Topic content, Table of Contents, Output Presets titles, Variable Sets, and so on.
Insert a variable
To insert or use a variable in an open topic:
-
To open a topic:
In the Author toolbar, select Contents and open a topic of your choice from the Contents panel.
-
Select Variables in the Author toolbar. The Variables panel opens.
-
Select a variable from the Variables panel. Now drag-and-drop the selected variable at the desired text location in the open topic.
Alternatively, press Ctrl+1. From the Variable dialog box, you can search through the list of variables and select a variable to insert it.
-
Click the Save All icon
 at the left side of the standard toolbar.
Convert text to variables
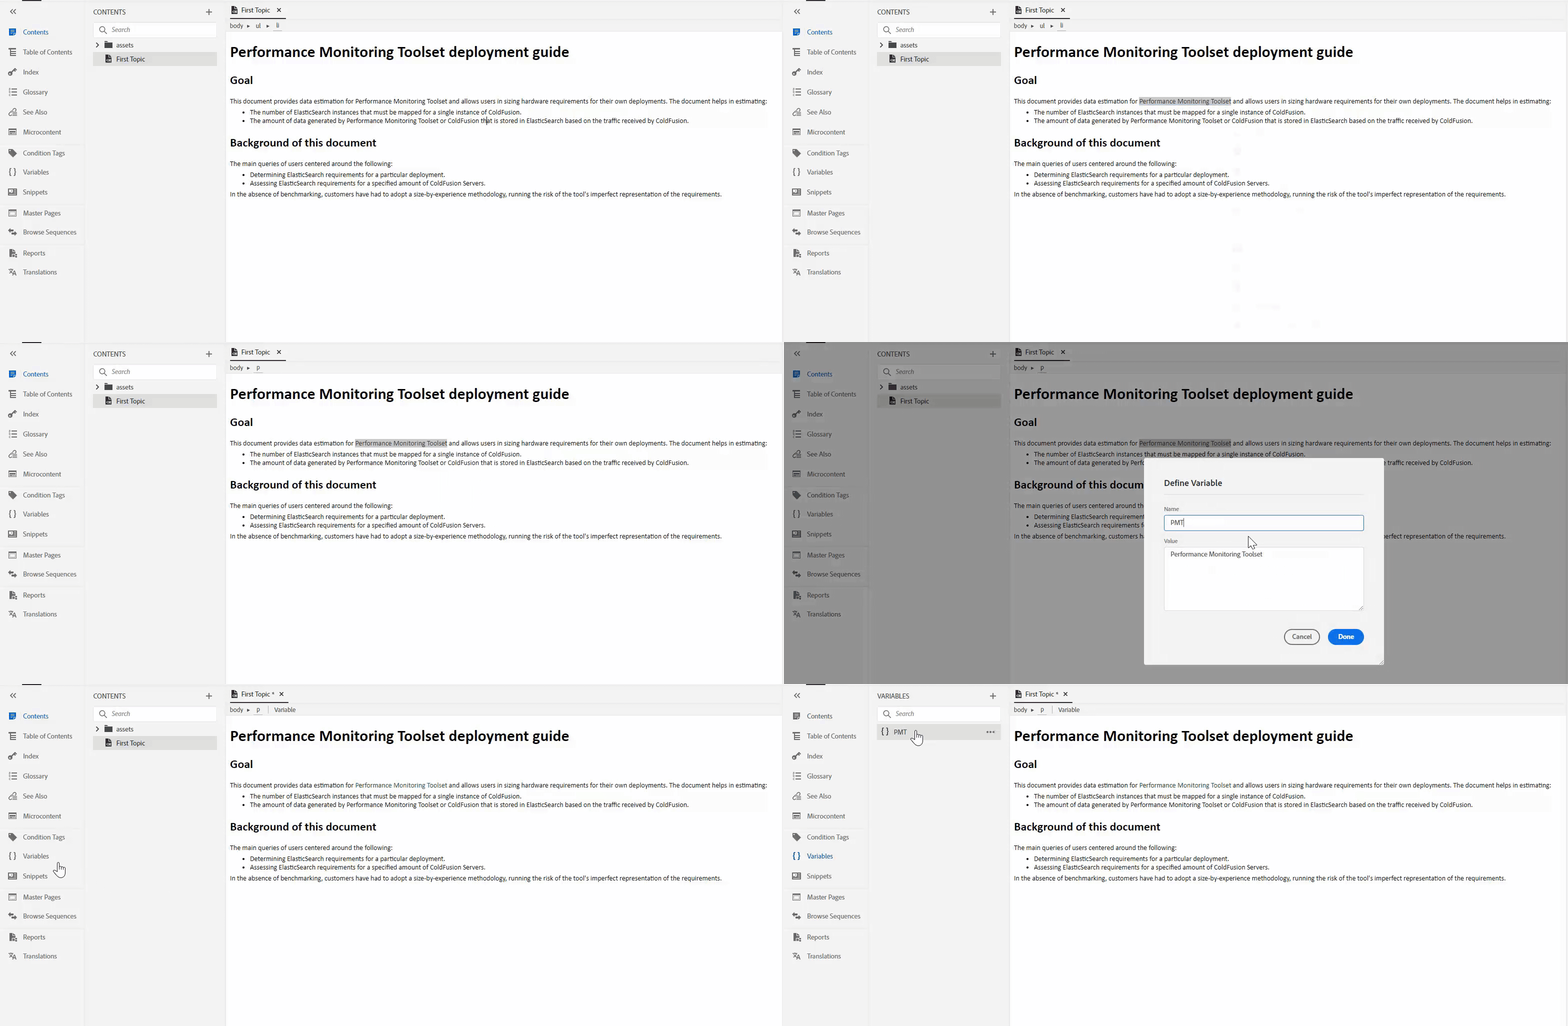
An alternative way to add a variable is to select a portion of a text and then add the selection as a value. For example, if you have a product that has a lengthy name and you want to reuse the name in multiple places, you can highlight the product and add it as a value.
This workflow also serves as a shortcut in creating a variable.
This is how you'd add a selection to a variable:
- In a topic, select the text that you want to add as variable.
- Right-click the selection.
- In the context menu, click Add to Variable.
- In the Define variable dialog, specify the variable that must be mapped to the selection.
The gif below demonstrates this workflow.


Duplicate a variable
-
In the Variables editor, select next to the variable you want to duplicate.
-
Select Duplicate from the list to open the Duplicate Variable dialog box.
-
Edit the Name of the duplicate variable.
-
Select Done.
-
Select Save, to display the duplicate variable in the variables list in Variables panel.
Delete a variable
-
In the Author toolbar, click Variables. The Variables panel opens.
-
Select
 option next to the desired variable either in the Variables panel or in the Variables editor.
 -
Select Delete in the Options list.
-
Click Yes in the Confirm dialog box to delete the selected variable.
NoteClicking on Save is not required.
-
If the variable is referenced in your project, you are prompted to choose among the listed three options:
- Delete the variable and its references - Deletes the variable and all its occurrences in the project.
- Delete only the variable - Deletes only the variable. This retains the references of the variable in the project.
- Delete variable and replace references with actual content - Deletes the variable and replaces all its occurrences with the variable value.
-
Select the relevant option and click Done.
Generate Variables report
You can generate a Variables report to view and manage variables in your project. Using this report you can find variables that are used in a topic and those that are not used in any topic. Before you delete a variable, you can locate the topics in which the variable is used and delete references to that variable.
You can then download or print the Variables report.
-
In the Author toolbar, select Reports. The Reports panel opens.
-
In the Reports panel, select Variables.
-
Use the Filters panel on the right side of the screen to customize the report. To know more, see Customize a report.
-
Once you've customized the Variables report based on your needs, click the Download icon
 in the standard toolbar to instantly download the report. The report is saved as a .csv file.
 -
To print the report, click the Print icon
 in the standard toolbar.


The gif below demonstrates the search and preview workflow.


