Select Guided > Fun Edits > Animated Sky.
- Get to know Premiere Elements
- Adobe Premiere Elements User Guide
- Introduction to Adobe Premiere Elements
- Workspace and workflow
- Working with projects
- 360° and VR Video Editing
- Importing and adding media
- Arranging clips
- Editing clips
- Reduce noise
- Select object
- Candid Moments
- Color Match
- Color Fonts and Emojis
- Smart Trim
- Freehand Crop
- Delete All Gaps
- Change clip speed and duration
- Split clips
- Freeze and hold frames
- Adjusting Brightness, Contrast, and Color - Guided Edit
- Stabilize video footage with Shake Stabilizer
- Replace footage
- Working with source clips
- Trimming Unwanted Frames - Guided Edit
- Trim clips
- Editing frames with Auto Smart Tone
- Artistic effects
- Color Correction and Grading
- Applying transitions
- Special effects basics
- Effects reference
- Applying and removing effects
- Create a black and white video with a color pop - Guided Edit
- Time remapping - Guided edit
- Effects basics
- Working with effect presets
- Finding and organizing effects
- Editing frames with Auto Smart Tone
- Fill Frame - Guided edit
- Create a time-lapse - Guided edit
- Best practices to create a time-lapse video
- Applying special effects
- Use pan and zoom to create video-like effect
- Transparency and superimposing
- Reposition, scale, or rotate clips with the Motion effect
- Apply an Effects Mask to your video
- Adjust temperature and tint
- Create a Glass Pane effect - Guided Edit
- Create a picture-in-picture overlay
- Applying effects using Adjustment layers
- Adding Title to your movie
- Removing haze
- Creating a Picture in Picture - Guided Edit
- Create a Vignetting effect
- Add a Split Tone Effect
- Add FilmLooks effects
- Add an HSL Tuner effect
- Fill Frame - Guided edit
- Create a time-lapse - Guided edit
- Animated Sky - Guided edit
- Select object
- Animated Mattes - Guided Edit
- Double exposure- Guided Edit
- Special audio effects
- Movie titles
- Creating titles
- Adding shapes and images to titles
- Adding color and shadows to titles
- Apply Gradients
- Create Titles and MOGRTs
- Add responsive design
- Editing and formatting text
- Text Styles and Style Browser
- Align and transform objects
- Motion Titles
- Appearance of text and shapes
- Exporting and importing titles
- Arranging objects in titles
- Designing titles for TV
- Applying styles to text and graphics
- Adding a video in the title
- Disc menus
- Sharing and exporting your movies
This Guided Edit is a walkthrough on how to replace the sky in your photo with an animated video.
This guided edit helps you bring life to still images by animating the sky and making your photos look lively. Note that this edit is only available for photos and not videos.


-
-
Click Add Media to add a photo. Select the appropriate import option and import media.
Add media to Premiere Elements Add media to Premiere Elements -
Once imported, the media file gets added to the Project Assets bin.
-
Drag-and-drop the media file in the Video 2 track in the timeline at the playhead position.
-
On the right panel, click the graphics icon. This opens the video background options. Drag the selected video and drop it on the Video 1 track in the timeline.
Below is an example of 01_Cloud and 02_Firework applied to an image.


 Note
NoteMake sure that the background video is aligned to the photo on video 2 track.
-
Drag the edge of the photo to cover the background.
-
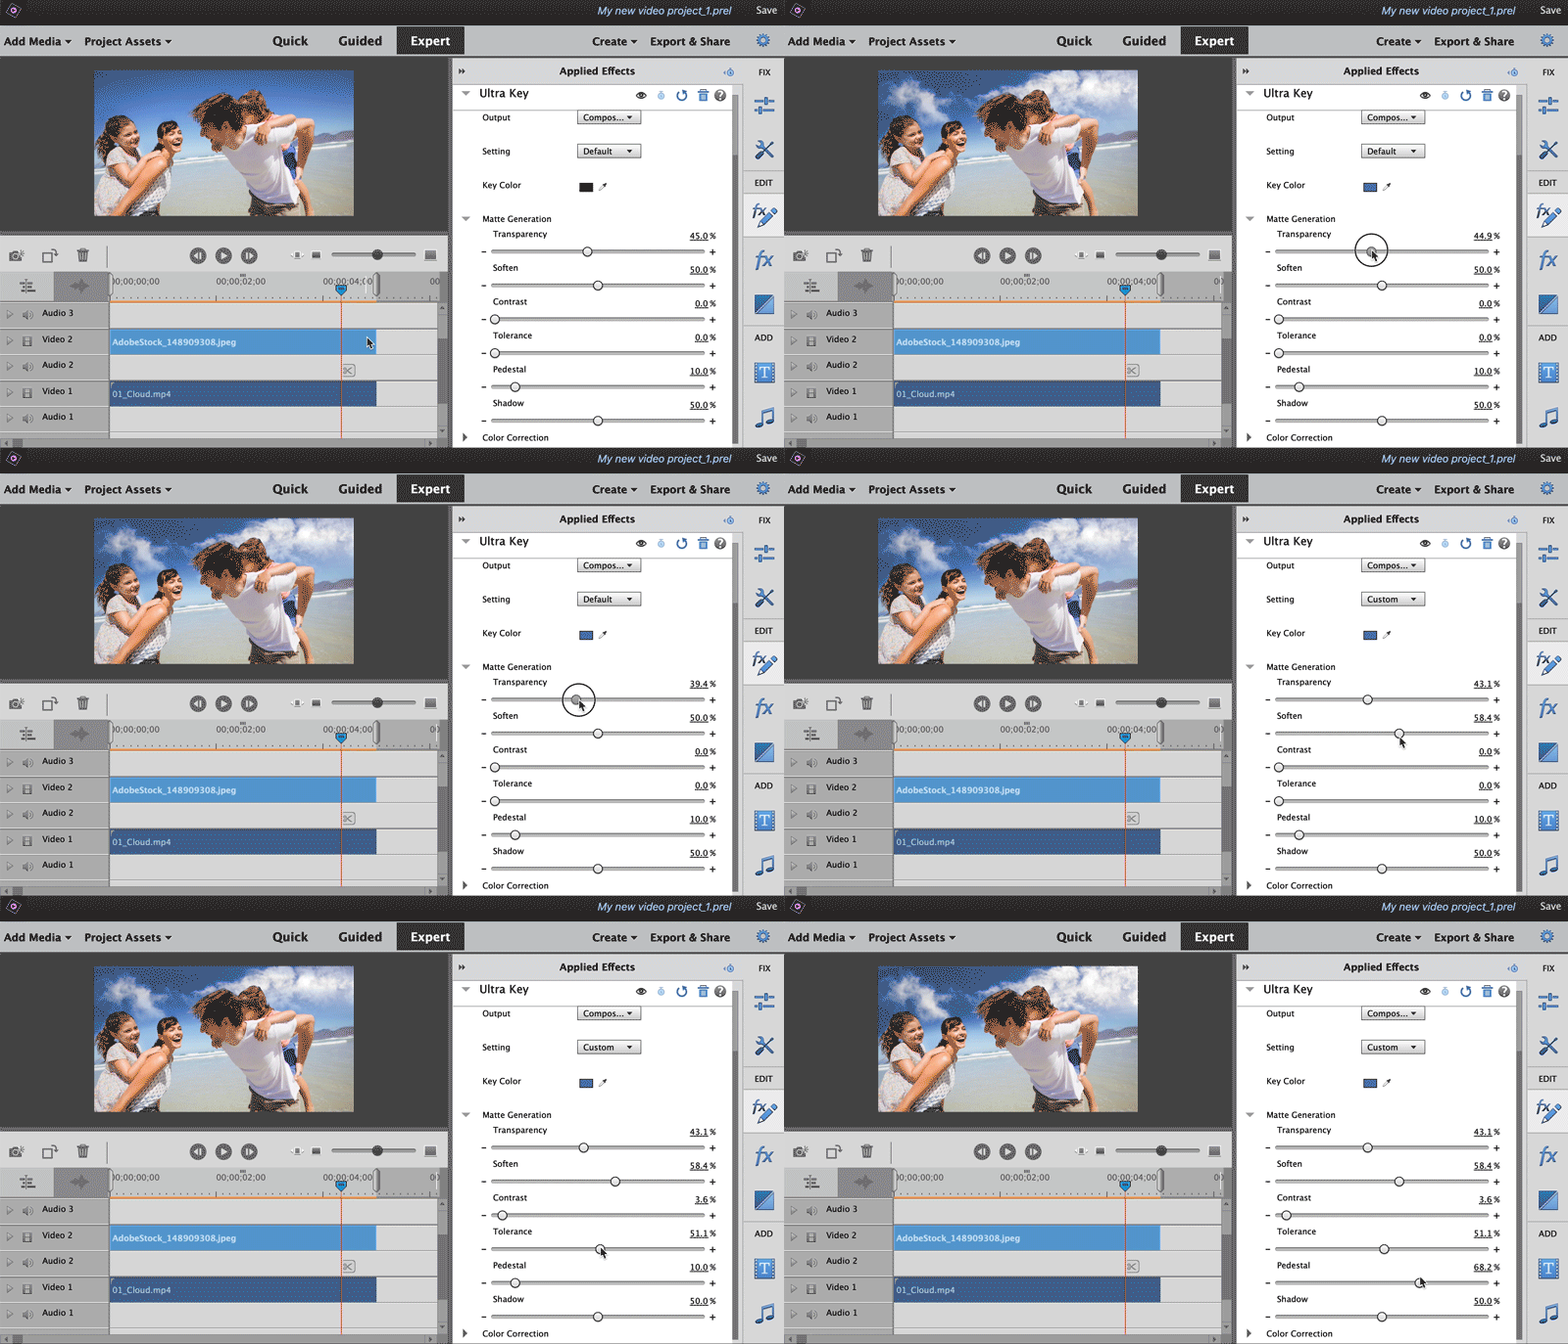
Click the effects icon on the right pane to open video effects. Drag-and-drop the ultra key effect onto the photo on the Video 2 track in the timeline.
Video effects Video effects -
In the Applied Effects panel, select the Key Color eye dropper. Hover it over the preview screen and select the sky color to make it transparent.


-
To trim the clip, click the right edge of the photo on Video 1 track and drag it to match the duration of the background video.
-
The sky in your photo is now animated. Press play to view the results.
-
Click Done to finish the project and exit the Guided Edit mode. To export the final output, select File > Export and Share. For information about various exports and share options available, see Export and share your videos.
Export and share Export and share


