In Elements Organizer, select a video clip.
- Elements Organizer User Guide
- Introduction
- Workspace and workflow
- Importing media files
- Viewing and fixing media files
- Marking places, faces, and events
- Managing catalogs, folders, and albums
- Creating albums and album categories
- Editing albums and album categories
- Create and edit catalogs in Elements Organizer
- Back up or restore catalogs | Elements Organizer 2018
- Tag your media
- Using Smart Tags
- Creating and editing Saved Searches
- Back up or restore catalogs | Elements Organizer 15 and earlier versions
- Troubleshooting catalog issues
- Searching photos and videos
- Creating photo projects
- Creating video projects
- Printing, sharing, and exporting
Learn how you can easily upload and share your videos on YouTube, Vimeo, and do much more using Elements Organizer.
Upload videos to YouTube
You can easily upload your videos to YouTube using Elements Organizer. You must have a user account with YouTube to upload videos to the site. If you have a Gmail account, you can use those details to log in to YouTube.
Before uploading a video to YouTube, ensure that you read the policy on YouTube for video upload. Ensure that your video meets the YouTube standards for size, duration, and format.
-
-
Select Share > YouTube.
-
If you are sharing a video for the first time, you are prompted to log in to your Google account.
-
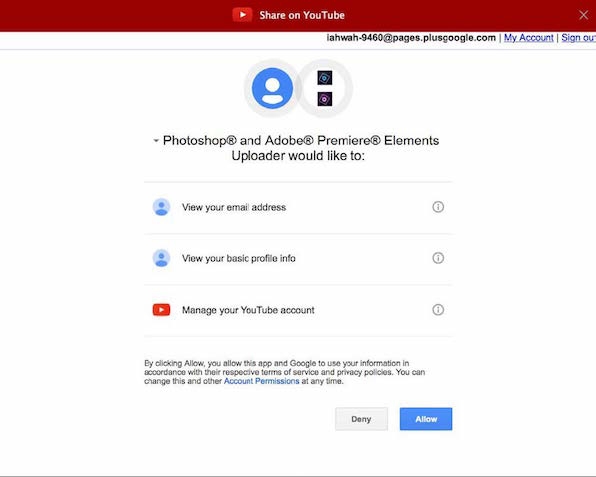
Next, you are prompted for appropriate permissions to share your videos.


-
The YouTube dialog appears.
In the YouTube dialog, enter the following information, and then click Upload.
The information that you enter ensures that users can easily locate your video when searching for it.
- Enter the title and description for your video.
- Enter tags that describe your video. For example, if the movie is about your vacation in Paris, use the tags France, Paris, June, Eiffel Tower, and so on.
- Select a category that matches the content of your video.
- Select viewing rights to your video by choosing Public or Private. If your video is set to Private, only you and up to 50 other invited users can see it. The video does not appear on your channel, in search results, playlists, and so on.
The progress dialog box appears informing you that the upload is in progress. Click YouTube.
- In the YouTube site that opens in the browser, enter your login information.
- Click your User ID at the top of the browser window, and select Videos. The video that you uploaded is displayed in the My Videos and Playlists section.
Share videos on Vimeo
Ensure that you register yourself with Vimeo before you use this feature.
-
Select videos that you want to share.
-
Do one of the following:
Select Share > Vimeo.
-
Enter your login details.
-
Follow the onscreen instructions to upload your photographs to this site.
Export videos to web supported format
Install Adobe Premiere Elements to use this feature.
Elements Organizer enables you to export your movie in formats suitable for delivery through the Internet.
-
Select the video files you want to copy.
-
Select Share > Online Video Sharing.
Adobe Premiere Elements launches and enables you to export your video files to a web supported format.
Sharing media files to mobile phones
Install Adobe Premiere Elements to use this feature.
You can export movies for playback on mobile phones, some PDAs, and portable media players, such as video iPod and PlayStation Portable (PSP) devices.
-
Select the media files you want to copy.
-
Select Share > Mobile Phones.
Adobe Premiere Elements launches and enables you to export the media files to the specified mobile phone or media player.
Burn video files to a DVD
If you have Adobe Premiere Elements installed, you can burn media files to a DVD.
-
Select the media files you want to copy.
-
Select Share > Burn Video DVD.
Adobe Premiere Elements launches and enables you to burn the media files to a DVD.

