
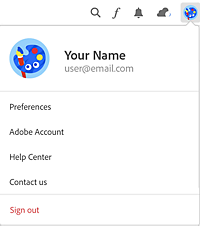
To sign out of Creative Cloud desktop, click your profile icon and choose Sign Out.
Last updated on
Jul. 24, 2023
- Adobe Fonts User Guide
- Introduction
- Font licensing
- Fonts added from Adobe Fonts
- Web fonts from Adobe Fonts
- Creative Cloud for enterprise customers
- Removed fonts
- Why aren't these fonts included in my Creative Cloud subscription?
- Why am I being asked to purchase a license for fonts in Adobe Fonts?
- Adobe Fonts not available to Adobe IDs registered in China
- Getting and using fonts
- Using Adobe Fonts in Creative Cloud apps
- Manage your fonts
- Find fonts from images
- Resolve missing fonts in desktop applications
- Using fonts in InDesign
- Fonts and typography
- Using web fonts in HTML5 Canvas documents
- Using fonts in InCopy
- Using web fonts in Muse
- Packaging font files
- Troubleshooting guide: Adding fonts
- Added fonts aren't showing to the font menu
- "Unable to add one or more fonts" or "A font with the same name is already installed"
- What happens when a font I'm using is updated by the foundry?
- Hide fonts in Adobe programs
- Web design and development
- Add fonts to your website
- Troubleshooting guide: Adding fonts to a website
- Troubleshoot font issues
- Using web fonts in HTML email or newsletters
- Using web fonts with Accelerated Mobile Pages (AMP)
- CSS selectors
- Customize web font performance with font-display settings
- Embed codes
- Dynamic subsetting & web font serving
- Font events
- Why are my web fonts from use.typekit.net?
- Site can't connect to use.typekit.net
- Using web fonts with CodePen
- Browser and OS support
- Domains
- Using web fonts when developing locally
- Content security policy
- Printing web fonts
- Language support and OpenType features
- Font technology
Adding and removing fonts may fail due to an interruption in your network connection or a conflict with your locally installed fonts.
This page offers troubleshooting steps for font installation errors in Creative Cloud desktop.
Error message: "This error could have occurred due to a network interruption"
If a font fails to be added due to a network issue, an error message is displayed: “This error could have occurred due to a network interruption.”

Confirm your internet connection using these steps:
- Enable wifi on your device, or select a network to connect to
- Click the Retry icon next to the font name or font style
-
-
Quit Creative Cloud desktop.
-
Restart the computer.
-
Start Creative Cloud desktop.
-
Sign back in to Creative Cloud.
If these steps don't solve the problem, see our fonts troubleshooting guide or contact Adobe Customer Care for further help.
Error message: "A font with the same name is already installed"
If you try to add a font that is already installed on your computer, an error message is displayed: “A font with the same name is already installed.”

The version available through Adobe Fonts may be more recent than the one you have installed. To replace the version on your computer, first uninstall the local version using your font management software or the font tools built in to the operating system.
- On macOS, the default font manager is Font Book. Highlight the name of the font and then choose Edit > Disable [font] family.
- On Windows, open the Control Panel and click Fonts. Copy the font from the Fonts folder to another location to create a backup, and then delete it from the Fonts directory. Finally, sign out of your Windows account and then sign back in to update the system fonts menu.
Then click the Retry button to try addingthe fonts again.
Using InDesign to locate installed fonts
If you have InDesign installed, you can use it to find where the font is currently installed on your computer:
-
Open a new document in InDesign.
-
Choose Type > Font > [desired font], and then draw a text box.
-
Choose Type > Find Font.
-
In the Find Font window, click the font name in the Font Information list, and then click More Info. The Path line shows where the font file is installed on the computer.

Note
- Occasionally, two fonts share an internal PostScript name but have slightly different user-visible names. Look for a similar font if you don't have the exact one installed.
- If the font isn't listed in your font management software, search for the font name on your computer. It may be installed in a local folder, such as the InDesign fonts folder.