User Guide Cancel

Use grids, guides, and measurements in PDFs

  1. Acrobat User Guide
  2. Introduction to Acrobat
    1. Access Acrobat from desktop, mobile, web
    2. What's new in Acrobat
    3. Keyboard shortcuts
    4. System Requirements
  3. Workspace
    1. Workspace basics
    2. Opening and viewing PDFs
      1. Opening PDFs
      2. Navigating PDF pages
      3. Viewing PDF preferences
      4. Adjusting PDF views
      5. Enable thumbnail preview of PDFs
      6. Display PDF in browser
    3. Working with online storage accounts
      1. Access files from Box
      2. Access files from Dropbox
      3. Access files from OneDrive
      4. Access files from SharePoint
      5. Access files from Google Drive
    4. Acrobat and macOS
    5. Acrobat notifications
    6. Grids, guides, and measurements in PDFs
    7. Asian, Cyrillic, and right-to-left text in PDFs
  4. Creating PDFs
    1. Overview of PDF creation
    2. Create PDFs with Acrobat
    3. Create PDFs with PDFMaker
    4. Using the Adobe PDF printer
    5. Converting web pages to PDF
    6. Creating PDFs with Acrobat Distiller
    7. Adobe PDF conversion settings
    8. PDF fonts
  5. Editing PDFs
    1. Edit text in PDFs
    2. Edit images or objects in a PDF
    3. Rotate, move, delete, and renumber PDF pages
    4. Edit scanned PDFs
    5. Enhance document photos captured using a mobile camera
    6. Optimizing PDFs
    7. PDF properties and metadata
    8. Links and attachments in PDFs
    9. PDF layers
    10. Page thumbnails and bookmarks in PDFs
    11. Action Wizard (Acrobat Pro)
    12. PDFs converted to web pages
    13. Setting up PDFs for a presentation
    14. PDF articles
    15. Geospatial PDFs
    16. Applying actions and scripts to PDFs
    17. Change the default font for adding text
    18. Delete pages from a PDF
  6. Scan and OCR
    1. Scan documents to PDF
    2. Enhance document photos
    3. Troubleshoot scanner issues when scanning using Acrobat
  7. Forms
    1. PDF forms basics
    2. Create a form from scratch in Acrobat
    3. Create and distribute PDF forms
    4. Fill in PDF forms
    5. PDF form field properties
    6. Fill and sign PDF forms
    7. Setting action buttons in PDF forms
    8. Publishing interactive PDF web forms
    9. PDF form field basics
    10. PDF barcode form fields
    11. Collect and manage PDF form data
    12. About forms tracker
    13. PDF forms help
    14. Send PDF forms to recipients using email or an internal server
  8. Combining files
    1. Combine or merge files into single PDF
    2. Rotate, move, delete, and renumber PDF pages
    3. Add headers, footers, and Bates numbering to PDFs
    4. Crop PDF pages
    5. Add watermarks to PDFs
    6. Add backgrounds to PDFs
    7. Working with component files in a PDF Portfolio
    8. Publish and share PDF Portfolios
    9. Overview of PDF Portfolios
    10. Create and customize PDF Portfolios
  9. Sharing, reviews, and commenting
    1. Share and track PDFs online
    2. Mark up text with edits
    3. Preparing for a PDF review
    4. Starting a PDF review
    5. Hosting shared reviews on SharePoint or Office 365 sites
    6. Participating in a PDF review
    7. Add comments to PDFs
    8. Adding a stamp to a PDF
    9. Approval workflows
    10. Managing comments | view, reply, print
    11. Importing and exporting comments
    12. Tracking and managing PDF reviews
  10. Saving and exporting PDFs
    1. Saving PDFs
    2. Convert PDF to Word
    3. Convert PDF to JPG
    4. Convert or export PDFs to other file formats
    5. File format options for PDF export
    6. Reusing PDF content
  11. Security
    1. Enhanced security setting for PDFs
    2. Securing PDFs with passwords
    3. Manage Digital IDs
    4. Securing PDFs with certificates
    5. Opening secured PDFs
    6. Removing sensitive content from PDFs
    7. Setting up security policies for PDFs
    8. Choosing a security method for PDFs
    9. Security warnings when a PDF opens
    10. Securing PDFs with Adobe Experience Manager
    11. Protected View feature for PDFs
    12. Overview of security in Acrobat and PDFs
    13. JavaScripts in PDFs as a security risk
    14. Attachments as security risks
    15. Allow or block links in PDFs
  12. Electronic signatures
    1. Sign PDF documents
    2. Capture your signature on mobile and use it everywhere
    3. Send documents for e-signatures
    4. About certificate signatures
    5. Certificate-based signatures
    6. Validating digital signatures
    7. Adobe Approved Trust List
    8. Manage trusted identities
  13. Printing
    1. Basic PDF printing tasks
    2. Print Booklets and PDF Portfolios
    3. Advanced PDF print settings
    4. Print to PDF
    5. Printing color PDFs (Acrobat Pro)
    6. Printing PDFs in custom sizes
  14. Accessibility, tags, and reflow
    1. Create and verify PDF accessibility
    2. Accessibility features in PDFs
    3. Reading Order tool for PDFs
    4. Reading PDFs with reflow and accessibility features
    5. Edit document structure with the Content and Tags panels
    6. Creating accessible PDFs
  15. Searching and indexing
    1. Creating PDF indexes
    2. Searching PDFs
  16. Multimedia and 3D models
    1. Add audio, video, and interactive objects to PDFs
    2. Adding 3D models to PDFs (Acrobat Pro)
    3. Displaying 3D models in PDFs
    4. Interacting with 3D models
    5. Measuring 3D objects in PDFs
    6. Setting 3D views in PDFs
    7. Enable 3D content in PDF
    8. Adding multimedia to PDFs
    9. Commenting on 3D designs in PDFs
    10. Playing video, audio, and multimedia formats in PDFs
    11. Add comments to videos
  17. Print production tools (Acrobat Pro)
    1. Print production tools overview
    2. Printer marks and hairlines
    3. Previewing output
    4. Transparency flattening
    5. Color conversion and ink management
    6. Trapping color
  18. Preflight (Acrobat Pro)
    1. PDF/X-, PDF/A-, and PDF/E-compliant files
    2. Preflight profiles
    3. Advanced preflight inspections
    4. Preflight reports
    5. Viewing preflight results, objects, and resources
    6. Output intents in PDFs
    7. Correcting problem areas with the Preflight tool
    8. Automating document analysis with droplets or preflight actions
    9. Analyzing documents with the Preflight tool
    10. Additional checks in the Preflight tool
    11. Preflight libraries
    12. Preflight variables
  19. Color management
    1. Keeping colors consistent
    2. Color settings
    3. Color-managing documents
    4. Working with color profiles
    5. Understanding color management

Before you begin

We're rolling out a new, more intuitive product experience. If the screen shown here doesn’t match your product interface, select help for your current experience.

In the new experience, the tools appear on the left side of the screen.

User grids

You can use grids to accurately line up text and objects in a document. When you enable Grids, it displays a framework of intersecting lines that helps you properly align various elements.

The Snap to Grid option aligns an object with the nearest grid line when you move the object.

To view or hide the grid, select  Menu > View > Show/Hide > Rulers & grids > Grid. A check mark appears next to the command name when the grid is displayed.

Use grids, guides, and measurements in Adobe Acrobat Pdfs.

To turn the Snap to Grid option on or off, select  > View > Show/Hide > Rulers & grids > Snap To grid

To change the grid appearance

  1. Select  Menu > Preferences.

    It opens the Preferences dialog.

  2. From the left panel, select Units & guides.

    Change grid settings.

  3. Change grid settings as follows:

    • To change the spacing between grid lines, enter a value for Width between lines and Height between lines.

    • To change the origin of the grid, enter a value for Grid offset from left edge and Grid offset from top edge.

    • To change the number of subdivisions within each grid square, enter a value for Subdivisions. Subdivision lines are lighter than grid lines.

    • To change the color of the grid lines, select Grid line color square and choose a new color from the options.

Use rulers and guides

Horizontal and vertical rulers allow you to check the size of objects in your document. You can also create guides to easily line up objects, such as form fields. You can change the unit of measurement and color used in the ruler.

  • To view rulers, select  Menu > View > Show/Hide > Rulers & grids > Rulers.
  • To view or hide guides, select  Menu > View > Show/Hide > Rulers & grids > Guides.

To use rulers and guides

  1. To create a horizontal guide, drag down from the horizontal ruler or double-click a location on the vertical ruler.

    To create a vertical guide, drag right from the vertical ruler or double-click on a location on the horizontal ruler.

  2. To move a guide, click the guide to select it, and then drag it to a new location.

  3. To delete a guide, click the guide to select it and press the Delete key.

  4. To delete all guides, right-click in the ruler area and select Clear All Guides or Clear Guides On Page.

  5. To change guide colors, go to  Menu > Preferences, and then from the left panel, select Units & guides. Then, select the Guide color square and select a new color from the options.

Measure the height, width, or area of objects

You can use the 'Measure objects' tools to measure distances and areas of objects in PDF documents. The measuring tools are useful for showing the distances and areas associated with objects in a form of computer-aided design (CAD) drawings. You can also use these tools to measure certain areas of a document before sending it to a professional printer. The measuring tools are available to Acrobat Reader users only if the PDF creator enables measuring functionality.

When you use a measuring tool, the Measurement Info panel shows information about the measurement, such as current measurement, delta values, and scale ratio. Acrobat inserts comments with the values calculated for distance, perimeter, or area.

Measuring tools in Acrobat
Measuring tools

A. Measuring toolbar B. Object being measured C. Measurement Info panel 

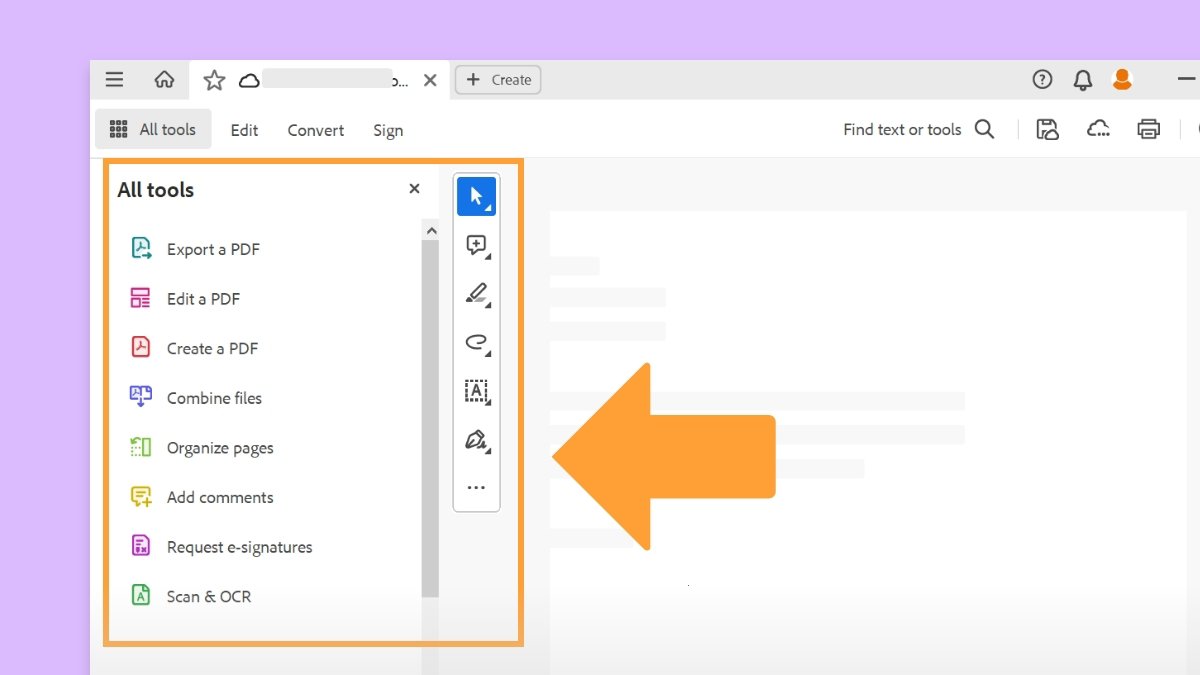
  1. From the All tools menu, select Measure object.

    It displays the Measure object toolset on the left panel.

  2. From the Measure object menu on the left, select Measuring tool.

    It displays the Measuring toolbar and the Measurement Info panel.  

  3. To measure areas of your PDF document, select any of the following measurement types:
    • Select the Distance tool to measure the distance between two points. Click the first point, move the pointer to the second point, and click again.

    • Select the Perimeter tool to measure a set of distances between multiple points. Click each point that you want to measure. Then, double-click the last point. 

    • Select the Area tool to measure the area within the line segments that you draw. Click each point that you want to measure. After you’ve clicked at least two points, click the first point to complete the area measurement. 

  4. While measuring objects, do any of the following:

    • To snap the measurement to the end of a line, select Snap to Paths 

    • To snap the measurement to the endpoint of a line, select Snap to Endpoints 

    • To snap the measurement to the midpoint of a line, select Snap to Midpoints 

    • To snap the measurement to the intersection of multiple lines, select Snap to Intersections 

    • To constrain the measurement lines to increments of 45º, hold down the Shift key.

    • To discontinue a measurement, right-click and choose Cancel Measurement.

    • To delete a measurement markup, click it with the Measurement Tool and press the Delete key.

Set Measuring tool options

To set measuring tool options, select the tool, then right-click anywhere on the PDF. It displays the following options:

  • Change Scale Ratio and Precision  - To change the scaling ratio (such as 3:2) and unit of measurement on the drawing areas.
  • Change Markup Label - To add or change the text that appears with the measurement.
  • Disable/Enable Measurement Markup - When enabled, the measurement lines you draw are added to the PDF. When disabled, the measurement lines disappear when you measure another object or select another tool.
  • Turn Ortho On/Off - When enabled, measurement lines are orthographic only.
  • Show/Hide Rulers - Show or hide vertical and horizontal rulers on the page. 
  • Snap to Page Content/Don’t Snap to Page Content - Turn all Snap Enables on or off.
  • Export Measurement Markup to Excel - Save the information for all the measurements in your PDF to a CSV file.
  • Preferences - Open the Measurement (2D) preferences.

Set Measuring preferences

You can set the 2D Measuring preferences to determine how 2D data is measured. To do so, go to  > Preferences and then select Measuring (2D) from the left panel and then configure the following options:

  • Use Scales And Units From Document (When Present) - When enabled, measurements based on the units generated from the original document, if present, are used. Deselect this option to specify the units of measurement manually.
  • Use Orthographic Lines - When enabled, measurement lines are orthographic only.
  • Measuring Line Color - Specifies the color or the line that appears while drawing.
  • Enable Measurement Markup - When enabled, the measurement lines you draw are added to the PDF. When disabled, the measurement lines disappear when you measure another object or select another tool. You can use the default measurement labels or specify your own label.
  • Use Default Leader Length (Distance Tool only) - When deselected, each time you draw a distance measurement, you move the mouse to determine the leader length.
  • Default Line Start - Specifies the appearance of the starting line in distance measurements.
  • Default Line End - Specifies the appearance of the ending line in distance measurements.
  • Caption Style (Distance Tool only) - Specifies whether the distance measurement caption is Inside or on Top of the measurement line.
  • Default Leader Length (Distance Tool only) - Specifies the length of the line leader that appears on one side of the measurement points.
  • Default Leader Extension Above Line (Distance Tool only) - Specifies the length of the leader extension that appears above the measurement line.
  • Default Leader Offset From Line Points (Distance Tool only) - Specifies the amount of blank space that appears between the measurement points and the leader.
  • 2D Snap Settings - Specify snap behavior. The sensitivity indicates how close the pointer must be to the item being snapped. Snap Hint Color specifies the color of the snap line that appears when you hold the pointer over the object.
Note:

In Acrobat Reader, Measuring preferences apply to PDFs that have commenting enabled.

View cursor coordinates

The Cursor coordinates show the coordinate position of the pointer within the document pane. The position numbering begins in the upper-left corner of the document. Cursor coordinates also shows the width and height of a selected object as you resize it.

To view x and y coordinates:

  1. Select  Menu > View > Show/Hide > Cursor coordinates.

  2. Move the pointer to view x and y coordinates.

To change the cursor coordinates measurement units:

  1. Select  Menu > Preferences

  2. From the left panel in the Preferences dialog, select Unit & Guides.

  3. Select the Page & ruler units drop down and then choose a different unit of measurement.

 Adobe

Get help faster and easier

New user?

Adobe MAX 2024

Adobe MAX
The Creativity Conference

Oct 14–16 Miami Beach and online

Adobe MAX

The Creativity Conference

Oct 14–16 Miami Beach and online

Adobe MAX 2024

Adobe MAX
The Creativity Conference

Oct 14–16 Miami Beach and online

Adobe MAX

The Creativity Conference

Oct 14–16 Miami Beach and online