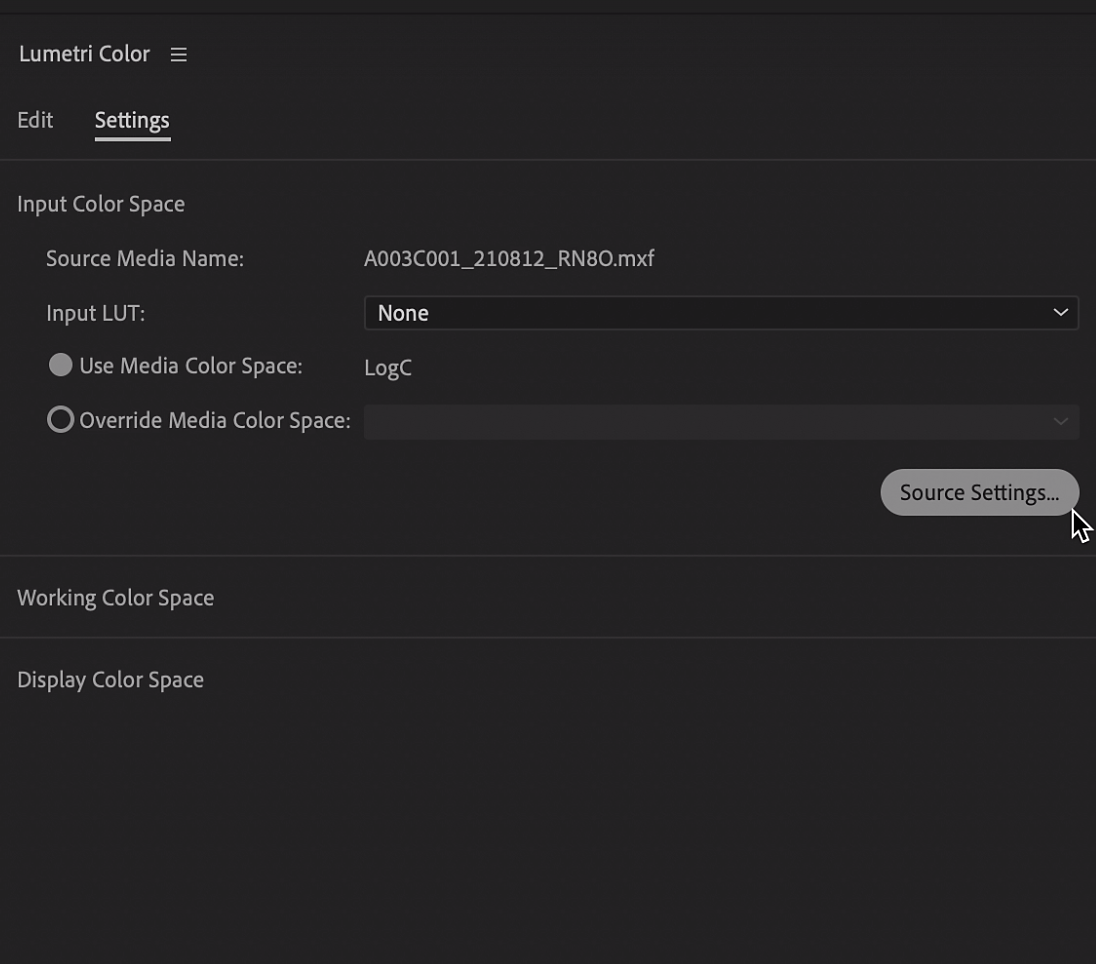
Additionally, you can adjust the RAW controls for exposure, white balance, and tint in the Source Settings on your clip. You can choose these options by selecting a clip, navigating to the Effect Controls panel, and selecting Source.
Learn about new features and enhancements in the August 2023 (version 23.6) release of Premiere Pro.
Now in Premiere Pro, optimize your workflow with ARRIRAW, which is more flexible than ever with improved color management and new settings to make your footage look great in every sequence. Along with previously improved format support and GPU acceleration, ARRIRAW plays back in real-time and looks incredible, so you can focus on editing and grading.
Learn about best practices for updating Premiere Pro.
With improved color management and new options for ARRIRAW, your clips will look great no matter your workflow. You can continue working with ARRIRAW as you always have or access new options for maximum flexibility.
You can now access color management settings for ARRIRAW by navigating to Interpret Footage > Color. In the Color Settings panel, you can use the automatically detected Log C Media Color Space, override the color space, or apply an Input LUT.
No matter your selected Media Color Space, Premiere Pro will make sure your footage is converted to match your sequence’s color space so your clips look great.


In case you missed it
These latest improvements are part of the work we’ve been doing all year long to make ARRIRAW playback blazing fast. Beginning in Premiere Pro 23.1, GPU de-Bayering provides incredible real-time playback of RAW footage directly in your sequence– no transcoding required. Exporting ARRIRAW is up to 15x faster, so you can output files in a fraction of the time.
Plus, we expanded support for the ARRI ALEXA 35 camera along with metadata for anamorphic lenses, so aspect ratios are displayed as intended.
Easier and more consistent color
For the past year, we’ve been making color in Premiere Pro faster, easier, and more consistent. In Premiere Pro 23.3, we introduced Automatic Tone Mapping, which makes it easier to work with HDR media like iPhone HLG and 10-bit log footage in the same SDR timeline.
Mix and match footage from different cameras, and start editing and color grading images that look great– no extra steps.
Automatic Tone Mapping supports HDR video, like iPhone HLG, as well as other HLG and PQ formats. It also supports log video, including Sony S-Log, Canon C-Log, and Panasonic V-Log.
Auto Tone Mapping is on by default. You can turn it off or on in your sequence settings and use a LUT-based workflow.
Additional updates
Auto Detect Log Video Color Space setting moved
The Auto Detect Log Video Color Space setting has been moved from Preferences to Project Settings, which can be found under File > Project Settings > General. Since this setting is now attached to the project, it’s easier to switch between projects that may or may not need to utilize this setting.
Get help and provide feedback quicker
When you select Help or Provide Feedback inside Premiere Pro, you’ll automatically log in to the Adobe Support Community Forums.
Name Overlay export effect changed to Text Overlay
We changed the name of the export effect from Name Overlay to Text Overlay to indicate that options other than filename are available.
Fixed issues
We have been working hard at making Premiere Pro even better. Here are the important fixes, performance improvements, and more.