See how Tsering Norbu captures light and color from the things he sees around him, saves the results as a Look with Adobe Capture, and applies the Look to clips in After Effects, Premiere Pro, and Premiere Clip.
Capture light and color from the things you see around you and save the results as a Look with Adobe Capture on your iPhone, iPad, or Android device. Then apply the Look to still images and videos in After Effects, Premiere Pro, and Premiere Clip.
What you'll need
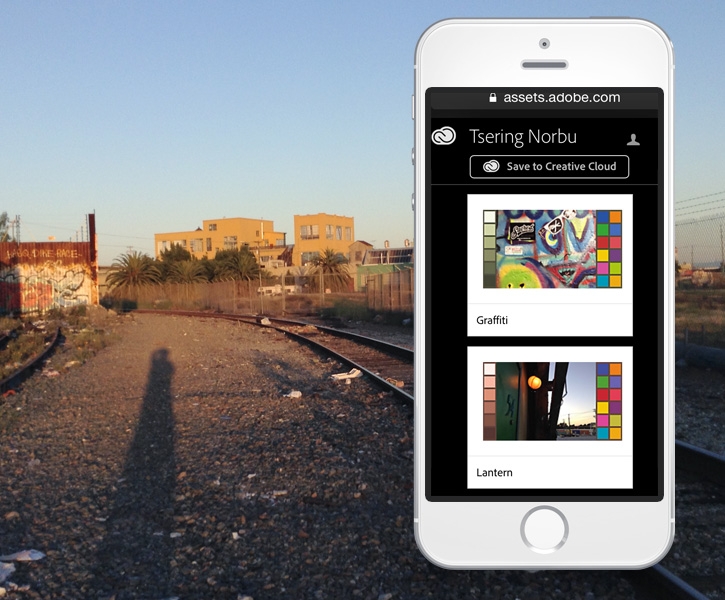
(Optional) Copy Tsering Norbu's library to your Creative Cloud Files
If you want to re-create Tsering Norbu's Look for video, open Tsering Norbu's assets. Click Save to Creative Cloud to create a copy of the files in your own account.
Once in your Creative Cloud Files, you can use these assets to create Looks with Capture. Then use your new custom Looks in After Effects, Premiere Pro or Premiere Clip.
Note: You need to be signed into your Creative Cloud account to save the library.

Capture color and light
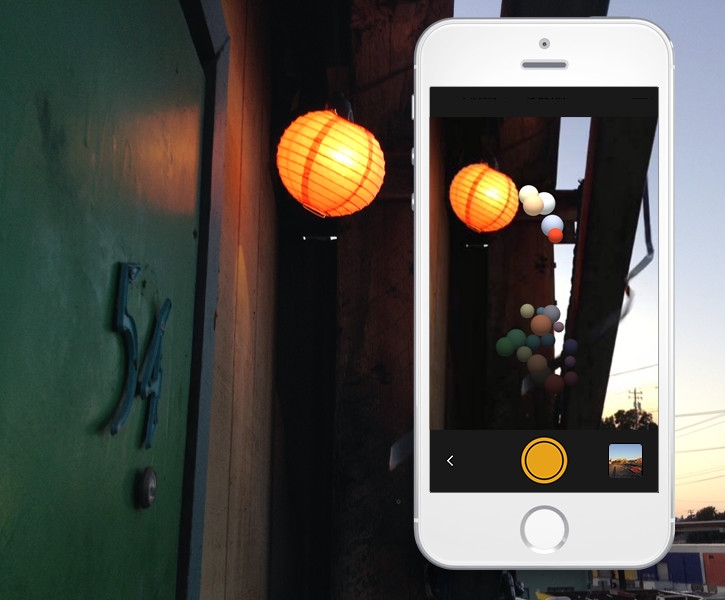
Launch Capture, tap Looks, then the + icon and point your device camera at an interesting scene or object. A cluster of 3D bubbles appears over your image showing the distribution of color and light you'll be capturing in the new Look. The larger the bubble, the more impact that color will have on your Look.
When you're ready, click the Capture button.
Note: The screenshots in this tutorial show Adobe Capture on an iPhone. The user interface may vary between iPhone, iPad, and Android devices.

Optional: If you want to re-create Tsering's Look, tap the icon to the right of the Capture button. Tap the Creative Cloud option and choose the Files drop down.
Then select the Tsering Norbu files you copied in Step 1. Choose tsering-lantern.jpg and tap Open and tap the Capture button.
Note: If you have setup an Adobe Stock account, Adobe Stock will appear as an additional Capture From option.


Pick a dominant color for your Look
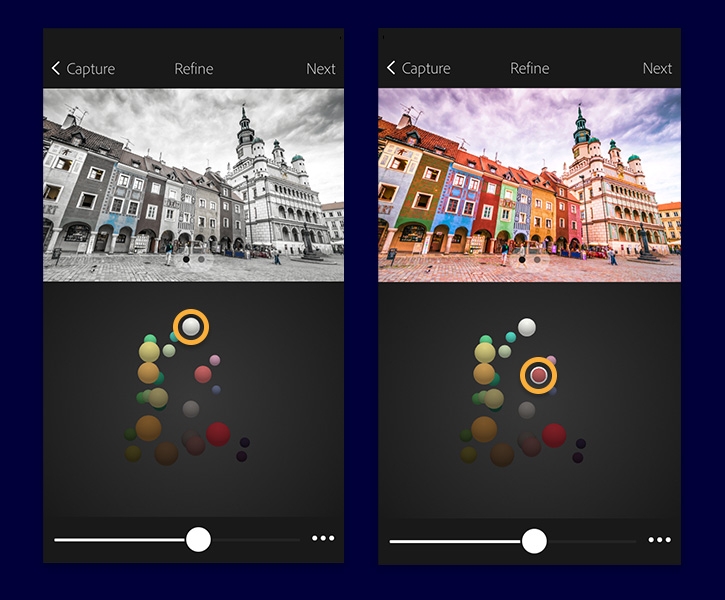
Your new Look is applied to a sample image in the top half of the screen.
Each bubble represents an individual saturation adjustment that will be applied to your video clips. Capture defaults to a dominant color to determine a midtone shift for the Look.
Tap on any of the bubbles to change the midtone of the Look.

Adjust the intensity of your Look
Swipe to the left on the sample image to see how your new Look impacts a sample video.
Use the slider to adjust the intensity of your Look. Finally, tap Next.
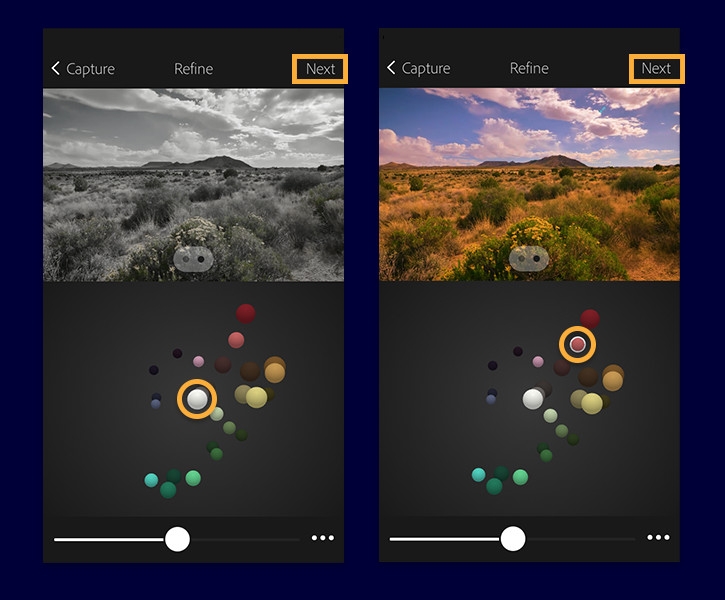

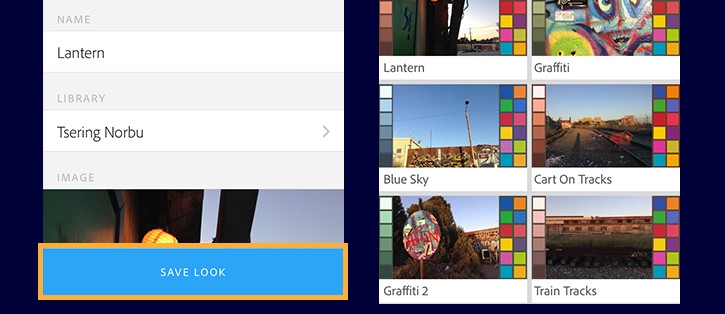
Give your Look a name, choose the appropriate Creative Cloud Library and tap Save Look. The new Look is saved to the selected Creative Cloud Library.

Create a new project in Premiere Pro
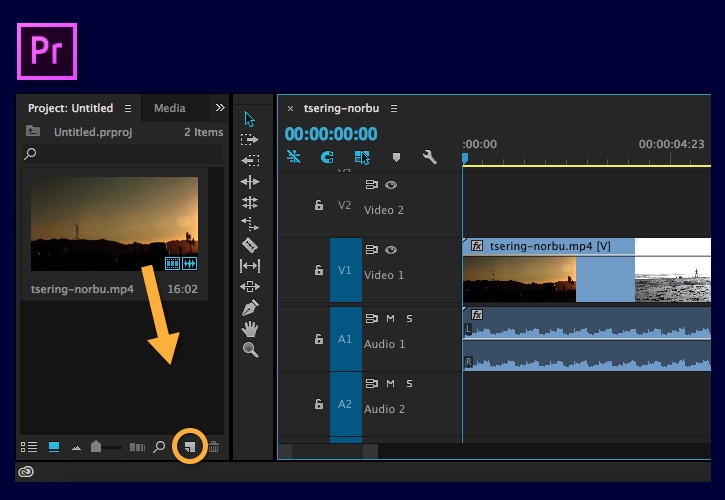
Download the tsering-norbu.mp4 sample video clip from the Tsering Norbu files you copied in Step 1 and save it to your computer. Create a new project and import the clip. Then, drag the clip onto the new item icon to create a new sequence.

Apply your Look
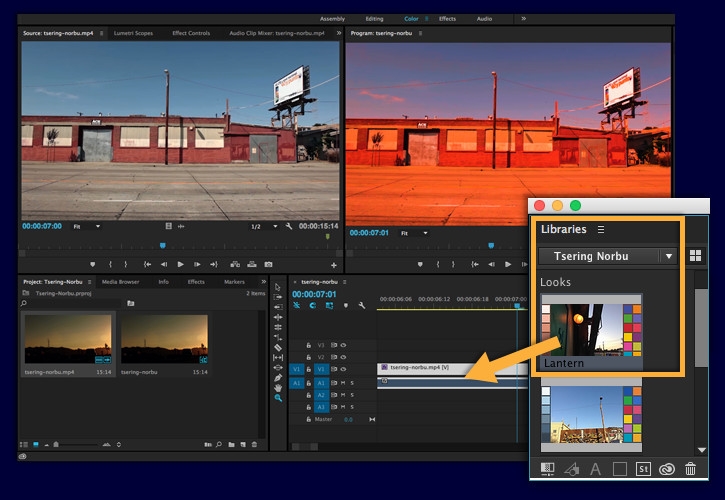
Open the Libraries panel (Windows > Libraries) and drag your new Look onto the sequence.
The video segment shown here is at 00:00:07.

Refine the colors in your clip
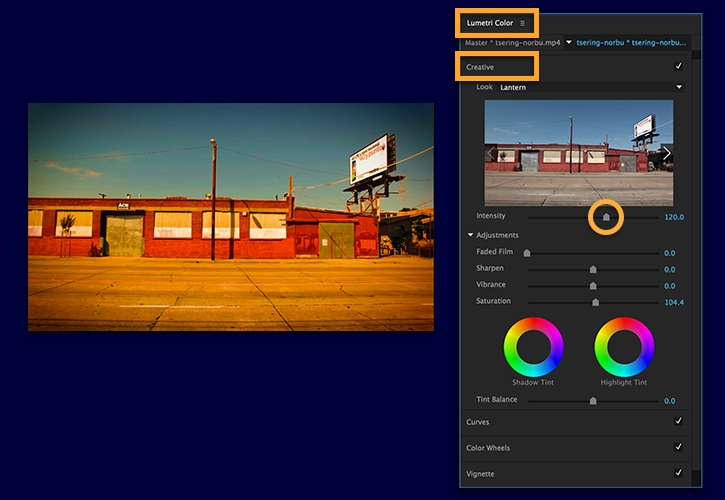
Click the Color workspace to open the Lumetri Color panel. Expand the Creative section. The Look you applied from your library is selected.
Adjust the Intesity, Faded Film, Sharpen, Vibrance, and Saturation sliders to refine the Look.
Tip: You can add a vignette to create a little drama. Open the Vignette section and set the Amount to -1.8.

Reuse Looks
Your new Look is stored in your Creative Cloud Libraries so you can apply it to other clips in your project or any other projects you're working on.


