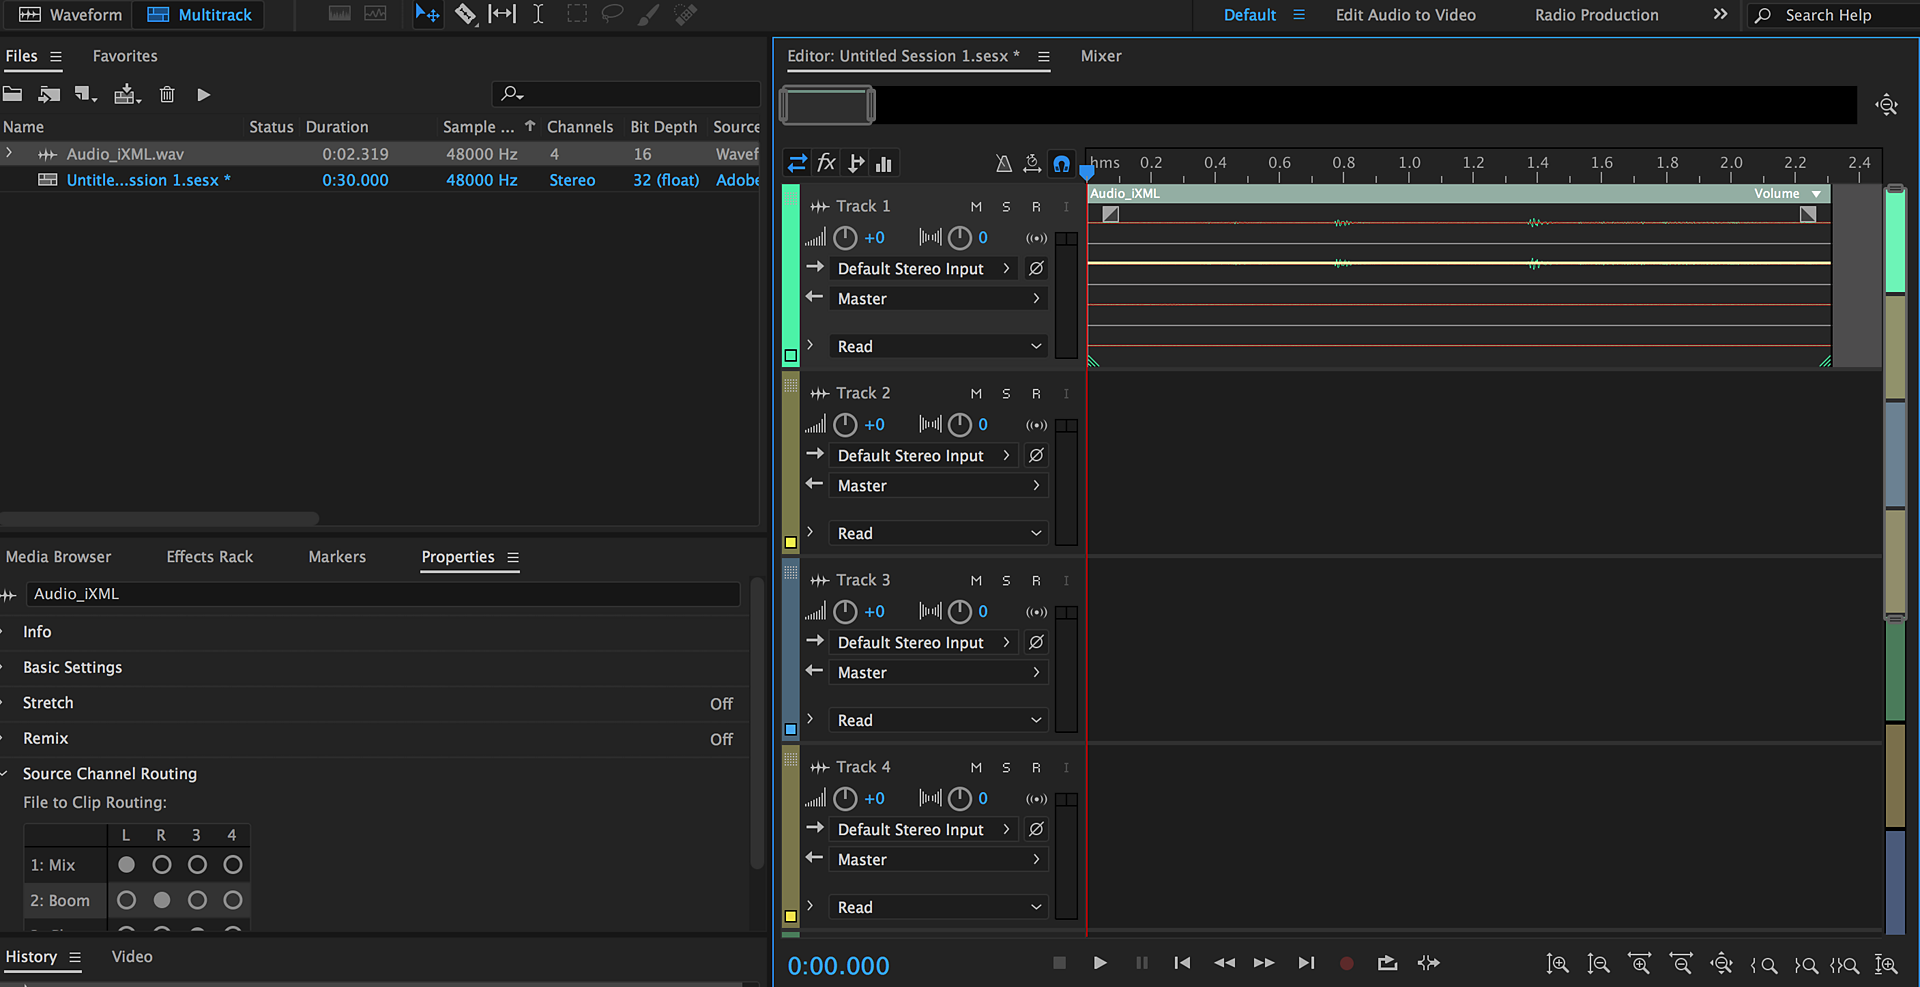
Select File > Open. The opened file appears in the Files Panel.
- Audition User Guide
- Introduction
- Workspace and setup
- Digital audio fundamentals
- Importing, recording, and playing
- Multichannel audio workflow
- Create, open, or import files in Adobe Audition
- Importing with the Files panel
- Extracting audio from CDs
- Supported import formats
- Navigate time and playing audio in Adobe Audition
- Recording audio
- Monitoring recording and playback levels
- Remove silences from your audio recordings
- Editing audio files
- Edit, repair, and improve audio using Essential Sound panel
- Session Markers and Clip Marker for Multitrack
- Generating text-to-speech
- Matching loudness across multiple audio files
- Displaying audio in the Waveform Editor
- Selecting audio
- How to copy, cut, paste, and delete audio in Audition
- Visually fading and changing amplitude
- Working with markers
- Inverting, reversing, and silencing audio
- How to automate common tasks in Audition
- Analyze phase, frequency, and amplitude with Audition
- Frequency Band Splitter
- Undo, redo, and history
- Converting sample types
- Creating podcasts using Audition
- Applying effects
- Enabling CEP extensions
- Effects controls
- Applying effects in the Waveform Editor
- Applying effects in the Multitrack Editor
- Adding third party plugins
- Notch Filter effect
- Fade and Gain Envelope effects (Waveform Editor only)
- Manual Pitch Correction effect (Waveform Editor only)
- Graphic Phase Shifter effect
- Doppler Shifter effect (Waveform Editor only)
- Effects reference
- Apply amplitude and compression effects to audio
- Delay and echo effects
- Diagnostics effects (Waveform Editor only) for Audition
- Filter and equalizer effects
- Modulation effects
- Reduce noise and restore audio
- Reverb effects
- How to use special effects with Audition
- Stereo imagery effects
- Time and pitch manipulation effects
- Generate tones and noise
- Mixing multitrack sessions
- Video and surround sound
- Keyboard shortcuts
- Saving and exporting
Multichannel Audio Workflow
You can use Adobe Audition to easily work with multichannel audio up to 32 channels. In the Waveform Editor, you can individually edit and process specific audio channels. You can also work with multichannel files in the Multitrack Editor as a single clip or with the channels split across multiple clips.
Waveform Editor
If you have multichannel audio or video files, you can edit each audio channel separately in the Waveform Editor by following these steps.
-
-
Expand the drop-down to see each of the channels within the file.
Channel list Channel list -
To disable other channels, double-click on an individual channel.
NoteChannel names from iXML metadata would be shown if available.
Enable specific channels Enable specific channels Waveform editor Waveform editor
Multitrack Editor
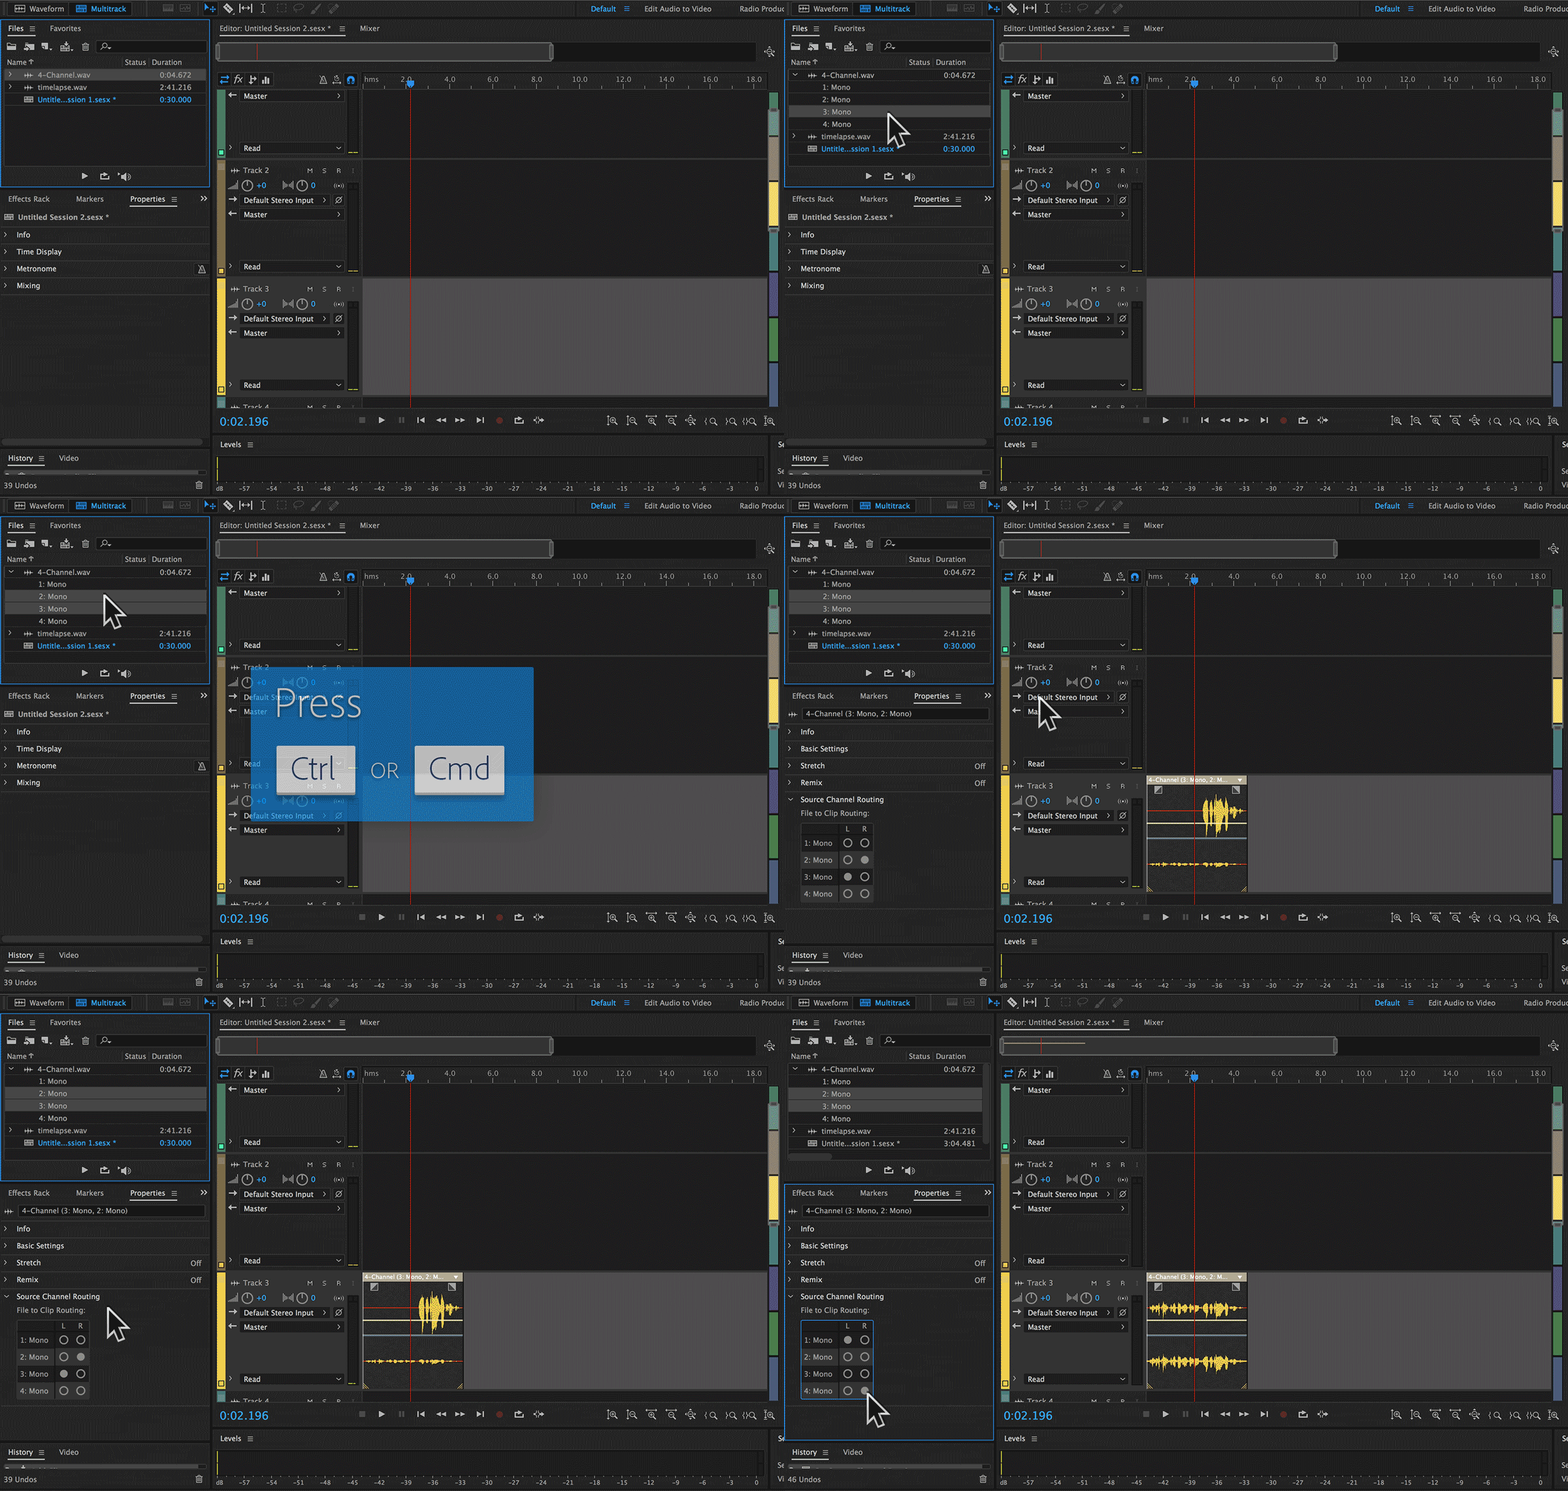
To use multichannel audio or video files within a session, you can bring each of the channels of the file into the Multitrack Editor as one single multichannel clip (default behavior). You can also automatically split each channel or groups of channels into different clips by holding Alt (Windows) or Option (Mac) while dragging.


- Select and drag the channels you want to import to the Multitrack panel. You can also select multiple channels and drag them to the same track or different tracks.
- To add channels to different tracks, hold Alt (Windows) or Option (MAC).


To channelize the clip according to the channelization of the destination track, use the double-modifier behavior using Command+Option (MAC) and Control+Alt (Windows).
Modify the channels in a specific clip
To modify the channels you have added to specific clip, follow these steps.
You cannot modify the number of channels in a clip you have added to a track. You can, however, replace one channel with another.
-
Select the clip you want to edit.
-
In the Properties panel, select Source Channel Routing.
-
Use radio buttons to modify the source channel routing of the selected clip

Specific Channel Routing 
Specific Channel Routing
Effects channelization
While working with effects, you can assign different in/out channels, and query for the different channel configurations they support. Easily route specific audio clip or track channels to mono, stereo, or surround/immersive effects, and quickly see at-a-glance existing routing configurations.
-
To modify effect layout, open an effect from the Effects Rack or Effects menu. The Effects window opens. Now, select the Channel map editor.
Channel map editor Channel map editor -
Choose Request Layout. The Request Effect Layout window opens.
Request layout Request layout -
The new Request Effect layout window allows you to choose the input type. Choose from Mono, Stereo, and 5.1 from the drop-down.
Choose input from drop-drown Choose input from drop-drown NoteThe output is always follows the input and cannot be changed.
-
For custom channel configurations, choose Custom and assign or edit Channel Label
Custom audio channel layout Custom audio channel layout -
Use the plus and minus icons shown below to add and remove channels.
Add or remove channels Add or remove channels -
You can now modify the effect input and effect output for all individual channels.
Modify effect input and effect output Modify effect input and effect output


