-
Hold the Control (Windows) or Command (Macintosh) key down and drag the Move Playhead icon anywhere in the Timeline.
The Move Playhead icon is the arrow icon on the right side of the playhead controller.

Note:
Make sure a green Plus (+) icon appears on the left side of the playhead controller before dropping the playhead.
When working with multiple playheads, select a master playhead to make grading and other adjustments.
- Click the Move Playhead icon and drag the playhead off the Timeline.
Note: Make sure the playhead is not the master one. If the number on the left of the playhead controller is orange, then it's the master playhead. Select another master playhead by clicking the playhead's number, and then delete the inactive playhead.
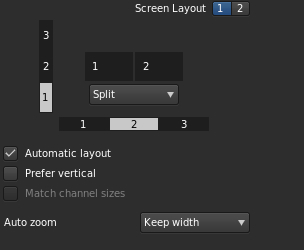
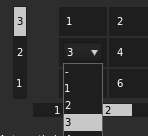
Arrange the screen layout by clicking the View button in the Timeline tab and dragging the icons in the Screen Layout panel.

Up to nine playheads can be viewed at once. When using more than nine playheads, click a number in one of the channels and select a desired playhead to view.

| Result | Windows | Mac OS |
|---|---|---|
| Change the current split-screen mode | F9 | Cmd+F9 |
| Change the horizontal or vertical orientation of split-screen mode. | F10 | Cmd+F10 |
| Flip the channel position of the split-screen mode. | F11 | Cmd+F11 |
Note:
The default F key assignments must be disabled on Mac OS systems. In System Preferences, select Keyboard, then the Keyboard Shortcuts panel. Select Expose & Spaces and deselect the default key assignments.

