
Browsers
Last updated on
Jan 3, 2023
Overview
The Adobe Acrobat Sign for Salesforce application provides easy signature workflows for easy implementation and adoption by individuals and organizations. You can use the application to:
- Get legitimate Adobe eSignatures or approvals for any document directly from Salesforce.
- Access real-time contract history and view saved contracts from any object.
- Track deals in real time across your organization.
- Get updates with Chatter when agreements are viewed, signed, canceled, or declined.
- e-Sign in over 20 languages and support fax-back service in 50+ locales worldwide.
- Automatically merge Salesforce data into documents before sending for signature.
- Automatically generate documents using Salesforce data and send them as Agreement attachments using Document Builder.
- Map signers' data back to Salesforce objects.
- Create reusable agreement templates for sending options and enable one-click 'Send for Signature’ buttons to send custom agreements from any Salesforce object.
- Access native integrations with Conga Composer, Apttus, Selectica, Drawloop, Zuora, Emptoris, and more.
Adobe Acrobat Sign for Salesforce (Classic profile): User Guide provides instructions on how to:
Note
Using Salesforce Lightning profile? Refer to Adobe Acrobat Sign for Salesforce (Lightning profile): User Guide.
To customize the processes for further automation of the application, refer to the Acrobat Sign for Salesforce: Customization Guide. For assistance, you may contact your Salesforce Administrator.
To learn how to automatically generate documents using Salesforce data, refer to Acrobat Sign Document Builder for Salesforce: User Guide.
Supported Browsers
|
|
Supported |
Limitations |
|---|---|---|
|
Microsoft® Edge |
Yes |
Yes |
|
Google Chrome™ |
Yes |
No |
|
Mozilla® Firefox® |
Yes |
No |
|
Apple Safari® |
Yes |
No |
Known Issues with Microsoft® Edge:
- When the Agreement page loads, an error may appear (similar to the below): "This page has an error. You might need to refresh it. Action failed"
- When you send an agreement and close the post-send "success" tab, the Agreement page does not refresh automatically to reflect the agreement status. It may give this error: "No new window detected. Please check your browser popup blocker settings before trying another action. This page can now be reloaded."
You can access the agreement page from the Agreement List. - When you select the Remind or Update actions on agreements that are in transit, the agreement page does not automatically refresh, and this error may appear in the footer: "This page has an error. You might just need to refresh it."
You can access the agreement page from the Agreement List.
Known Issues with the Acrobat Sign for Salesforce application:
If you've enabled account sharing on your Acrobat Sign account, the users that are not included in the agreement cannot view the agreement in the Salesforce environment, unless:
- The agreement was created from a shared library template in the Adobe Acrobat Sign library.
- The library template is shared in a manner that includes the viewer via: (a) Shared for all users in the account, or (b) Shared at the group level, where the sender and viewer are in the same group.
Note: You can use Adobe Acrobat Sign to view the agreement.
“Agreements” are the objects that Acrobat Sign installs into Salesforce, and are the vehicle for delivering your document to the recipients.
“Recipient” is the generic term used for any signer, approver, or delegator of an Agreement (basically anyone you send the document to for some action).
Agreements can be created using one of the following ways, depending on how your Administrator has deployed the package:
- The Agreements tab
- Salesforce Objects (Contact, Lead, Opportunity, Account, and more)
- Chatter


Note
Previous agreements created from a Salesforce object (like this Contact) are listed in the Agreements list. A great way to find an agreement is to look at the Salesforce object (Contact, Account, and more) that the agreement is related to.
Create Agreements from Salesforce Chatter
To create agreements from Salesforce Chatter, your Administrator must enable the Adobe Acrobat Sign Chatter Settings. Once done, the Adobe Acrobat Sign object can be embedded in the home page and other Salesforce objects.
To send agreements from Chatter:
- Open Salesforce Chatter and expand the feed.
- From the Chatter menu on top, select Adobe Acrobat Sign.
- In the section that opens, provide the agreement details.
- To send the agreement, select Send.

Note
When using Chatter to send from an object such as a Contact, that Contact is inserted as the first recipient.
Once you open the agreement in draft mode, you must configure it to define the recipients, nature of the agreement, documents to be sent for signature, and other settings, if necessary.

A. Signing order of the recipient B. Role of the recipient C. Recipient type D. Recipient Search field E. Private message tool
-
Under Recipients, configure the following fields:
- A denotes the signing order of the recipient. Once you add all the recipients, you can drag a row up or down to change the signing order.
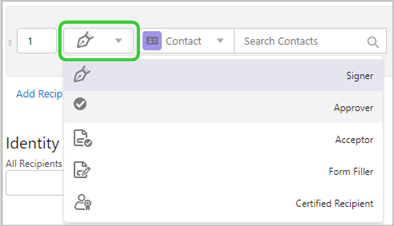
- B denotes the role of the recipients. Open the drop-down menu and select a desired role for the recipient:
- Signers (default)– Recipients who need to apply at least one legal signature.
- Approvers– Recipients who must review and approve the document but are not required to legally sign.
- Acceptor– Recipients who need to acknowledge the agreement without formally signing it.
- Form Filler–Recipients who need to fill in form content during the signature process.
- Certified Recipient– Recipients who don't need to sign or fill form fields, but may be asked to either delegate, decline, or acknowledge the agreement.
- Delegators– Recipients who need to delegate their role to another party. There is a delegator option for each of the above roles (when enabled by the SFDC admin).
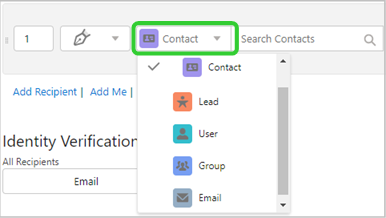
- C denotes the recipient type. Open the drop-down menu and select one of the options:
- Contact– Any Contact in Salesforce.
- Lead– Any Lead in Salesforce.
- User– Any User of Salesforce within your Salesforce Org.
- Group– A set of users in a Salesforce Role that needs to sign or approve. Admins need to define your available Groups.
- Email– Recipients that are not currently listed in Salesforce as one of the other object types.
- D denotes the recipient search field. Once you select a recipient type, enter the relevant name or identifier to search for the recipient or enter the details.
- E denotes the tool for a private message for the recipient. Select
 for any recipient and then in the dialog that appears, write a message and select Save.
It delivers a private message only to the marked recipient. If nothing is added, the recipient receives the default agreement message.
- To delete a recipient entry, select X for the recipient that you want to remove.
- To add more recipients, select Add Recipient and fill in the required details in the row that appears.
- To add yourself as a recipient, select Add Me. It adds a row with your details.
- To send a copy of the agreement to other people, select Add CC, and then in the CC field that appears, add the desired email addresses.
-
Select the Identity Verification drop-down menu and select one of the below verification types that you want to include for all the recipients:
- Email (default) – Authentication is based on access to the email box
- Password – A sender-generated alpha/numeric password that must be separately communicated to the recipients.
- Social – Authenticate to a third-party social network like Facebook or LinkedIn.
- KBA (USA only) – Knowledge-Based Authentication requires the recipient to enter their Social Security Number and then answer a few non-trivial questions based on the public database.
- Phone – Requires the sender to provide the recipient’s phone number so an SMS code can be sent when their signature is needed.
- Government ID - Requires the recipient to provide an image of a passport, a government ID, or a driver's license. The government ID or driver's license also prompts the user to provide a "selfie" to match against the ID's image.
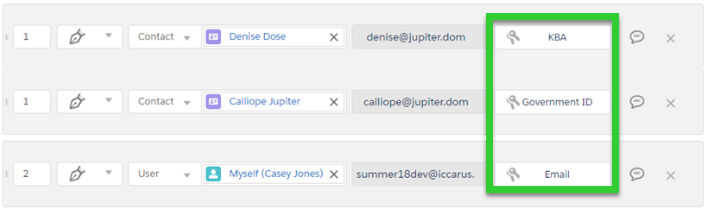
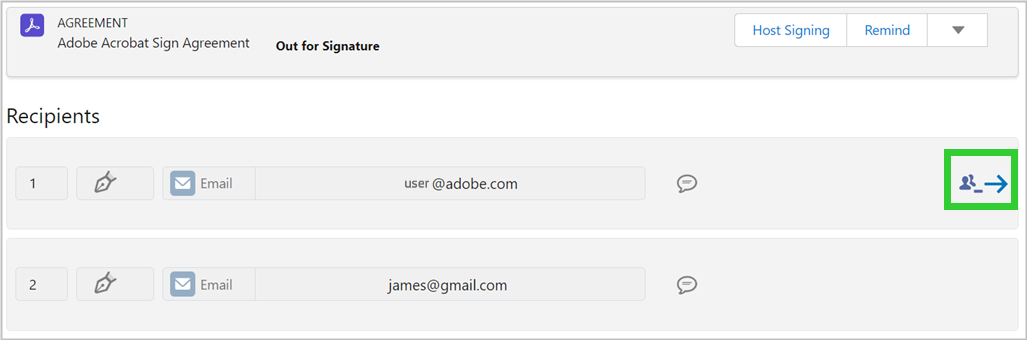
NoteYou can configure Adobe Acrobat Sign to enable a unique verification method for each recipient. Once this option is enabled, it displays the verification option for each recipient, as shown below.
-
To include other workflow options, configure the following fields under Options:
- Password protect the signed document – Select the checkbox and then enter a password in the fields that appear. The given password is required to view the final PDF.
- Completion Deadline – Select the calendar icon and set a date when the document should expire (auto-cancel).
- Create Reminders – Choose a reminder frequency option from the drop-down menu to send email reminders to the recipients. It sends a reminder email only to the current recipients.
- Recipient Language – Open the drop-down menu and select a language for the email template and the on-screen instructions for the agreement.
- Signature Type – Select one of the following options:
- E-signature to get electronic signatures.
- Written Signature to send the agreement with a cover page and instructions to print, sign, and upload the agreement back to Adobe Acrobat Sign.
-
To include one or more files that you want to get signed:
- Select Upload Files. Or, drag and drop the file to the field under Files.
- From the Add Files dialog that opens, select a file that you need to get signed. You can attach one or more files from the following source locations:
- Salesforce CRM & Files
- Salesforce Documents
- Acrobat Sign Library (must be enabled by the SFDC Admin)
- From your computer (Salesforce limits upload file size to ~700KB)
- Select Add Files.
Note: You can add multiple documents to the agreement. Agreements with multiple documents present the documents to the recipients in the order you list them. To re-order the stack, drag the selection up or down.
- Select Upload Files. Or, drag and drop the file to the field under Files.
-
In the agreement preview window that opens:
- Under Recipient, select a recipient name and then drag and drop the required signature field on the agreement.
- Similarly, add signature fields for each recipient.
- Optionally, add Signer info fields, data fields, or other fields, as required.
- Review the agreement details.
- Once done, select Send to send the agreement to the recipients.


Find and manage agreements
Acrobat Sign for Salesforce integration associates your agreements to a Salesforce object in a meaningful way. For example, when you send an NDA to a contact, then the agreement is listed on that Contacts page. Similarly, if you send an agreement to a recipient from an Opportunity object, both Recipient and Opportunity objects will show the agreement in their lists.
In case an agreement is orphaned in the system, it's listed under the Agreements tab. The list under Agreements displays the agreements that you are authorized to view.
-
From the list of agreements, select the agreement that you want to manage and take one of the below-listed actions from the top action bar and the drop-down menu:
- To send a reminder to the recipients, select Remind.
It automatically sends a reminder email to the recipients. - To view the agreement details, select View.
- To update the agreement, select Update.
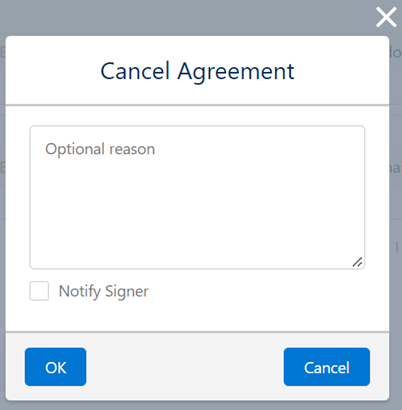
- To cancel the agreement, select Cancel Agreement. In the dialog that opens, you may provide a reason for canceling the agreement and choose to notify the signers. Next, select OK.
It terminates the agreement and sets it to a Canceled status.
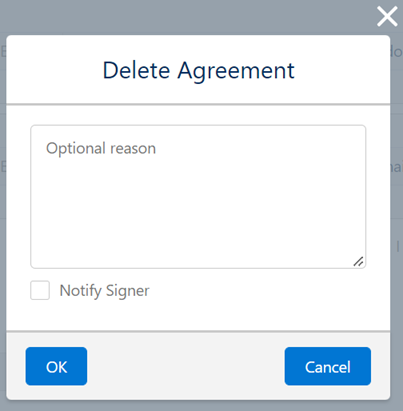
- To delete the agreement, select Delete Agreement.
In the dialog that opens, you may provide a reason for deleting the agreement and choose to notify the signers. Next, select OK.
It deletes the agreement record from Salesforce.
- To send a reminder to the recipients, select Remind.


Select the Manage Agreements tab to open the agreement portal in your Acrobat Sign account, as shown below. It displays all the agreements related to your user ID (email address).
Salesforce sometimes makes the agreements searchable with the context and users. However, most Admins suppress this tab to maintain all activities at Salesforce.
