Select the Radio Group content block.
Последнее обновление
3 июл. 2023 г.
Overview
Radio buttons are graphical user interface elements used to present learners a list of options or choices. They're often used in quizzes, assessments, or interactive modules where learners must select a single option from a set of mutually exclusive choices.
Radio buttons are typically represented as circular or rounded buttons accompanied by text labels. Only one option can be selected at a time within a group of radio buttons, and a new option automatically deselects the one previously selected.
When a learner clicks on a radio button, it becomes highlighted or filled, indicating that it has been selected. This visual feedback helps learners understand which option they have chosen and clearly indicates their selection.
Add a radio button group
Select Add interactive components > Radio Group.

Change the properties of the Radio Group content block
-
-
In the Visual Properties panel, in the Alignment and Spacing section, you can adjust the width of the content block. Adjust the horizontal and vertical padding of the block by specifying the padding percentages in the upper and lower directions. Select Autofit height to change the height of the Radio Group block to adjust to the slide automatically.
-
Select a design of the Radio Group from the Design Options panel.
-
In the Components section, select the following:
Label: Select to display or hide the label inside the block.
Button: Select to add a button inside the block. You can increase or decrease the number of buttons inside the block.
Card: Select to add a card around the block.
-
In the Appearance section, add the Radio Group’s background color, a border, and shadow. You can add the shadow in all directions of the block.
-
In the Card pill in Appearance, change the properties, such as, color, border, radius for corners, or shadows.

Change the properties of the Radio Group options
-
Select the options.
-
In the Visual Properties panel, in the Design Options section, select a radio group design from the list of Design Options. Design Options make your slides view exactly how you imagine, by choosing responsive text or media blocks, and editing the appearance, style, layout, color, object shapes, and much more.
-
In the States section, open the States Flyout. You can select any state for the radio group. The options are Hover, Selected, Checked, and Unchecked. For the disabled states, you can right-click the disabled states, and select Enable.
The selected state has properties to style the button click.
-
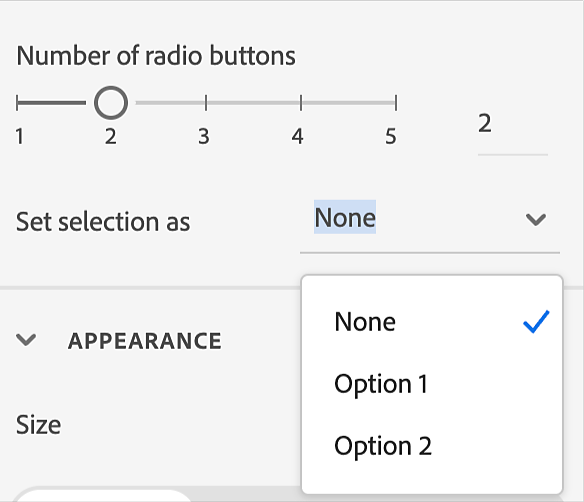
In the Settings section, you can increase or decrease the number of radio buttons from the slider. You can also set the default selection of a button. You can have none, one, or all options selected.
-
In the Appearance section, you can:
Change the style of the shape of the radio group: Change the group’s background color, add border, or add shadows to the group.
In this section, you can also change the size of the radio group. The options are Small, Medium, and Large.
Change the text of the radio group options: Change the text font, color, spacing, or size.
Add an icon as radio group option: Enable the Image toggle. Replace the icons for the options, and adjust each option's blur, brightness, and contrast. Also, add a border and shadow to the icons.


Change the text in the Radio Group
-
Select a text object in the Radio Group.
-
In the Appearance section, you can change the text properties. For more information, see Work with text.

Add an interaction to an option
-
Select the options in the slide.
-
Select Interactions on the right panel.
-
Select the tab Selection of.
Select the correct answer.
-
In the Actions panel, select any action, which confirms the right answer. The action can be a message on a different slide or play any animation.


