Quickly explore layout ideas for print, web or mobile on your iPad and iPhone with Adobe Comp. Create a layout on the go with Comp and finish it on your desktop.
Typekit is now Adobe Fonts.

What you'll need
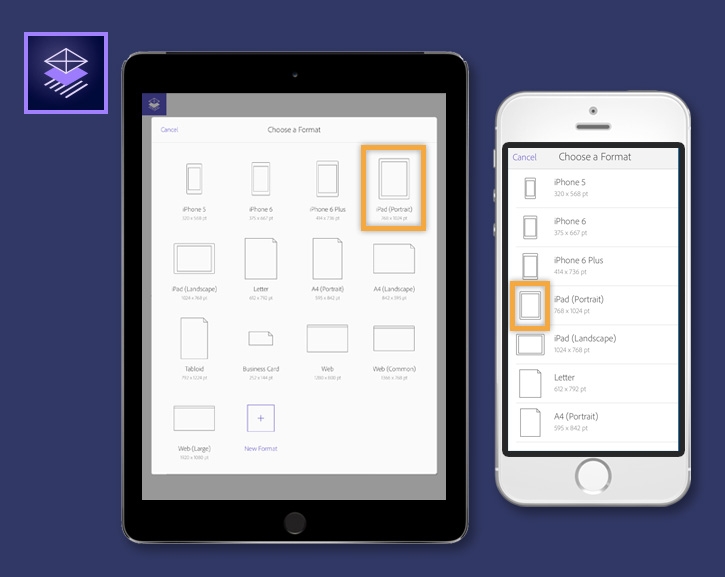
Choose a format
Open Comp and tap the + sign to create a new project and select the format that best suits your web, mobile or print project. For this tutorial choose iPad portrait.
To re-create the layout shown in this tutorial, use assets in the Pigeon Scooter Library. Click Save to Creative Cloud to copy the library into your own account so you can access assets directly in Comp.
Note: You need to be signed into your Creative Cloud account with your Adobe ID to copy assets.

Set up guides and margins
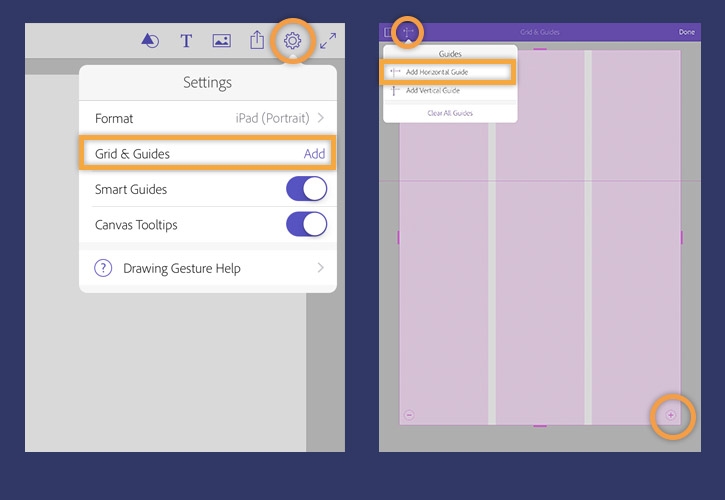
Tap Settings > Grid & Guides > Add.
Add columns to your layout by tapping the + icon on the grid layer at the bottom right corner of your screen.
Tap the Guides (T-square) icon and choose Add Horizontal Guide. A new guide appears at the top of the screen. Drag the new guide up or down to place it on the page. You can delete the guide by tapping the x.
Tap Done to return to your layout.

Draw a layout
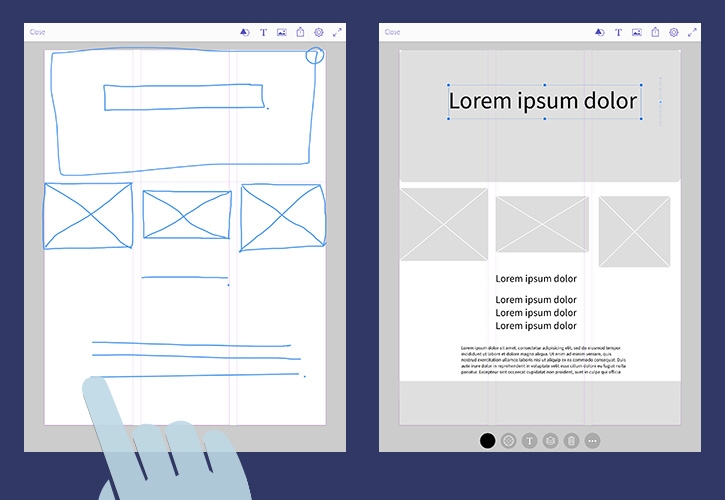
Draw a box with a circle around one corner to create a rounded rectangle. Draw an X where you want to put images. Comp converts your gestures into objects as you draw.
To create a line of text, draw a line with a dot. To create more lines of text draw a +. To create a block of text, draw a bunch of lines with a dot.
Tip: You can tap the Settings icon > Drawing Gesture Help for more on drawing objects.

Select and align multiple objects
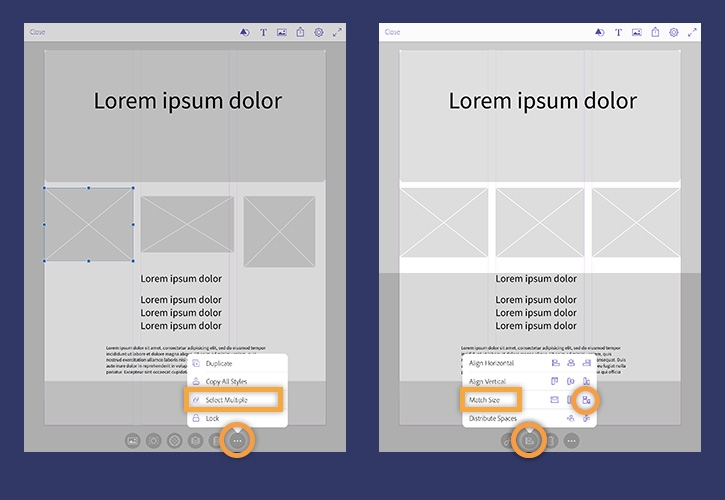
Tap an image placeholder to select it, then tap the More icon at bottom of screen and choose Select Multiple. Tap the other two image placeholders in your layout to add them to the selection then tap Done.
Tap the Align icon at bottom of screen and choose Match Size then tap the Match Width and Height icon.

Edit text
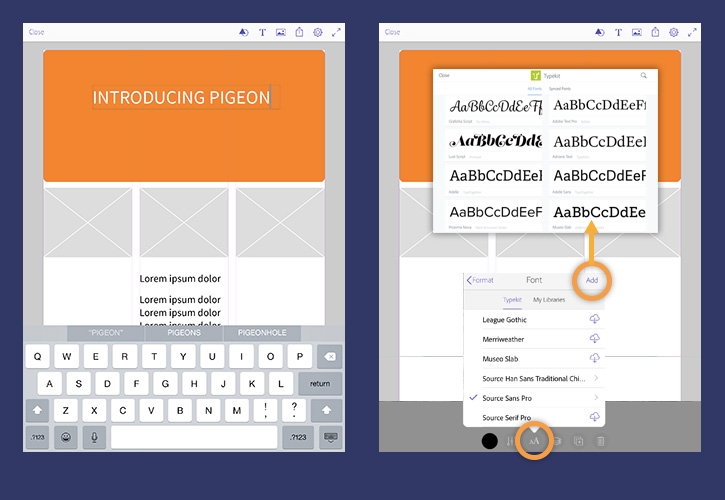
Double tap the text box at the top of the page and type "INTRODUCING PIGEON". Close the keyboard. The text object remains selected. If you tap the screen to exit the keyboard, tap the text box to reselect.
Tap the Text Format icon at the bottom of the screen and center align the text. Then, tap Font to choose from the list of Typekit fonts.
Tap the Color icon and change the text to white. Select the rectangle at top of layout and change its color to orange.
Tip: Tap Add in the Font menu to access over 1000 Typekit fonts included in your Creative Cloud membership. Fonts are synced to your desktop when you're signed into Creative Cloud on your desktop.

Copy text styles
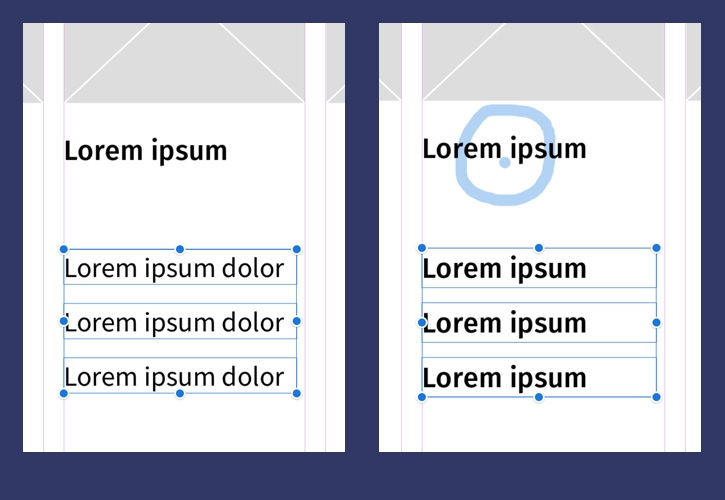
Once you have a text style, you can copy it to other text blocks in your layout. Select a text block at the bottom of the page.
Draw a target over the text that has the style you want to copy. The text style is applied to all the selected text.
Tip: Undo by swiping with two fingers. Drag left or right with three fingers to step backwards or forwards through the history of your document.

Add graphics from your Creative Cloud Libraries
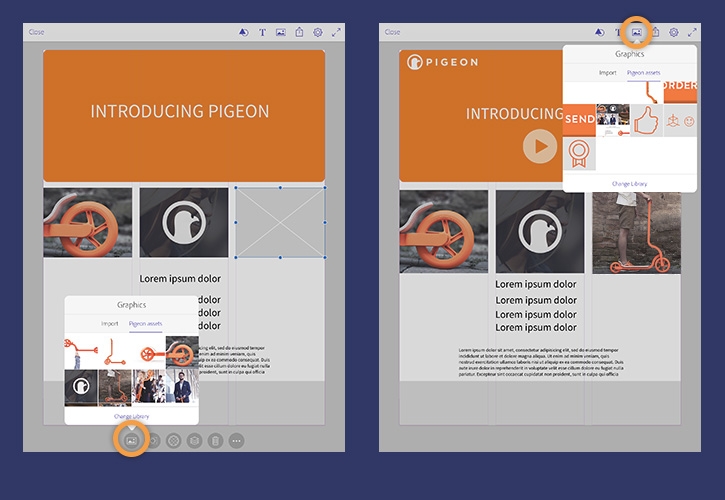
Tap an image placeholder then tap the Graphics icon at the bottom of the screen.
To use a full resolution image from your Creative Cloud Libraries, choose My Libraries and choose the Pigeon Assets library. Tap on the image of a man riding a scooter to fill the placeholder frame. Repeat this process to add more images.
You can also add vector graphics to your layout. Tap the Graphics icon at the top of the screen. From the Pigeon Assets Library add the Pigeon logo, Play button, or other white vector icons.

Edit an image in Photoshop Fix
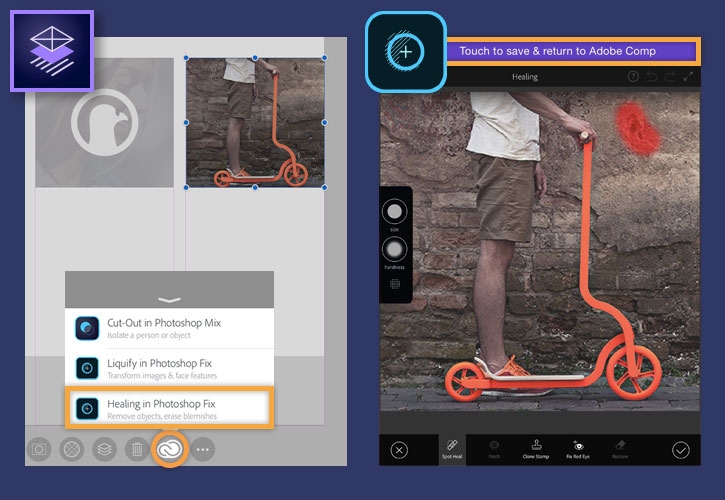
Comp uses Adobe CreativeSync to work seamlessly with other mobile apps like Photoshop Mix and Photoshop Fix so you can retouch or create composite images that update immediately in your Comp layout.
Tap the photo of a man riding a scooter then tap the Edit Across Apps icon. Select Unlink to edit the graphic without replacing the original in your library. Choose Healing in Photoshop Fix.
Use the Spot Heal tool to remove the small flaw a the top of the picture. Finally, tap Touch to save and return to Adobe Comp at the top of screen.

Group objects
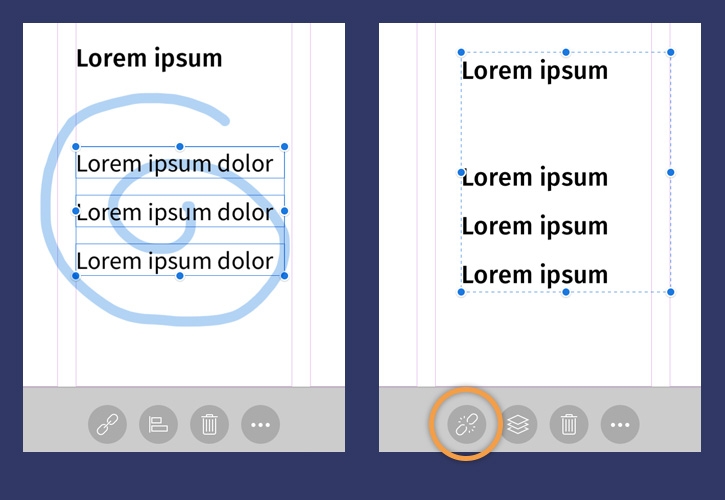
Draw a spiral over multiple text blocks at the bottom of your layout to create a large selection.
With all the text blocks selected, tap the Group icon. Both text blocks will appear in a single selection indicating that you now have a group. Move all the grouped text to position it in the center of the page.
You can ungroup objects by tapping the Ungroup icon.

Send to desktop
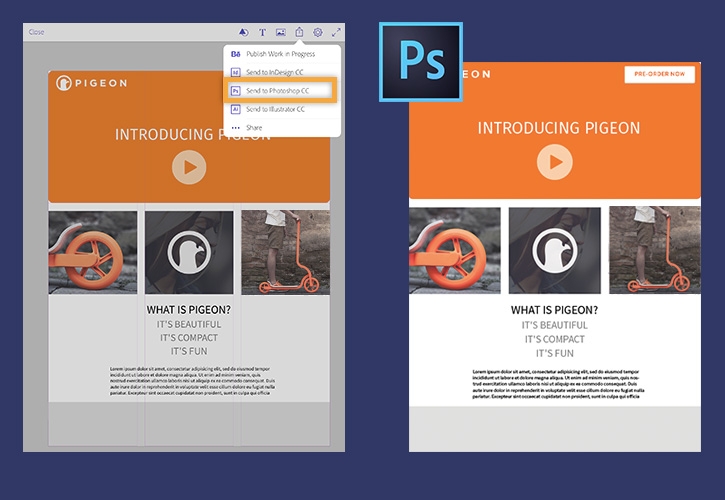
You can send your layout to various desktop applications depending on the type of layout you're working on:
- Send to Illustrator
- Send to Photoshop
- Send to InDesign
- Send to Muse
You can also share your in-progress layout on Behance.
