Use jQuery effects in dreamweaver
Design engaging websites by using cool jQuery effects. Dreamweaver's integration with jQuery lets you include effects such as sliders without having to write any code.

Add jQuery effects

  1. In the Design or Code view of your Dreamweaver document, select the element to which you want to apply a jQuery effect.

  2. Select Windows > Behaviors to open the Behaviors panel.

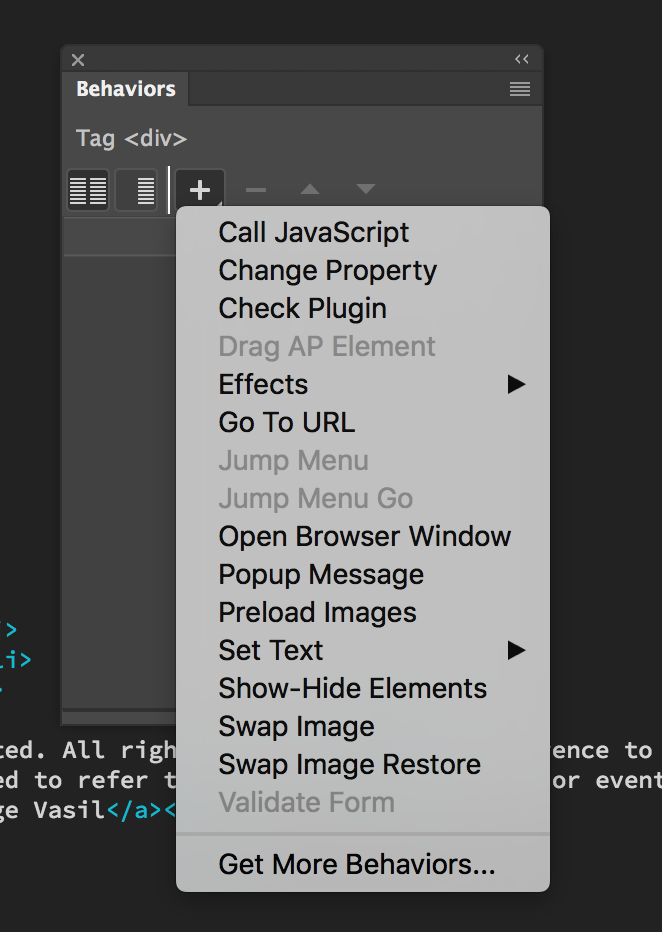
  3. Click the Plus icon, click Effects, and then click the required effect.

    Adding jQuery effects
    Adding jQuery effects

    The customization panel with the settings for the selected effect appears.

  4. Specify the settings, such as, the target element to which the effect is to be applied, and the duration for the effect.

    The target element can be the same as the element you selected initially or a different element on the page. For example, if you want users to click an element A to hide or show an element B, the target element is B.

  5. To add multiple jQuery effects, repeat the steps above.

    When you choose multiple effects, Dreamweaver applies the effects in the order they are displayed in the Behaviors panel. To change the order of the effects, use the arrow keys at the top of the panel.

Dreamweaver automatically inserts the relevant code into your document. For example, if you have selected the 'Fade' effect, the following code is inserted:

  • External file references for the dependent files that is required for jQuery effects to work:
<script src="jQueryAssets/jquery-1.7.2.min.js" type="text/javascript"></script><script src="jQueryAssets/jquery-ui-effects.custom.min.js" type="text/javascript"></script>
  • The following code is applied to the element in the body tag:
<li id="earthFrm" onclick="MM_DW_effectAppearFade($('#earthForms'),'show','fade',1000)"> Earth Forms</li>
  • A script tag along with the following code is added:
<script type="text/javascript"> function MM_DW_effectAppearFade(obj,method,effect,speed) { obj[method](effect, {}, speed); }</script>

Event-based jQuery effects

When you apply a jQuery effect, it is assigned to the onClick event by default. You can change the trigger event for the effect using the Behaviors panel.

  1. Select the required page element.

  2. In the Windows > Behaviors panel, click the Show Set Events icon.

  3. Click the row that corresponds to the effect that is currently applied. Note that the first column changes to a drop-down list providing a list of events that you can choose from.

  4. Click the required event.

Remove jQuery effects

  1. Select the required page element.

    The Behaviors panel lists all the effects that are currently applied to the selected page element.

  2. Click the effect you want to delete and then click the Delete icon.