Before you begin
We're rolling out a new, more intuitive product experience. If the screen shown here doesn’t match your product interface, select help for your current experience.
Before you begin
We're rolling out a new, more intuitive product experience. If the screen shown here doesn’t match your product interface, select help for your current experience.
When you apply one or more routine commands to your files, you can save time and keystrokes by using an action—a defined series of commands with specific settings and in a specific order that you apply in a single step. You can apply an action to a single document, several documents, or a collection of documents. You can even scan and combine several documents into a single PDF before running an action.
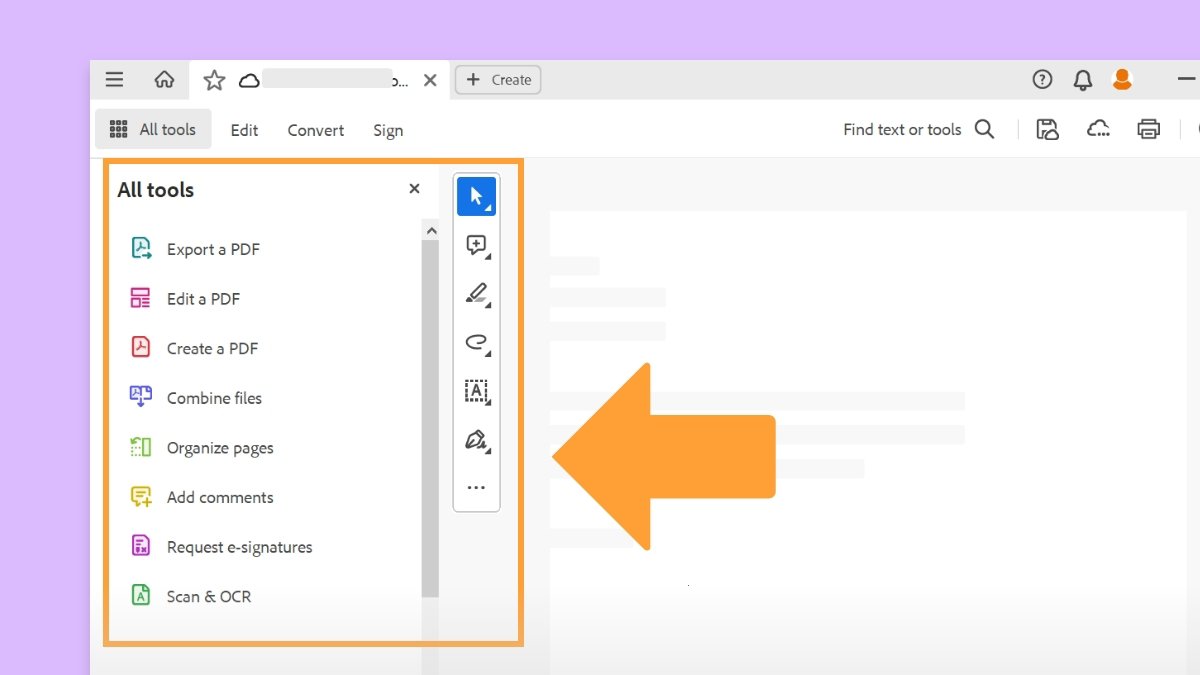
Acrobat provides some predefined actions. You can also create your actions. You can access and manage the actions by selecting All tools > Use guided actions.
Adobe Acrobat also lets you export and import actions and commands so that you can share them with others.
The actions interface and architecture replace the batch script mode available in the earlier versions of Acrobat. Most of your Acrobat XI batch scripts can be imported as actions; some require minor changes.
Acrobat includes several simple predefined actions that you can use to streamline your work. These actions represent common tasks you routinely perform to prepare files for distribution. You don't have to open any of the PDF files before you begin to run these actions.
You can avoid password prompts when you run a sequence on PDFs that require passwords. Automate password entry or specify a security method for these files in the Use guided actions panel of the Preferences dialog box. If you select Do Not Ask For Password, PDFs that require passwords are not processed.
Choose All tools > Use guided actions. A list of available actions is displayed under the Actions List in the left pane.
Choose the action from the list. The left pane changes to display each task included in the action, as well as any instructions provided by the author of the action.
Under Files to be processed, select Add files to select the files that you want to run the action on. You can run the action on the currently opened file or add more files, folders, or email attachments.
When all the files you want to process are listed, select Start from the left pane on the lower left.
If Acrobat prompts you, provide additional information.
As the actions progress, a check mark identifies completed actions or tasks. On successful completion of all tasks, you get an option to save your work. You can choose to save or cancel the pop up window. You can view Full report in the lower left or select Done to complete the action.
You can select Stop in the left panel to stop processing an action. Acrobat saves any files already processed as defined in the action. You can select Resume to continue the Action or select the cross icon before the action name in the RHP to exit from further processing of the action.
To make your action easier to follow, you can group steps into panels, add divider lines, and include instructions. You can limit the action to specific files, apply it to all files within a folder, or let the user choose a file from various sources such as a scanner, web page, or Clipboard.
Choose All tools > Use guided actions. A list of available actions is displayed under the Actions List in the left pane.
In the left pane, select Actions under ADD AND MANAGE, then select New action.
The Create New Action dialog box is displayed.
To apply the action to a specific file or all files within a folder, select the File  or Folder
  under Files to be processed. Navigate to the file or folder and select Open.
In the Choose tools to add pane, expand the panels, and double-click a task to add it. You can add multiple tasks. The tasks are executed as they appear in the Action steps to show list.
To predefine options for a task, select  Specify Settings.
To have the action prompt the user to select options, select the Prompt User checkbox.
Add other tasks as required. The buttons on the right allow you to fine-tune the action you created. You can add a new panel grouping, instructions, or a divider line, or move or delete items in the list.
Select Save. In the Save Action dialog box, enter the action's name and description and select Save.
Fine-tune the action using the buttons on the right. Add a new panel grouping, instructions, or a divider line, or move or delete items in the list.
Add Panel (![]() )
)
Creates a new panel grouping at the bottom of the current set of tasks. When prompted, type the name of the panel, and select Save.
Add Instruction (![]() )
)
Adds instructions below the currently selected task. When prompted, type the instructions, and click Save.
Add Divider (![]() )
)
Adds a divider line below the currently selected task.
Move Up (![]() )
)
Moves the currently selected item up the list. You can move a task, instructions, a divider line, or an entire panel grouping.
Move Down (![]() )
)
Moves the currently selected item down in the list. You can move a task, instructions, a divider line, or an entire panel grouping.
Remove (![]() )
)
Deletes the currently selected item. Be careful what you select. You can delete an entire panel grouping.
Use the Edit Action dialog box to edit, rename, copy, delete, reorder, import, or export actions.
Choose All tools > Use guided actions. A list of available actions is displayed under the Actions List in the left pane.
Select the ellipsis next to the action you want to edit. You get options to edit, rename, copy, move, or export.
You can only edit the actions you created, not the list's existing ones. For the existing actions, you can only copy, move or export.
Select Edit to change the tasks or settings. The Edit Action dialog box opens. You can also use the Edit Actions dialog box to review an action and exit without saving changes.
To add tasks, expand the panels under the Choose tools to add pane and select a task.
Select Save.
If necessary, edit the description in the Save Action dialog box and select Save.
Choose All tools > Use guided actions. A list of available actions is displayed under the Actions List in the left pane.
Select the ellipsis next to the action you want to edit. Select Rename.
In the Save Action dialog box, enter a new name. You can also add a description. Select Save.
You can duplicate an action, and you can modify the tasks in the action before you save the copy.
Choose All tools > Use guided actions. A list of available actions is displayed under the Actions List in the left pane.
Select the ellipsis next to the action you want to edit. Select Copy.
Enter the action name and description in the Save Action dialog box and select Save.
A new copy of the selected action is added to the Actions list.
Choose All tools > Use guided actions. A list of available actions is displayed under the Actions List in the left pane.
Select the ellipsis next to the action you want to delete. Select Remove.
You can only delete the actions you created, not the list's existing ones.
In the confirmation dialog box, select Yes.
Choose All tools > Use guided actions. A list of available actions is displayed under the Actions List in the left pane.
Select the ellipsis next to the action you want to delete. Select Export.
In the Save As dialog box, specify the name and location of the file to save the action. Action files have a .sequ extension.
Select Save.
Choose All tools > Use guided actions.
Under ADD AND MANAGE, Select Actions from the left pane.
Select Import.
You can also double-click a .sequ file to import an action.
In the Open dialog box, select the action file to import and select Open. Action files have a .sequ extension.
In the confirmation dialog box, select OK.
If an action contains JavaScript, an alert message states that the selected action contains JavaScript. Select Import to continue or Cancel to abort the import process.
Before you run actions on PDFs that are encrypted or password protected, you can set your digital ID to enter required passwords automatically.
Specify a security method for these files in the Use guided actions panel of the Preferences dialog box. If you select Do not ask for password, PDFs that require passwords are not processed.
Open the Preferences dialog box. Select Acrobat > Preferences (macOS) or hamburger menu > Preferences (Windows).
In the Preferences dialog box, select Signatures under Categories.
For Identities & Trusted Certificates, select More.
On the left, open Digital IDs and select Digital ID Files.
In the list on the right, select an ID and then select the following commands from the top bar:
Login
Logs in using the specified digital ID. Type the password and select OK.
Logout
Logs out using the specified digital ID when you have finished running an action.
Custom commands allow you to preconfigure commands such as Watermark and Header & Footer to reduce the amount of time each command would take to set up. This saves time for repetitive tasks.
Custom commands are single-step and applicable to the current document, while actions are multi-step sequences and applicable to multiple files.
Choose All tools > Use guided actions > Custom commands > New Custom Command.
The New Custom Command dialog displays a list of customizable commands in the left pane. Choose a command that you want to customize.
Change the command label and tool tip, if you want. Also, choose whether you want to see the command-specific options when the command is run.
Select Command Options. Select or specify appropriate values or options in the dialog box and select OK.
Select OK to save the new custom command.
The command is displayed under the Custom Commands section in the left pane.
Choose All tools > Use guided actions.
In the left pane, under the Custom Commands section, select the command's name.
You'll only see the Custom Commands section if you created a custom command earlier.
Use the Manage Custom Commands dialog box to edit, copy, rename, remove, reorder, import, or export commands.
Choose All tools > Use guided actions. Under ADD AND MANAGE, select Custom commands > Manage custom commands.
In the Manage Custom Commands dialog box, choose the command from the list and select the appropriate action. Then, follow onscreen instructions or prompts to complete the task.
Once you are done, select Close.

Work smarter with Acrobat on your desktop
Create, edit, and organize PDFs with powerful tools that help you stay productive anywhere.